What Is PHP and Why It Matters for Web Hosting
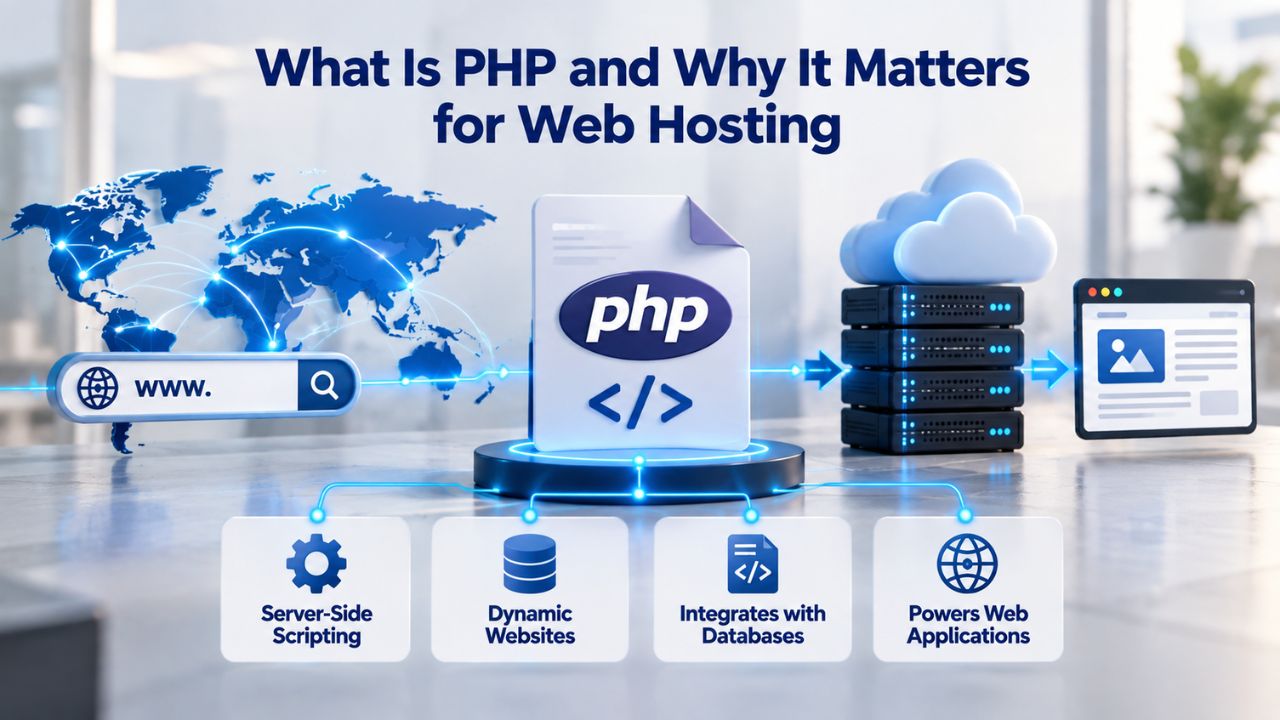
PHP is a server-side programming language, meaning it runs on your hosting server, not in your visitor’s browser, to generate dynamic web pages. WordPress, Shopify integrations, contact forms, and custom applications all rely on PHP to function. Unlike static HTML files, PHP scripts execute code, access databases, and process user input. This flexibility is powerful but requires server resources: memory to run the script, execution time, and file-upload limits.
PHP as the Engine Behind Your Site
When a visitor loads your WordPress homepage, PHP runs on the server to query the database, load theme files, run plugin code, and generate the HTML sent to the browser. Each operation consumes memory and processing time. A plugin that generates high-resolution thumbnails, a page builder that saves complex layouts, or a checkout process that validates payment information all push PHP to work harder, requiring more resources than a simple blog with few plugins.
The server enforces limits on how many resources any single script can use. If a script tries to allocate more memory than your memory_limit setting allows, or runs longer than your max_execution_time setting permits, the server stops it to protect the overall stability of the shared hosting environment. For most sites, the default limits are sufficient. But if you’re running WordPress with a page builder, media galleries, bulk import plugins, or an e-commerce store, you’ll likely need to increase at least one of these limits to avoid errors during normal operation.
Default Limits Exist for a Reason
Conservative default settings aren’t meant to punish you; they protect the server. A script misconfigured to use unlimited memory, or a runaway loop that runs indefinitely, would consume all server resources and make the server unusable for every other account.
Setting reasonable limits ensures fair resource sharing across all accounts on a shared server. Limits are so conservative on shared hosting because any single website must coexist with dozens or hundreds of others, all competing for the same hardware. If your application legitimately needs unlimited resources, VPS or dedicated hosting may be a better fit than shared plans.
Business Web Hosting Plans & Pricing
Choose the hosting plan that fits your website, WordPress site, or growing business. Compare features, storage, performance, security, and website capacity to find the right hosting environment for your needs.
cPanel Starter
cPanel Hosting that's easy, reliable and lightning-fast.
- 1 website
- 30 GB storage
- Unmetered bandwidth*

cPanel Economy
cPanel Hosting that's easy, reliable and lightning-fast.
- 1 website
- 100 GB space
- Unlimited bandwidth*
- 100 email accounts**
- 10 MySQL databases (1 GB ea.)
cPanel Deluxe
cPanel Hosting that's easy, reliable and lightning-fast.
- Unlimited websites
- Unlimited space
- Unlimited bandwidth*
- 500 email accounts
- 25 MySQL databases (1 GB ea.)
cPanel Ultimate
cPanel Hosting that's easy, reliable and lightning-fast.
- Unlimited websites
- Unlimited space
- Unlimited bandwidth*
- 1000 email accounts
- Unlimited MySQL databases (1 GB ea.)
- 2X Processing power & memory (available for Linux/cPanel only)
- Premium DNS
- 1-year SSL certificate to secure customer data and increase search rankings
*We don't limit the amount of storage and bandwidth your site can use as long as it complies with our Hosting Agreement. Should your website bandwidth or storage usage present a risk to the stability, performance or uptime of our servers, we will notify you via email and may be required to upgrade, or we may restrict the resources your website is using.
**Email account storage is limited to 100 email accounts with 100 MB of total storage.
WordPress Basic
A great way to get started.
- 1 website
- 10 GB NVMe storage
- Unmetered bandwidth
- Free SSL Certificate *
- WordPress pre-installed
- Weekly backups
- Web Application Firewall
- Daily malware scans
- One-time malware removal

WordPress Deluxe
Improve your site performance with Cloudflare CDN.
- 1 website
- 20 GB NVMe storage
- Unmetered bandwidth
- Free SSL Certificate *
- WordPress pre-installed
- Daily backups
- Web Application Firewall
- Daily malware scans
- One-time malware removal
- Up to 2x faster performance with global Cloudflare CDN **
- Enhanced security with DDoS protection
- Staging site
WordPress Ultimate
Add online marketing with more sites, storage and security.
- 1 website
- 30 GB NVMe storage
- Unmetered bandwidth
- Free SSL Certificate *
- WordPress pre-installed
- Daily + on-demand backups
- Web Application Firewall
- Daily malware scans
- Unlimited malware removal
- Up to 2x faster performance with global Cloudflare CDN **
- Enhanced security with DDoS protection
- Staging site
- WordPress code optimizer
- Smart WordPress plugin manager
- Sell online with WooCommerce
*An SSL certificate is included with every site and free for the life of the hosting plan. Certificates are automatically installed, validated and renewed.
Web Hosting Plus Launch
For multiple basic sites.
- 100 GB storage*
- 4 GB RAM
- 2 CPUs
- Unmetered traffic
- 50 websites & databases
- Free, unlimited SSL for all your websites**

Web Hosting Plus Enhance
For high-traffic WordPress, Joomla, and other sites.
- 200 GB storage*
- 8 GB RAM
- 4 CPUs
- Unmetered traffic
- 100 websites & databases
- Free, unlimited SSL for all your websites**
Web Hosting Plus Grow
For advanced eCommerce sites like Magento.
- 300 GB storage*
- 16 GB RAM
- 8 CPUs
- Unmetered traffic
- 150 websites & databases
- Free, unlimited SSL for all your websites**
Web Hosting Plus Expand
For multiple basic sites.
- 400 GB storage*
- 32 GB RAM
- 16 CPUs
- Unmetered traffic
- 200 websites & databases
- Free, unlimited SSL for all your websites**
*The total amount of usable storage capacity for your particular Hosting Service(s) may differ from the represented capacity as there is required space for the operating system(s), system file(s) and other supporting file(s).
**If you cancel the Web Hosting Plus product, you will lose the associated SSL certificate as well.
Understanding cPanel’s MultiPHP INI Editor: Basic Mode vs. Editor Mode
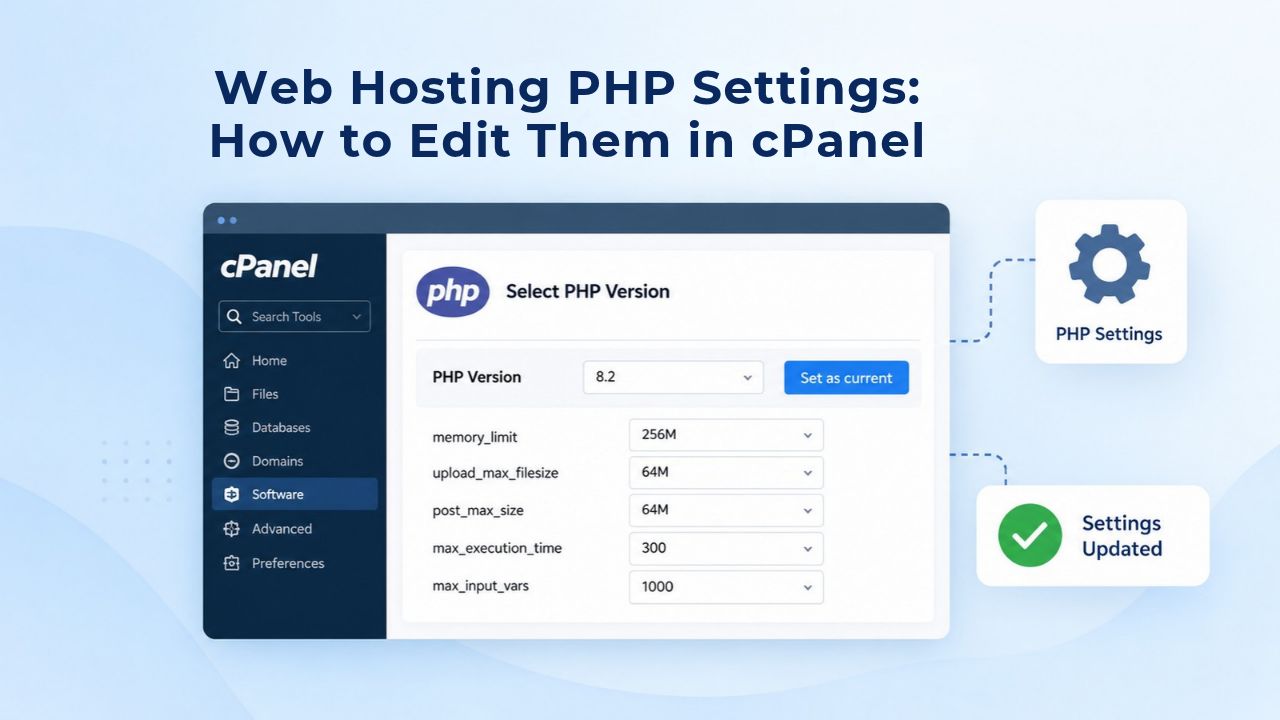
cPanel’s MultiPHP INI Editor is the primary tool for adjusting PHP settings on shared hosting plans. After you log into cPanel and go to the Software section, you’ll find the MultiPHP INI Editor. cPanel’s official documentation describes two modes: Basic Mode and Editor Mode, each suited to different needs. Most site owners only need Basic Mode, which displays the most commonly adjusted settings in a beginner-friendly interface. But if you need to configure an obscure directive or experiment with advanced settings, Editor Mode gives you full control over the raw php.ini file.
Basic Mode: The Beginner-Friendly Approach
Basic Mode displays the most commonly adjusted PHP settings in a simple toggle or text-field interface, without requiring knowledge of php.ini syntax. You select your domain (or Home Directory for all domains) from a dropdown, then adjust sliders or type new values for settings like memory_limit, max_execution_time, and upload_max_filesize. When you click Apply, the system saves your changes directly to your account’s php.ini file.
The availability of directives depends on your PHP version; some settings appear only in newer versions. This approach is ideal if you’re solving a specific problem (upload failures, timeout errors) and don’t need to configure obscure PHP settings. cPanel even displays the default value for each setting alongside its php.net documentation, helping you understand what each directive does and why it matters.
Basic Mode is the recommended starting point for most site owners. If you’re fixing an upload error, you’ll increase upload_max_filesize and post_max_size in Basic Mode without ever touching the raw file. If you’re fixing a timeout error, you’ll increase max_execution_time in the same interface. Changes take effect immediately, and you can verify they worked by checking your WordPress Site Health settings or retesting the failed operation. Most hosting-related PHP issues can be solved entirely within Basic Mode.
Editor Mode: Advanced Configuration for Custom Directives
Editor Mode opens a text editor where you can add any PHP directive directly, not just the ones cPanel displays in Basic Mode. This is useful when you need to set an obscure setting like session.save_path, disable_functions, or max_input_vars, settings that don’t appear in the Basic Mode interface. You select your domain or account, then paste or type the php.ini directives you want, making sure each is on its own line. Click Save, and the system updates your php.ini file. Editor Mode requires familiarity with php.ini syntax and the names of directives you want to set, but it gives you complete control over any PHP setting.
If your application requires a specific directive not shown in Basic Mode, Editor Mode is where you’ll add it. This mode is also useful for disabling dangerous PHP functions for security purposes, setting custom session storage paths, or configuring advanced caching directives. However, typos in directive names are common mistakes. If something stops working after you add a directive, check the spelling and remove any unrecognized directives. When in doubt about Editor Mode, contact your hosting provider’s support team before making changes.
Common PHP Errors and What Causes Them
Many website owners encounter cryptic errors without realizing they stem from PHP settings. Understanding these patterns helps you identify which setting needs adjustment, and whether the fix is even possible on your current hosting plan. Three errors account for most PHP-related issues on shared hosting: memory exhaustion, timeout errors, and upload failures.
Memory and Resource Errors: When Scripts Run Out of RAM
When a PHP script tries to use more memory than your memory_limit setting allows, the server terminates it and displays “Allowed memory size exhausted” or a fatal error. This is common during WordPress plugin bulk operations, WooCommerce checkout processing, or page-builder saves. If you see this error, your site is trying to do something resource-intensive, but your memory limit is too low. The error message usually appears as a white screen or a fatal error in your error log, sometimes preceded by a warning that you’re approaching the memory limit.
You can adjust memory_limit in the MultiPHP INI Editor, but shared hosting accounts have account-level memory caps (enforced by CloudLinux LVE or similar isolation) that you cannot exceed. If you increase memory_limit to 512MB but your account’s LVE cap is only 256MB, you’ll hit the account cap first, and the increased setting won’t help. Contact your hosting provider if you hit the maximum allowed for your plan; they can tell you whether upgrading to a higher-tier plan is the next logical step.
Timeout Errors: When Scripts Run Too Long
When a PHP script runs longer than your max_execution_time setting allows, typically 30 seconds by default, the server stops it and returns a timeout error. This happens often during bulk imports, large file uploads, or complex plugin operations like WooCommerce order processing or Elementor page saves. The error usually appears as “Maximum execution time of 30 seconds exceeded” or a browser connection timeout message. Raising max_execution_time to 180–300 seconds often solves this, but if a single operation takes minutes, it may mean your site needs more resources than shared hosting provides.
Sometimes a timeout error masks a deeper problem, inefficient code or a plugin with a memory leak. Before increasing max_execution_time, check whether the operation is actually necessary. For example, large bulk imports of products or posts might be better run in smaller batches or during off-peak hours. However, for legitimate operations like saving a complex page-builder layout or processing a large file upload, increasing the timeout limit is the right solution.
Upload Failures: “The File Exceeds Maximum Upload Size”
When a file upload fails, it’s usually because the file exceeds upload_max_filesize, or because post_max_size (the maximum size of the entire POST request) is smaller than upload_max_filesize. This commonly trips up users uploading large media files, theme ZIPs, or plugin installers. The error might say “This file exceeds the maximum upload size for this site” or fail silently; the file appears to upload but never actually arrives. Silent failures are particularly frustrating because it looks like the upload succeeded when it didn’t.
The fix is usually straightforward: increase both upload_max_filesize and post_max_size to match your needs. Remember: post_max_size must always be equal to or larger than upload_max_filesize; if it’s too small, the file will fail silently even though the file size is within the stated limit. Many site owners miss this relationship and spend hours troubleshooting upload failures even after increasing upload_max_filesize.
When and Why to Adjust PHP Settings
Not every site needs the same PHP settings. A simple blog with few plugins and light traffic can run fine on conservative defaults. A WooCommerce store handling checkout processing and bulk imports, or a multi-plugin WordPress site with a page builder and media gallery, needs higher limits to avoid errors during normal operation.
Identifying Your Site’s Resource Requirements
A blog that publishes articles with a few images each week probably doesn’t need more than 128MB memory and 30 seconds execution time. But add a page builder, a product gallery plugin, and a newsletter plugin, and you’ll suddenly hit memory limits. To identify your actual requirements, monitor errors. Enable error logging in WordPress (add define(‘WP_DEBUG_LOG’, true); to wp-config.php) and check your error log weekly for the first month after launching your site. If you see memory exhaustion errors, increase memory_limit. If you see timeout errors, increase max_execution_time. If you see upload errors, increase upload and post sizes.
This data-driven approach beats guessing. You’ll adjust settings based on actual errors, not assumptions about what you might need. Some site owners over-provision their PHP settings thinking “more is better,” but overly high limits can mask performance problems in your code; a plugin with a memory leak might work fine with 512MB of memory but crash with 128MB, and you’d never know you have a problem until you move to a more resource-constrained hosting environment.
Balancing Performance and Safety
Conservative defaults protect your server’s stability. Raising limits too high defeats that protection. The goal is to find the sweet spot where your site runs without errors, but limits stay low enough to catch genuinely problematic code. For most WordPress sites, 256MB memory and 300 seconds execution time are safe, reasonable values. For e-commerce or resource-heavy sites, you might need 512MB memory and 600+ seconds. Only go higher if you have specific errors telling you to.
The Essential PHP Settings for Shared Hosting
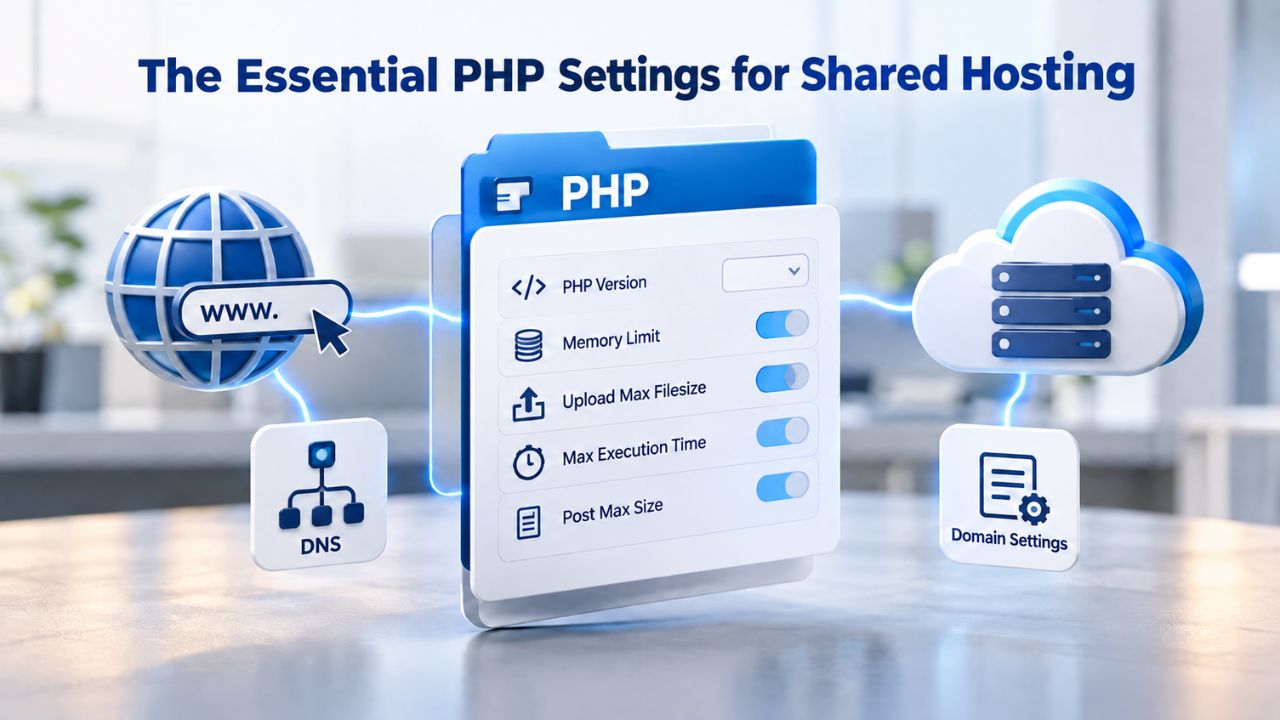
Four PHP settings control most hosting issues on shared plans. Understanding what each does and what typical values look like helps you adjust them confidently. These settings work together; increasing one without adjusting others can create new problems. For example, raising memory_limit without raising post_max_size won’t help with upload failures, because the POST request size cap will still block the upload before it ever hits the memory limit.
memory_limit: How Much RAM Each Script Gets
The memory_limit setting controls the maximum amount of memory (in megabytes) that a single PHP script may consume before the server terminates it. The default is typically 128M, but WordPress and modern plugins often need 256M or more to avoid errors like “Allowed memory size exhausted”. For e-commerce sites or page-builder-heavy WordPress installations, 256M–512M is common. However, shared hosting accounts have account-level memory caps (enforced by CloudLinux LVE), so setting memory_limit to 1GB won’t help if your account’s cap is only 512MB; you’ll hit the account cap first.
The memory_limit you can set in cPanel is just one part of the puzzle. Your hosting account also has a total memory cap that applies to all processes running at the same time. If you have multiple PHP processes, cron jobs, and background tasks running at the same time, they all share that total account memory. Think of it as the difference between how much one person can carry (memory_limit) versus how much a whole team can carry at once (account LVE limit). You need to know both numbers to understand your actual resource ceiling. Ask your hosting provider what your account’s LVE memory limit is, then adjust memory_limit conservatively within that constraint.
max_execution_time: How Long Scripts Can Run
The max_execution_time setting controls the maximum number of seconds a PHP script can run before the server terminates it. The default is typically 30 seconds, which is enough to serve web pages but too short for bulk imports, WooCommerce order processing, and page-builder saves. For WordPress sites, 180–300 seconds is typical; for e-commerce or complex plugins, 300+ seconds may be needed. Keep this setting as low as practical for your actual use case; runaway scripts shouldn’t run indefinitely. A well-written script will finish in seconds or minutes, not hours, so there’s rarely a good reason to set this above 600 seconds on shared hosting.
Separate from max_execution_time is max_input_time, which controls how long a script can spend parsing incoming request data (like processing a file upload). This is distinct from the script’s actual execution time and is often set higher than max_execution_time to accommodate slow uploads. If you’re uploading a large file over a slow connection, you want enough max_input_time to let that upload complete without timing out, even if the actual processing is fast. Most hosts set this to 60–300 seconds by default.
upload_max_filesize and post_max_size: File Upload Limits
upload_max_filesize determines the largest single file PHP will accept through a form upload, whether that’s a media file, plugin ZIP, or theme upload. The post_max_size setting defines the maximum size of the entire HTTP POST request body, which includes the file plus any other form data. Critically, if post_max_size is smaller than upload_max_filesize, uploads will fail silently even though the file itself is within the limit. Always set post_max_size equal to or larger than upload_max_filesize to avoid this trap; many site owners miss this relationship entirely.
Default values are often 2M or 8M for upload_max_filesize and 8M or 64M for post_max_size. For a WordPress site with media uploads, 32M–64M for both is typical. For an e-commerce store uploading product images and downloadable files, 64M–128M or higher might be needed. The important thing is keeping them in sync; if you set upload_max_filesize to 64M but forget to set post_max_size to at least 64M, uploads will fail. Both settings control different parts of the upload pipeline, and both need to be large enough.
| PHP Setting | Default | Purpose | Typical for WordPress | Typical for E-Commerce |
|---|---|---|---|---|
| memory_limit | 128M | Max memory per script | 256M | 256M–512M |
| max_execution_time | 30s | Max script runtime | 180s–300s | 300s–600s |
| upload_max_filesize | 2M–8M | Max single file upload | 32M–64M | 64M–128M |
| post_max_size | 8M–64M | Max POST request | 64M | 64M–128M |
| max_input_time | 60s | Max parse time | 60s–120s | 120s–300s |
| display_errors | Off | Show errors to visitors | Off (production) | Off (production) |
Get the Right PHP Settings for Your Site
Niya Digital’s Web Hosting service includes full cPanel access with MultiPHP INI Editor on all plans. Adjust PHP settings to match your needs, from a simple blog to a multi-plugin WordPress site or WooCommerce store. Our support team is ready to help if you’re unsure which settings to adjust.
Understanding Shared Hosting Limits and Account-Level Caps
When you adjust PHP settings in cPanel, you’re configuring limits for individual PHP scripts. But your shared hosting account also has account-level resource limits that cap total usage across all processes. CloudLinux LVE (Lightweight Virtual Environment) or similar isolation technology enforces these limits to prevent any single account from consuming all server resources and degrading performance for other accounts. Understanding shared hosting constraints starts with the relationship between individual script limits and account-level limits.
What Account-Level Limits Actually Control
Your account-level memory cap (set by CloudLinux LVE or similar) is the total RAM your entire account can use at one moment, across all simultaneous PHP processes. If your account’s cap is 512MB and you have three PHP processes running at the same time (perhaps a visitor loading a page, a cron job in the background, and a scheduled backup task), they all share that 512MB pool. Setting memory_limit to 256M on individual scripts means each one can use up to 256M, but if two of them run simultaneously, they’ll consume 512M together and hit the account cap. Understanding this distinction prevents frustration when increasing memory_limit doesn’t solve your memory problems.
Different hosting providers set different account-level limits, but typical shared hosting maximums include memory_limit of 256M–512M, max_execution_time of 60–300 seconds, and upload limits of 64M–512M. Your plan documentation or hosting provider should specify your account’s caps. If you’re consistently hitting these limits, contact your hosting provider; they can help you optimize your site or upgrade to a plan with higher caps.
Why Shared Hosting Has Conservative Defaults
Conservative PHP defaults aren’t meant to punish you; they protect the server. A script misconfigured to use 2GB of memory, or a runaway loop that runs for hours, would consume all server resources and make the server unusable for every other account. Setting reasonable limits (and account-level caps) ensures fair resource sharing.
If your application legitimately needs unlimited resources, VPS or dedicated hosting may be a better fit than shared plans. These limits exist on every shared hosting provider worldwide, no matter how “unlimited” their marketing claims sound.
Step-by-Step: How to Edit PHP Settings in cPanel (Basic Mode)
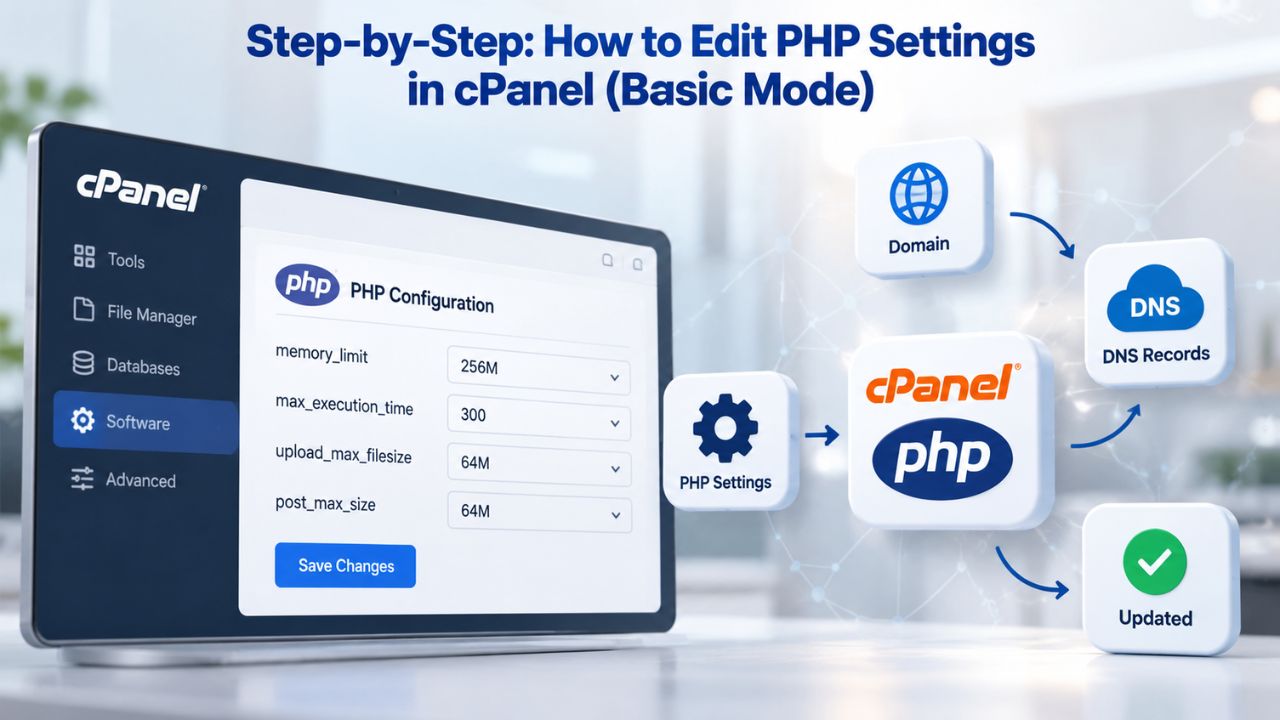
Most site owners only need Basic Mode. This section walks you through accessing the MultiPHP INI Editor, selecting your domain, and adjusting the settings you need. The process typically takes a few minutes, and changes take effect immediately without a server restart. Once you’ve made your adjustments, you can verify they worked by checking your WordPress Site Health or testing the operation that was previously failing.
Accessing the MultiPHP INI Editor
Log into your cPanel dashboard using the login URL provided by your hosting provider (usually yourdomain.com/cpanel or similar). On the cPanel home page, scroll to the Software section and click on MultiPHP INI Editor. The interface will load and show two tabs: Basic Mode and Editor Mode. Make sure you’re on the Basic Mode tab to start. If you accidentally clicked on Editor Mode, click the Basic Mode tab to switch. The Basic Mode interface is much more user-friendly for making common adjustments, and it’s the recommended starting point for most site owners.
Once the interface loads, you’ll see a dropdown menu at the top labeled “Configure PHP INI basic settings” or similar. This dropdown lets you choose which domain or account level you want to configure. The interface will also show the default value for each setting, cPanel’s recommended default, and a link to the official php.net documentation for that directive. This context helps you understand not just what to change, but why.
Selecting Your Domain or Account
Click the dropdown menu and choose either a specific domain name (to apply changes to that domain only) or Home Directory (to apply changes to all domains under your account). Select a specific domain if you have multiple sites and want to adjust settings for only one. For example, you might want to increase memory_limit for your WooCommerce store but leave your blog at the default. Once you select a domain, the Basic Mode form will load, displaying text fields and sliders for common PHP settings.
The form typically shows current values alongside cPanel-provided defaults and links to each directive’s php.net documentation. Take a moment to review the current values before making changes. If your current memory_limit is 128M and you’re seeing “allowed memory size exhausted” errors, you now know exactly what needs to change. This transparency helps you decide which settings to adjust and by how much.
Adjusting the Settings You Need
Find the setting you want to adjust, usually memory_limit, max_execution_time, upload_max_filesize, or post_max_size. If you’re fixing an upload error, increase both upload_max_filesize and post_max_size to the same value (e.g., 64M for both). If you’re fixing a timeout error, increase max_execution_time to 180–300 seconds. If you’re fixing a memory error, increase memory_limit to 256M or higher (but don’t exceed your account’s maximum). For security purposes, cPanel’s documentation recommends using cPanel-provided default values whenever possible. Only increase a setting above the default if you have a specific problem to solve, and only increase it as much as necessary.
Make your changes carefully. Double-check that upload_max_filesize and post_max_size are properly aligned (post_max_size ≥ upload_max_filesize). Verify that your memory_limit increase doesn’t exceed your hosting provider’s maximum for your account. If you’re unsure about any value, leave it alone and consult your hosting provider before making changes. It’s better to contact support and make the right change once than to adjust multiple times based on guesses.
Applying Your Changes and Verifying
Once you’ve adjusted the settings you need, scroll to the bottom of the form and click Apply. The system saves your changes immediately to your account’s php.ini file. In most cases, the changes take effect within seconds; no restart needed. To verify the changes worked, log into your WordPress dashboard and go to Tools > Site Health > Info > Server to see your updated PHP configuration. The values shown there should match what you just set in cPanel. If the new values don’t appear, clear your WordPress cache or contact your hosting provider; some configurations require a cache clear or service restart.
Test the operation that was previously failing. If you increased upload_max_filesize to fix upload failures, try uploading a large media file to confirm it works now. If you increased max_execution_time to fix timeout errors, try the operation that was timing out before. Most of the time, increasing the right setting solves the problem immediately. If it doesn’t, contact your hosting provider’s support team with details about what you adjusted and the error you’re still seeing; they can review error logs and help you troubleshoot further.
Step-by-Step: Using Editor Mode for Custom PHP Directives
If you need to set a PHP directive that doesn’t appear in Basic Mode, such as session. save_path,save_path, disable_functions, or max_input_vars, you’ll use Editor Mode. This mode requires knowledge of php.ini syntax but gives you complete control over any PHP setting. Editor Mode is also useful for disabling dangerous PHP functions for security purposes, setting custom session storage paths, or configuring advanced caching directives. This section walks you through accessing Editor Mode, understanding php.ini syntax, and adding custom directives safely.
Accessing Editor Mode and Understanding the Interface
Log in to cPanel and go to Software > MultiPHP INI Editor. This time, click the Editor Mode tab at the top of the interface. Like Basic Mode, you’ll see a dropdown to select your domain or Home Directory. Select the domain you want to configure. Editor Mode will open a text editor showing the raw php.ini file for your domain or account. Each directive is on its own line, in the format directive_name = value. For example: memory_limit = 256M or upload_max_filesize = 64M. The path to the php.ini file being edited is displayed at the top, so you know exactly which file you’re modifying.
Editor Mode edits the same php.ini file as Basic Mode, but displays it as raw text rather than a user-friendly form. Changes you make in Editor Mode will show up in Basic Mode the next time you load it, and vice versa. This can help you understand the relationship between the two interfaces. Basic Mode is just a wrapper around the raw php.ini file, making it easier to modify without learning syntax.
Adding or Editing Custom Directives
To add a new directive that doesn’t appear in Basic Mode, click at the end of the file and press Enter to create a new line. Then type the directive in the format directive_name = value. For example: disable_functions = exec,system,shell_exec or max_input_vars = 3000. Each directive must be on its own line. Do not add comments (lines starting with semicolons) unless you’re familiar with php.ini syntax, as incorrect comments can cause PHP to reject the entire file. If you’re adding multiple directives, separate them with line breaks, not spaces or commas.
Make sure each directive name is spelled correctly. Typos are the most common cause of Editor Mode problems. If you misspell a directive name, PHP will ignore it, and you’ll wonder why your change didn’t take effect. If you’re unsure whether a directive is valid or how to spell it, check php.net or ask your hosting provider before making changes. Copy-pasting from official documentation is safer than typing from memory.
Saving Changes and Troubleshooting
Once you’ve added or edited your directives, scroll to the bottom and click Save. The system saves your changes immediately to the php.ini file. Like Basic Mode, changes typically take effect within seconds. If you make a mistake and the directive isn’t recognized, you may see errors in your PHP error log or on your website.
If that happens, log back into Editor Mode, find the incorrect line, fix or remove it, and click Save again. When in doubt, remove the suspicious line and consult your hosting provider’s documentation or contact support. A single typo can break your site’s PHP configuration, so double-check before saving.
Security Best Practices When Adjusting PHP Settings
Adjusting PHP settings for functionality matters, but so does adjusting them safely. A few practices protect your site from common vulnerabilities while you’re fine-tuning your configuration. Security and functionality aren’t opposites; the right PHP configuration does both. Conservative defaults exist partly for security: low limits prevent runaway scripts, and disabling certain features prevents exploitation. When you increase limits to support legitimate features, you’re still responsible for maintaining security in other ways.
Using Strong Defaults and Avoiding Unnecessary Changes
For security purposes, cPanel’s official documentation recommends using cPanel-provided default values unless you have a specific reason to change them. The defaults exist partly for security: conservative limits prevent runaway scripts, and features like display_errors = Off (in production) prevent information leakage. When you adjust settings, do so only for a specific problem, and only adjust them as much as necessary. Resist the temptation to “maximize” settings thinking “more is better”; higher limits don’t make your site faster, and overly high limits can mask performance problems in your code.
Also ensure you’re keeping your PHP version current. Older PHP versions (5.x, 7.0) have known security vulnerabilities and are no longer receiving patches. WordPress recommends at least PHP 7.4, with 8.x strongly preferred. You can change your PHP version in cPanel’s Select PHP Version tool (also under the Software section). Newer versions are faster and have more security patches, so upgrade regularly when your plugins and themes support it. Updating PHP often has a bigger impact on security and performance than adjusting individual php.ini settings.
Never enable display_errors on a Live Site.
The display_errors setting controls whether PHP errors are shown on screen to your visitors. In development, enabling this helps you debug. On a live site, it should always be off because error messages leak sensitive information (file paths, database details, plugin names) that attackers can exploit. Instead, configure error logging so errors are written to your error log but not shown to visitors. Your hosting provider typically manages this automatically on shared plans; error logging is usually enabled by default, and display_errors is off.
If you’re running WordPress, you can enable debug logging by adding a few lines to wp-config.php: define(‘WP_DEBUG’, true); and define(‘WP_DEBUG_LOG’, true); will create a debug log file where errors are recorded without being displayed to visitors. This gives you access to detailed error information for troubleshooting while keeping your site secure. Check the error log weekly for the first month after making changes, then monthly thereafter to catch problems early.
Consider Disabling Dangerous Functions for Added Security
In Editor Mode, advanced site owners sometimes add a disable_functions directive to prevent PHP from executing system commands through functions like exec, system, shell_exec, or proc_open. Legitimate applications rarely need these functions, but attackers frequently exploit them. If your application doesn’t require them, disabling them adds a security layer. However, check with your hosting provider or application documentation before disabling any function; you don’t want to break a feature you actually need.
A typical disable_functions directive might look like: disable_functions = exec,system,passthru,shell_exec,popen,escapeshellcmd,proc_open,proc_nice,ini_restore. Some hosting providers disable these functions on all accounts by default, which is excellent practice. Check your current configuration to see what’s already disabled, then add any additional functions you’re comfortable disabling. If you later discover a plugin needs a function you’ve disabled, you can remove that function from the list and save again.
When to Ask Your Hosting Provider for Help
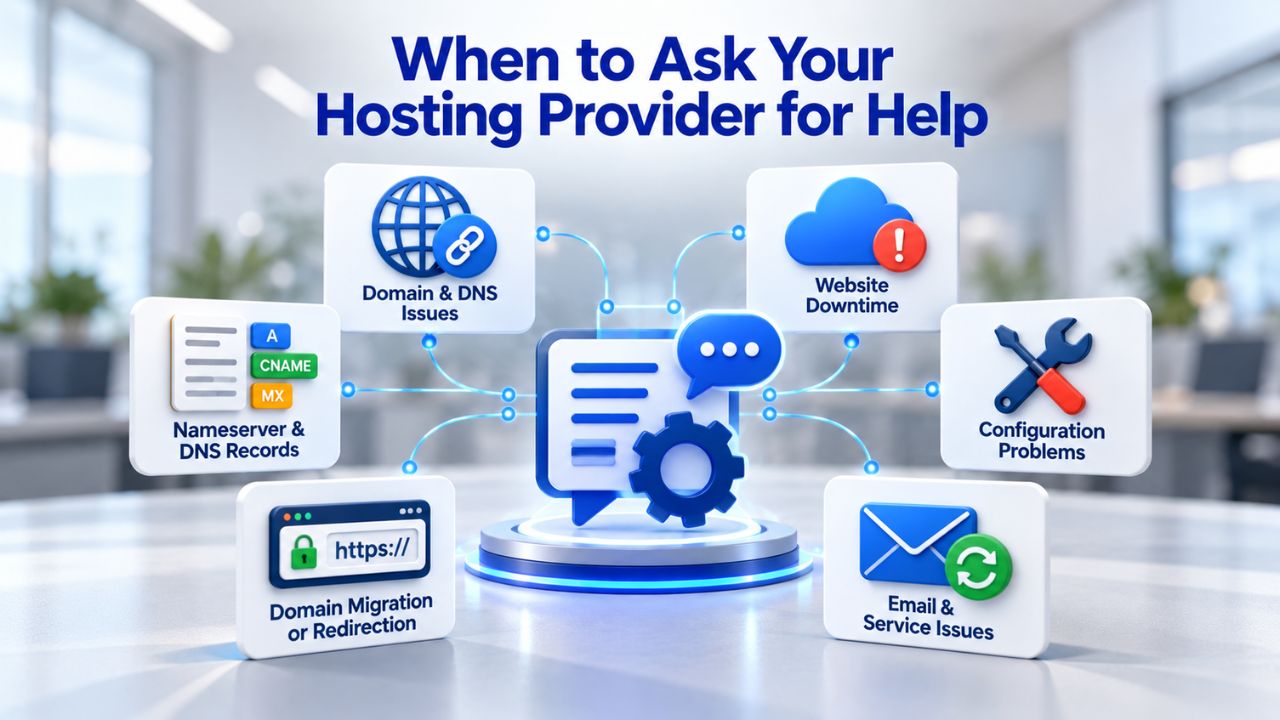
Adjusting PHP settings yourself through cPanel is usually safe and straightforward. But some situations call for expert help from your hosting provider. Knowing when to escalate saves you time and prevents misconfiguration. Your hosting provider’s support team has tools and access you don’t; so they can review error logs, check your account’s resource usage, and recommend solutions based on your specific situation. Don’t hesitate to ask for help when you hit a limit you don’t understand or when changing settings causes unexpected problems.
When You Hit Your Account’s Maximum Limits
If you’ve raised your PHP settings to your hosting provider’s stated maximums and you’re still hitting resource errors, your site probably needs more resources than your current plan provides. Contact your hosting provider’s support team. They can review your specific situation and recommend a plan upgrade (to higher-tier shared hosting, VPS, or dedicated hosting) or suggest code optimizations that might reduce your site’s resource consumption. They might also find a plugin with a memory leak or inefficient database queries that cause excessive resource usage.
Before requesting an upgrade, ask your hosting provider to optimize your current configuration first. Sometimes a database optimization, caching improvement, or plugin conflict resolution can reduce resource usage enough to solve the problem without upgrading. If optimization doesn’t help and you’re hitting hard limits, upgrading becomes the next logical step. Don’t just keep raising limits blindly; eventually you’ll hit a cap you can’t exceed, and at that point, more resources are the only answer.
When You Encounter Unknown Errors After Changing Settings
If you adjusted PHP settings and immediately started seeing errors you didn’t see before, blank pages, 500 errors, or cryptic fatal errors, something may be misconfigured. Before continuing to troubleshoot, revert your changes (adjust settings back to their defaults in cPanel or contact support for help), then contact your hosting provider. They can review error logs and help you identify whether a particular setting is causing the issue. Don’t keep adjusting settings randomly, hoping to find the right combination; that rarely works and often makes things worse.
Document what you changed before contacting support: “I increased memory_limit from 128M to 512M, and now I’m seeing fatal errors.” This information helps your support team reproduce the issue and determine whether your change caused it. If reverting the change fixes the problem, you know the setting was causing the issue. Then you can adjust more conservatively (e.g., try 256M instead of 512M) or investigate whether your site actually needs that much memory or whether there’s a deeper problem to solve.
When You Need a Custom Directive Beyond Basic Mode
If your application requires a specific PHP directive that doesn’t appear in Basic Mode and you’re not confident editing Editor Mode directly, ask your hosting provider. Many hosting teams can add custom directives and verify the syntax, saving you troubleshooting time and reducing misconfiguration risk.
This service is especially valuable if the directive is obscure or if you’re not sure whether your application actually needs it. Your hosting provider can also advise whether a particular directive is safe to set on their infrastructure or whether it might conflict with other server settings.
Get Expert Support for PHP Configuration on Niya Digital
Adjusting PHP settings in cPanel is straightforward for common issues, but if you hit account limits or need advanced directives, Niya Digital’s support team is ready to help. We review your site’s resource usage, recommend settings for your application, and ensure your configuration is secure. Start with our Web Hosting plans today and get expert guidance throughout your journey.
Frequently Asked Questions
What is PHP, and why does it matter for my website?
PHP is a server-side programming language that runs on your hosting server to generate dynamic web pages. WordPress, form submissions, and custom applications all rely on PHP. Unlike static HTML, PHP can process user input, access databases, and execute code, but this requires server resources like memory and processing time. Understanding PHP settings helps you avoid errors when your site’s actual usage exceeds the default limits configured on your hosting account.
How do I check my current PHP settings?
The easiest way is to log into your WordPress dashboard and navigate to Tools > Site Health > Info > Server. This displays your current PHP version and configuration limits (memory_limit, max_execution_time, upload_max_filesize, etc.). Alternatively, log into cPanel, go to Software > MultiPHP INI Editor, and view the current values for your domain in Basic Mode. Both methods show you exactly what’s configured without requiring any technical knowledge.
What’s the difference between upload_max_filesize and post_max_size?
upload_max_filesize sets the maximum size of a single file you can upload (e.g., a 50MB video). post_max_size sets the maximum size of the entire POST request, which includes the file plus any other form data. If post_max_size is smaller than upload_max_filesize, uploads fail silently. Always set post_max_size equal to or larger than upload_max_filesize, typically the same value (e.g., 64M for both).
Why do I get ‘Allowed memory size exhausted’ errors?
This error means your PHP script tried to use more memory than your memory_limit allows. Common causes are plugins running heavy operations (media processing, bulk imports, page-builder saves) or poorly optimized code. You can increase memory_limit in cPanel’s MultiPHP INI Editor, but shared hosting accounts have account-level memory caps you cannot exceed. If you hit that cap, contact your hosting provider about upgrading to a higher-tier plan.
Can I increase PHP settings beyond what cPanel recommends?
Yes, you can adjust settings beyond the defaults if your site needs them. However, shared hosting accounts have maximum limits set by your hosting provider (enforced by CloudLinux LVE or similar). You cannot exceed those maximums no matter what you set in cPanel. Check your hosting provider’s documentation or contact support to learn your account’s specific limits before making changes.
What happens if I set max_execution_time too high?
If you set it very high (e.g., 3600 seconds), a poorly written script with an infinite loop could run for that entire duration and consume server resources. For this reason, keep max_execution_time as low as practical for your actual use case; 180–300 seconds is typical for WordPress. Shared hosting best practice is to keep execution times low to prevent runaway scripts and address slow operations through code optimization instead.
Why should I never enable display_errors on a live website?
Enabling display_errors shows PHP error messages to your visitors, including sensitive details like file paths, database names, and plugin/theme information. Attackers use this information to plan exploits. On live sites, always keep display_errors = Off and configure error logging instead so errors are recorded but hidden from visitors. Your hosting provider usually manages this automatically.
How do I know if my site needs higher PHP settings?
Common signs include upload failures, timeout errors during bulk operations or plugin installation, and memory exhaustion errors. Check your site’s error log and WordPress Site Health to identify what’s failing. Compare your current PHP settings to your hosting provider’s recommendations for your site type (blog, e-commerce, multi-plugin). If your current settings are already at your account’s maximum and you’re still hitting errors, you need a hosting plan with higher resource limits.
What is memory_limit and how does it differ from account-level memory limits?
memory_limit is the maximum RAM a single PHP script can use (set in MultiPHP INI Editor). Your account’s LVE memory limit is the total RAM your entire account can use at once, across all simultaneous processes. If you run multiple PHP processes, cron jobs, and background tasks at the same time, they all share the LVE cap. You can increase memory_limit within cPanel, but you cannot exceed your account’s LVE cap. Contact your hosting provider if you need higher account limits.
Can I use Editor Mode to add any PHP directive I want?
Technically yes, but only directives that your PHP version supports will take effect. If you add an unrecognized directive, PHP will ignore it silently (or log a warning). If you’re unsure whether a directive is valid or supported, check php.net or ask your hosting provider. Typos in directive names are common mistakes; if something stops working after you add a directive, check the spelling.
What is safe_mode and should I enable it?
safe_mode is a deprecated PHP feature (removed in PHP 5.4.0) that some older hosting configurations still reference. It’s not recommended for modern PHP versions. If your site runs PHP 7.0 or higher (which it should for security reasons), you don’t need to worry about safe_mode; it’s no longer available.
How do I handle uploads that are too large even after increasing upload limits?
Some shared hosting providers have account-level upload caps (separate from PHP settings) that cannot be exceeded. If you’ve increased upload_max_filesize and post_max_size to your plan’s maximum and uploads still fail, contact your hosting provider; the cap may be at the account or server level, not just in PHP configuration. For very large uploads, VPS or dedicated hosting (which often allows larger caps) may be necessary.
What PHP version should I use?
Always use the latest stable PHP version that your applications support. WordPress recommends at least PHP 7.4, with 8.x strongly preferred for performance and security. You can change your PHP version in cPanel’s Select PHP Version tool (also under the Software section). Newer PHP versions are faster and have more security patches, so upgrade regularly when your plugins/themes support it.
What should I do if changing PHP settings breaks my website?
If you adjust settings and immediately encounter errors, revert the changes by logging back into the MultiPHP INI Editor and restoring the original values. Then contact your hosting provider’s support team before making additional adjustments. They can review error logs to identify exactly which setting caused the problem, helping you adjust more precisely next time without breaking functionality.
How often should I review my PHP settings?
Review your PHP settings when you first encounter errors (timeouts, memory exhaustion, upload failures) and adjust as needed. Also review when you add new plugins, install a page builder, or upgrade WordPress, as these can increase resource demands. Monitor your site’s error logs periodically. If you consistently hit limits without encountering actual errors, you likely don’t need to increase settings further.
Glossary
- PHP: A server-side programming language that runs on your hosting server (not in a browser) to dynamically generate web page content, power content management systems like WordPress, and process form submissions and user input.
- cPanel: A web-based control panel (graphical user interface) that allows website owners and hosting resellers to manage hosting accounts, websites, email accounts, databases, domains, DNS settings, and backups without requiring command-line access.
- MultiPHP INI Editor: A tool built into cPanel that allows users to configure PHP settings (php.ini directives) on a per-domain or per-account basis. It offers a beginner-friendly Basic Mode for common settings and an advanced Editor Mode for custom directives.
- php.ini: The main configuration file for PHP on a server that contains all default PHP directives controlling how PHP behaves, such as memory limits, execution time limits, file upload size limits, and error handling. Changes to php.ini affect all PHP scripts running on that server.
- Memory Limit: In the context of PHP, the maximum amount of RAM a single PHP script is allowed to consume before the server terminates it. Measured in megabytes (M) or gigabytes (G). Distinct from account-level memory limits.
- CloudLinux LVE: A server-level resource-isolation technology (Lightweight Virtual Environment) that enforces per-account limits on CPU, memory, processes, and other resources to prevent any single hosting account from consuming all server resources and degrading performance for other accounts on the same server.