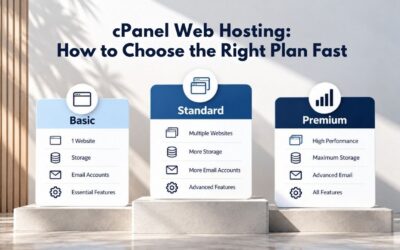
Understanding the cPanel Migration Path
A cPanel migration uses a standardized backup-and-restore workflow built into the control panel itself. Both your current host and your new host run the same core system, cPanel, so you can package your account’s entire structure into a single backup file and import it into your new account with minimal manual reassembly. This cPanel-to-cPanel approach is the most straightforward migration path for shared hosting environments and avoids the complexity of switching control panels.
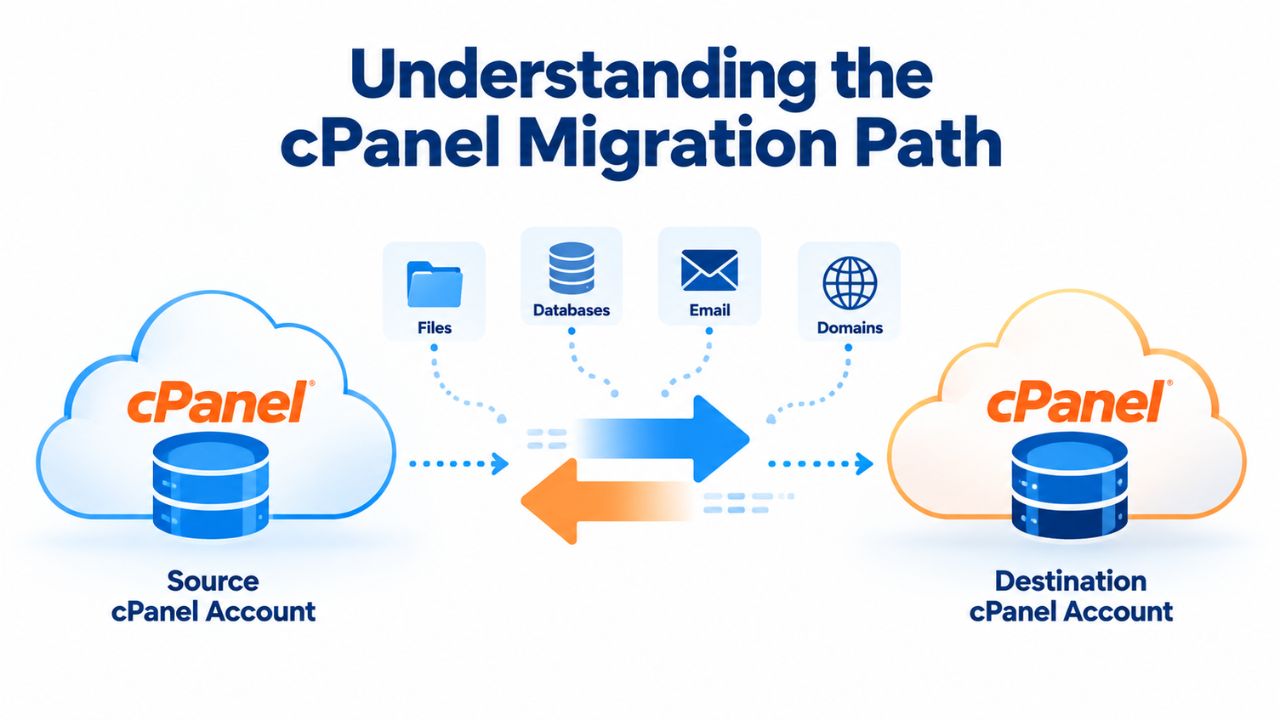
What Gets Migrated in a Full cPanel Backup
When you create a full account backup in cPanel, the backup file includes everything tied to your hosting account. All website files stored in your home directory and public_html folder are captured, along with every MySQL database associated with your account. Email account configurations, addresses, forwarding rules, and filters are transferred intact. Additionally, your addon domains and subdomains, DNS zone configurations, SSL certificate records, and cron job settings all become part of the single compressed (.tar.gz) file.
Because cPanel bundles all of these components into one archive, restoring the backup on your new host recreates your entire account structure in one operation. You avoid manually uploading files, recreating databases, or reconfiguring email separately. This comprehensive approach minimizes the risk of missing a critical component and ensures consistency between your old and new environments. The backup format is standardized across all cPanel installations, so a backup from any cPanel host can be restored into any other cPanel host without compatibility friction.
Why cPanel-to-cPanel Works Well
cPanel has been the standard control panel for Linux-based shared hosting since 1996 and now powers over 1.4 million servers worldwide. This dominance means most hosting providers, especially resellers offering shared plans, use cPanel as their standard. Because both your old and new hosts use the same system, the migration process is a built-in feature rather than a workaround.
The backup format is standardized, so a backup from any cPanel host can be restored into any other cPanel host without compatibility issues. You avoid the complexity of manually mapping files, reconfiguring databases, or rebuilding your site’s environment on a different control panel. Most importantly, cPanel-to-cPanel migration is reliable because hosting providers perform it daily; the tools are mature, well-tested, and predictable when executed correctly.
Business Web Hosting Plans & Pricing
Choose the hosting plan that fits your website, WordPress site, or growing business. Compare features, storage, performance, security, and website capacity to find the right hosting environment for your needs.
cPanel Starter
cPanel Hosting that's easy, reliable and lightning-fast.
- 1 website
- 30 GB storage
- Unmetered bandwidth*

cPanel Economy
cPanel Hosting that's easy, reliable and lightning-fast.
- 1 website
- 100 GB space
- Unlimited bandwidth*
- 100 email accounts**
- 10 MySQL databases (1 GB ea.)
cPanel Deluxe
cPanel Hosting that's easy, reliable and lightning-fast.
- Unlimited websites
- Unlimited space
- Unlimited bandwidth*
- 500 email accounts
- 25 MySQL databases (1 GB ea.)
cPanel Ultimate
cPanel Hosting that's easy, reliable and lightning-fast.
- Unlimited websites
- Unlimited space
- Unlimited bandwidth*
- 1000 email accounts
- Unlimited MySQL databases (1 GB ea.)
- 2X Processing power & memory (available for Linux/cPanel only)
- Premium DNS
- 1-year SSL certificate to secure customer data and increase search rankings
*We don't limit the amount of storage and bandwidth your site can use as long as it complies with our Hosting Agreement. Should your website bandwidth or storage usage present a risk to the stability, performance or uptime of our servers, we will notify you via email and may be required to upgrade, or we may restrict the resources your website is using.
**Email account storage is limited to 100 email accounts with 100 MB of total storage.
WordPress Basic
A great way to get started.
- 1 website
- 10 GB NVMe storage
- Unmetered bandwidth
- Free SSL Certificate *
- WordPress pre-installed
- Weekly backups
- Web Application Firewall
- Daily malware scans
- One-time malware removal

WordPress Deluxe
Improve your site performance with Cloudflare CDN.
- 1 website
- 20 GB NVMe storage
- Unmetered bandwidth
- Free SSL Certificate *
- WordPress pre-installed
- Daily backups
- Web Application Firewall
- Daily malware scans
- One-time malware removal
- Up to 2x faster performance with global Cloudflare CDN **
- Enhanced security with DDoS protection
- Staging site
WordPress Ultimate
Add online marketing with more sites, storage and security.
- 1 website
- 30 GB NVMe storage
- Unmetered bandwidth
- Free SSL Certificate *
- WordPress pre-installed
- Daily + on-demand backups
- Web Application Firewall
- Daily malware scans
- Unlimited malware removal
- Up to 2x faster performance with global Cloudflare CDN **
- Enhanced security with DDoS protection
- Staging site
- WordPress code optimizer
- Smart WordPress plugin manager
- Sell online with WooCommerce
*An SSL certificate is included with every site and free for the life of the hosting plan. Certificates are automatically installed, validated and renewed.
Web Hosting Plus Launch
For multiple basic sites.
- 100 GB storage*
- 4 GB RAM
- 2 CPUs
- Unmetered traffic
- 50 websites & databases
- Free, unlimited SSL for all your websites**

Web Hosting Plus Enhance
For high-traffic WordPress, Joomla, and other sites.
- 200 GB storage*
- 8 GB RAM
- 4 CPUs
- Unmetered traffic
- 100 websites & databases
- Free, unlimited SSL for all your websites**
Web Hosting Plus Grow
For advanced eCommerce sites like Magento.
- 300 GB storage*
- 16 GB RAM
- 8 CPUs
- Unmetered traffic
- 150 websites & databases
- Free, unlimited SSL for all your websites**
Web Hosting Plus Expand
For multiple basic sites.
- 400 GB storage*
- 32 GB RAM
- 16 CPUs
- Unmetered traffic
- 200 websites & databases
- Free, unlimited SSL for all your websites**
*The total amount of usable storage capacity for your particular Hosting Service(s) may differ from the represented capacity as there is required space for the operating system(s), system file(s) and other supporting file(s).
**If you cancel the Web Hosting Plus product, you will lose the associated SSL certificate as well.
Pre-Migration Planning and Assessment
Before starting a backup, confirm your current hosting account meets basic migration criteria and that you’ve documented the critical information you’ll need during the transition. Planning now prevents surprises and helps you move forward confidently when the migration begins.
Assess Your Current Account Size and Type
Log in to your current hosting account’s cPanel dashboard and navigate to the account information or server status section to verify your total disk space usage. Account size matters because it determines how long backup creation will take and how much bandwidth you’ll need to transfer the files. For most migrations, account sizes under 5 GB transfer smoothly within an hour; larger accounts may take several hours.
Confirm that your source hosting account is a standard cPanel account (not a proprietary site builder or managed WordPress platform without cPanel access, which follow different migration steps). Your new host should also offer a cPanel account to use the backup-restore method. Contact your new hosting provider to confirm they offer cPanel and can restore full backups; most do, but it’s worth verifying before committing to the migration.
Document Your Inventory and Prepare DNS Settings
Before you start, create a comprehensive checklist of your existing setup. Write down all domain names and add-on domains associated with your account, list the names of all MySQL databases and their purposes (e.g., WordPress database, customer data), note all email addresses and their forwarding rules, and record the current DNS records if you plan to keep them after migration. This inventory becomes your post-migration verification checklist; confirm each database, email account, and domain works on the new host before updating your live DNS records.
If you have access to your domain’s DNS settings through a registrar or your current hosting control panel, consider reducing the Time-to-Live (TTL) value on your primary A record to 300 seconds (5 minutes) at least 7 days before your planned migration date. TTL controls how long internet service providers cache your DNS information.
By lowering it early, you pre-stage the cache with short expiration times, so when you actually switch your domain to point to the new host, the change propagates globally within minutes instead of the typical 24–48 hours. After your migration is complete, you can raise the TTL back to 1–2 hours for normal operation. This step is optional but valuable for minimizing the window during which some visitors may reach the old site.
| Pre-Migration Task | What to Verify | Timeline |
|---|---|---|
| Assess account size | Check total disk space usage in cPanel | Before backup creation |
| Confirm cPanel account | Verify source and destination both use cPanel | Before purchasing |
| Create domain inventory | Document all domains, subdomains, and addon domains | Before migration |
| List all databases | Note database names and purposes | Before backup |
| Document email accounts | Record all email addresses and forwarding rules | Before backup |
| Note DNS records | Save current DNS configuration for reference | Before DNS switch |
| Record SSL certificate status | Note if Let’s Encrypt (free) or paid certificate | Before migration |
| Lower DNS TTL (optional) | Reduce A record TTL to 300 seconds; allow 7 days to cache | 1–2 weeks before |
Creating Your cPanel Backup
The backup process is the foundation of safe migration. A full backup protects you against data loss and gives you a rollback point if something goes wrong during restoration on your new host. Niya Digital’s team has found that customers with a solid backup strategy experience fewer problems during and after migration, even when unexpected issues arise.
Generate a Full Account Backup
Log in to your cPanel account at your current hosting provider. In the cPanel home dashboard, look for the “Backup” tool under the “Files” section (some cPanel themes call it “Backup Wizard”). Click on “Backup” and select the “Full Backup” or “Download a Full Account Backup” option. You’ll see a confirmation that cPanel is about to create a compressed file containing your entire account. Choose “Do not send email notification” if you don’t need a notification when the backup finishes, then click “Generate Backup.” cPanel will now begin building the backup file in the background.
The backup process can take anywhere from a few minutes (for small sites under 500 MB) to several hours (for large accounts with extensive databases). During backup creation, avoid making any changes to your website, databases, or email configuration. Any additions or edits made during the backup will not be reflected in the final backup file. They can cause data mismatches when you restore. Treat the backup period as a freeze window: no new content uploads, no database updates, no new email accounts. Once the backup completes, you can make changes again.
Download and Protect Your Backup File
Return to the Backup tool and refresh the page periodically. Once the backup completes, it will appear in the “Backups Available for Download” section with a timestamp. The file will be named something like youraccountname.tar.gz. If the file is small (under 1 GB), you can download it directly through cPanel’s File Manager or through your browser. For larger files, use FTP to download the backup to your local computer, as browser downloads can time out for large files.
Once you have the .tar.gz backup file, do not unzip it or modify it using Windows built-in archive tools or third-party utilities. The cPanel backup format is a specialized compressed file, and opening it with unsupported software can corrupt the archive. Store the backup file in a safe location on your computer or in cloud storage. Keep it until after you’ve fully verified that your new site is live and functioning correctly on the new host. This backup is your safety net; if you discover a problem after migration, you can ask your new hosting support team to restore it from the backup.
Setting Up Your New cPanel Account
Once you’ve purchased hosting with your new provider and received your cPanel login credentials, log into your new cPanel account and perform a few basic preparatory steps. Taking time to set up your new environment correctly helps ensure the restoration succeeds and your migrated site works properly from day one.
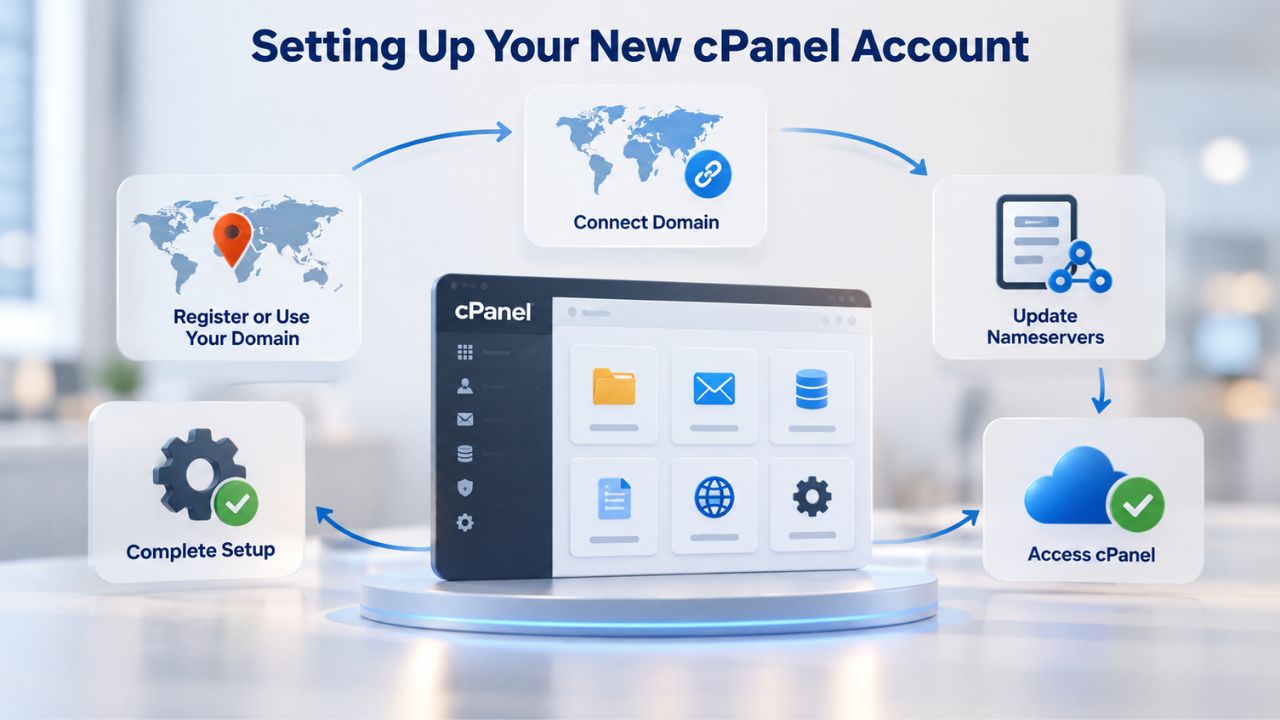
Verify Hosting Plan Capabilities
Review your new cPanel plan’s feature list to confirm it supports the applications and functionality your site needs. Check that your plan includes sufficient storage and bandwidth for your site’s current size and growth expectations. Verify that it supports the programming language and PHP version your site requires (e.g., PHP 8.1 for modern WordPress installations). Confirm it includes the number of databases, email accounts, and add-on domains you use.
If your new plan has limits that conflict with your current setup (e.g., your new plan supports only 2 email accounts but you have 5), contact your new hosting provider before proceeding. You may need to upgrade to a higher plan that accommodates your actual needs. Many providers offer different tiers specifically because different sites have different requirements; choosing the right tier upfront prevents headaches during and after migration.
Create Required Database Users and Accounts
If your new hosting plan requires you to create databases and users manually before restoring, you can create placeholder databases ahead of time in cPanel’s “MySQL Databases” tool. When you restore your backup, cPanel will overwrite these placeholders with the actual data from your backup file. However, many new hosting providers automatically recreate databases during restoration, so you may not need this step. Check your new provider’s migration documentation or contact their support team for guidance specific to their system.
Note your cPanel login credentials and keep them secure. You’ll need full cPanel access to upload the backup file and initiate the restoration process. If your new provider assigned you a temporary password, change it to something secure that only you know. Store your credentials securely and never share them with unauthorized individuals; your hosting account controls all of your website’s data and infrastructure.
Uploading and Restoring Your Backup
Next, transfer your backup file from your computer to your new hosting account so cPanel’s Backup Restoration tool can access it. Once the file is uploaded, you’ll use cPanel’s restoration tool to unpack and restore all your account data in a single operation.
Upload Your Backup File to the New Host
Log into your new cPanel account. Navigate to “File Manager” in the “Files” section. In File Manager, navigate to your home directory (the root folder of your account). Use the “Upload” button to select your .tar.gz backup file from your computer and upload it. For backup files under 1 GB, this method is fast and straightforward. Once uploaded, the backup file will sit in your home directory, ready for restoration.
For backup files larger than 1 GB, FTP is faster and more reliable than the browser-based File Manager. You’ll need your new hosting account’s FTP credentials (usually provided in your welcome email from your new hosting provider). Download a free FTP client, connect to your hosting server using your credentials, navigate to your home directory, and upload the .tar.gz backup file to the /home or root directory of your account. Once the upload completes, verify the file size matches your local copy; this confirms the file transferred completely without corruption.
Initiate and Monitor the Restoration Process
In your new cPanel account, go to “Backup” under the “Files” section and look for “Restore a Full Backup/cpmove File” or “Backup Restoration.” You’ll see options to restore with a file already uploaded to your account. Click “Restore with File” if your backup file is already in your home directory. A list will appear showing all backup files (.tar.gz and .cpmove files) in your account’s designated backup directories. Select your backup file from the list and click “Restore.”
cPanel will then unpack the archive and begin restoring your data. During restoration, cPanel recreates your home directory structure, recreates and populates your MySQL databases with your existing data, recreates your email accounts with their settings, and restores your DNS zone records (though DNS might not be live yet until you update your domain’s nameservers).
The restoration process can take several minutes to an hour depending on the size of your account and your server’s processing speed. Do not close your browser or interrupt the process; let it complete fully. When restoration finishes, you’ll see a completion message. If the restoration fails, cPanel will display an error message indicating what went wrong. Contact your new hosting provider’s support team with the error message; they can help diagnose the issue.
Get Professional Support for Your Migration
Moving your site shouldn’t require technical expertise you don’t have. We offer comprehensive migration assistance for cPanel accounts, so you don’t have to manage every technical detail on your own. Whether you handle the steps yourself or ask our team to guide you through each phase, we ensure your site transitions smoothly. Our support team is available to answer questions, assist with setup, and troubleshoot any unexpected issues during the migration process.
Testing Your Site on the New Host Before Going Live
Before you switch your domain’s DNS records to point to your new host, thoroughly test your site on the new server. Testing catches configuration issues, database connection problems, and compatibility issues while the old host remains active as a fallback. This is one of the most critical steps in the entire migration process.
Access Your Site via Temporary URL and Test Core Pages
Your new hosting provider should have given you a temporary URL that points directly to your new cPanel account without requiring a DNS change. The temporary URL typically looks like youraccountname.newhost.com or newhost.com/~youraccountname. Log into your new cPanel account, find the server IP address or temporary URL in the “Server Information” section, and use that temporary URL to view your site in a web browser. Verify that your homepage loads, that all pages are accessible, and that images, stylesheets, and scripts load correctly.
Navigate through your site’s key pages: product pages if you run an e-commerce store, blog post archives if you maintain a blog, contact forms if your site includes them. Click on links to confirm they resolve correctly. Check that your site’s navigation menu works as expected and that all internal links point to the correct pages. Pay special attention to pages that display external content or rely on third-party integrations; if those elements fail to load, you may have port or firewall configuration issues on the new host.
Verify Databases, Email, and SSL Certificates
If your site uses a database (WordPress, content management system, or custom application), test core functionality that relies on the database. For WordPress, create a test post or log in to the WordPress admin dashboard. For e-commerce sites, check that products display and shopping cart functions work. For custom databases, try viewing pages that pull data from the database. If your site displays a database connection error, the connection credentials in your site’s configuration file may not match your new database setup.
Access cPanel’s phpMyAdmin tool, verify the database name, username, and password you see there, and update your site’s configuration file with the correct credentials. Most WordPress installations store database credentials in wp-config.php; you can edit this file through cPanel’s File Manager. Test email functionality if your site sends transactional emails (password reset emails, order confirmations, contact form submissions). Visit your site using the https:// protocol on the temporary URL.
Your browser should load without SSL certificate warnings or errors. If you see a warning, the SSL certificate hasn’t been properly installed on your new account. If you were using a free Let’s Encrypt certificate on your old host, your new cPanel account should offer free Let’s Encrypt integration; request a new certificate through cPanel’s “AutoSSL” or “Let’s Encrypt” tool.
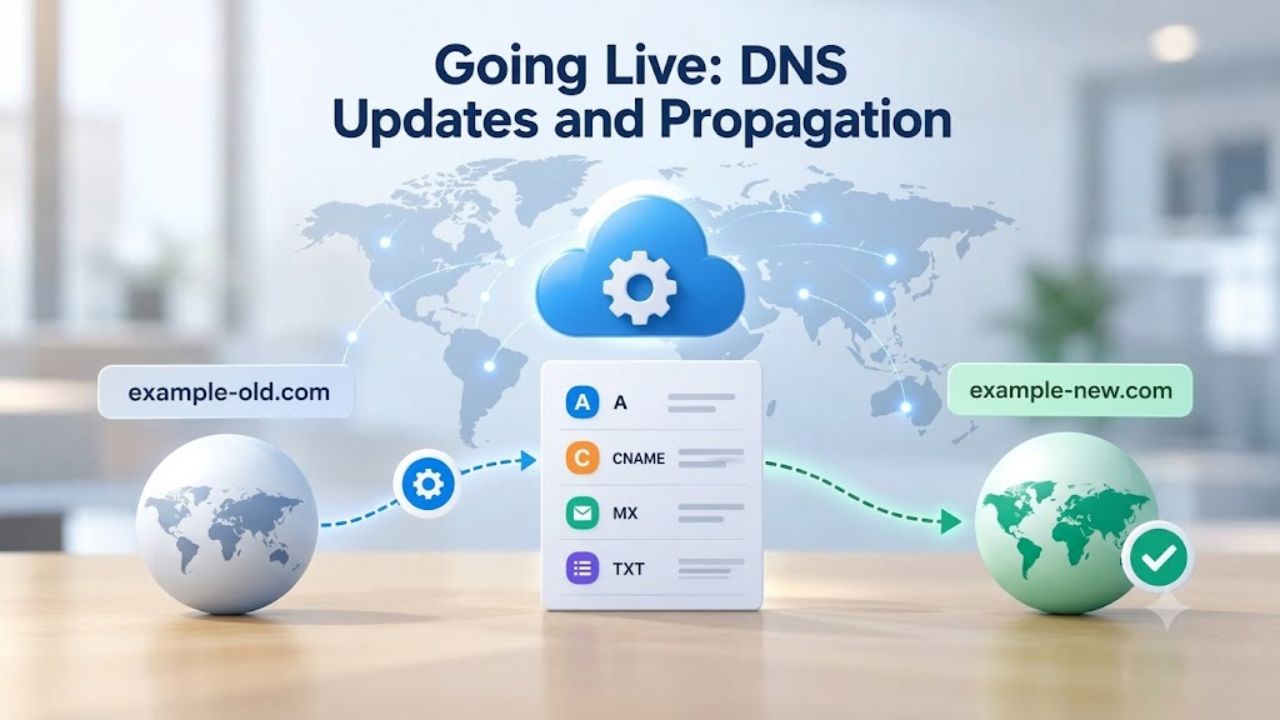
Going Live: DNS Updates and Propagation
Once you’ve confirmed your site works correctly on the new host, the final step is updating your domain’s DNS records to point to the new server. This is when your site goes live on the new host for all visitors. Plan to perform this step during a time when you can monitor your site for the next few hours.
Update Nameservers or A Records
Log into your domain registrar’s control panel (the company where you registered your domain). Find the “Nameservers” or “DNS Management” section and replace your current nameservers with the nameservers provided by your new hosting provider. Your new provider will have given you this information in your welcome email or in the cPanel Account Information section. After you update the nameservers at your registrar, save the changes. Your new provider’s nameservers will now handle all DNS resolution for your domain, directing traffic to your new host.
Alternatively, if your registrar manages DNS records directly, you can update just the A record (the primary IP address record) instead of changing nameservers. In your registrar’s DNS or Zone File editor, find the A record pointing to your old host’s IP address, note the new IP address from your new cPanel account’s Server Information, and change the A record to point to that new IP address. This method gives you more granular control but requires you to manually update other DNS records (MX for email, CNAME for subdomains) if you’re not using your new provider’s nameservers.
Monitor DNS Propagation and Keep Your Old Host Active
After you update your DNS records, your domain’s change will begin propagating globally. This typically takes 24–48 hours. Still, different visitors will see the change at different times depending on their internet service provider’s DNS caching behavior. During propagation, some visitors will reach your old host while others reach your new host. Both versions of your site should be identical now, so visitors see the same content regardless of which host they reach.
Keep your old hosting account active for at least 48 hours, preferably a full week, after your DNS change. While DNS propagates, some of your visitors may still be routed to your old host by their ISP’s DNS server. If your old hosting account is already terminated, those visitors will get a “site not found” error. Keeping the old host active ensures uninterrupted access for everyone during the propagation window. You can check the current status of your DNS propagation using a free DNS propagation tool by entering your domain name; the tool will show you which nameservers different DNS resolvers around the world are currently using.
Post-Migration Monitoring and Verification
After your site is live on the new host and DNS propagation is complete, monitor your site’s performance and functionality for the first few days. This period catches any issues that testing on the temporary URL might have missed and confirms that your migration is truly successful.
Verify Search Engine Indexing and Site Performance
Visit your search engine webmaster tools (if you use them for your site) and check the coverage report to see if search engines have reindexed your pages. You may see temporary “Discovered but not indexed” messages while search engines recrawl your site on the new host; this is normal and typically resolves within a few days. Submit your sitemap to your search engine tools to help expedite reindexing.
Use your site’s performance monitoring tools (or your new hosting provider’s built-in monitoring) to track your site’s response time and availability over the first week on the new host. If you notice unexpected slowdowns or intermittent downtime, it could indicate resource contention on your new plan, misconfigured caching, or missing database indexes. Contact your new hosting provider’s support team if you see issues; many hosting providers offer performance reviews or optimization recommendations. Check that your site’s pages load as quickly (or faster) on the new host compared to your old host.
Update Configurations and Monitor for Issues
Log into your analytics account and verify that traffic from your new host is being tracked correctly. You may see a brief dip in traffic during the migration window as different users reach different hosts, but traffic should normalize once propagation completes. Check that page views, bounce rates, and conversion goals are being recorded as expected.
Once everything is confirmed working, review your cPanel settings to match your old host’s configuration. Check that backups are scheduled automatically (cPanel’s Backup Configuration allows you to set daily or weekly backup frequency). Verify that security settings like password protection on admin directories are in place. Confirm that your SSL certificate is set to auto-renew (for Let’s Encrypt) so you don’t encounter certificate expiration issues. If you had specific email filter rules on your old host, verify they’re active on the new host; sometimes custom filters don’t transfer automatically and need to be recreated manually.
| Post-Migration Component | What to Test | Success Indicator |
|---|---|---|
| Website pages | Access homepage and key pages via domain name | All pages load without errors; images and styling appear correct |
| Database connectivity | Check pages that display database-driven content | Data displays; no “database connection error” messages |
| Email functionality | Test sending and receiving from migrated email accounts | Messages arrive and send without delays or errors |
| SSL certificate | Browse site using https\:// protocol | No browser warnings; padlock icon visible; no certificate errors |
| Search engine indexing | Check coverage report in search engine tools | Pages are indexed; crawl errors are minimal or absent |
| Site performance | Load key pages and measure load time | Response times are acceptable; no unusual slowdowns |
| Email delivery | Send test email from contact form; test transactional email | Emails arrive in inbox within normal timeframe |
| Cron jobs (if applicable) | Check scheduled tasks are running in cPanel | Backups execute; scheduled emails send; automated tasks run as expected |
Common Migration Pitfalls and How to Avoid Them
Understanding the most common migration mistakes helps you avoid them. These pitfalls have caused problems for many site owners, but you can prevent them with proper care and attention.
Protecting Your Backup File and Avoiding Data Loss
The most common migration mistake is opening or unzipping your backup file with Windows default archive tools or third-party utilities before uploading it. This corrupts the cPanel-specific file format and makes the backup unusable for restoration. Always upload the .tar.gz file as-is and let cPanel’s Backup Restoration tool handle decompression. If you need to verify the file is intact, confirm its file size matches what was shown in your cPanel Backup tool before you downloaded it.
Research shows that 58% of data loss incidents during server migration occur due to improper backup or restoration procedures. This statistic underscores the importance of treating your backup with care. Create a backup of your backup, and store it in multiple locations (your computer, cloud storage, an external hard drive). If anything goes wrong during restoration, you want multiple copies to fall back on. Never assume the restoration will work perfectly on the first try; the backup is your insurance policy against disaster.
Preventing Email Interruption and SSL Certificate Issues
Deleting your old hosting account the moment your DNS changes are submitted creates a window, sometimes several days, where visitors still routed to the old host get “site not found” errors. Keep the old account active for at least 48 hours after the DNS switch, and ideally for a full week. This simple step eliminates downtime for most visitors.
Overlooking your SSL certificate is a common oversight with serious consequences. Visitors who navigate to your site using https:// may see certificate warnings if SSL isn’t properly installed on the new host. Either request a new free Let’s Encrypt certificate through cPanel’s Auto SSL tool or contact your hosting provider to ensure paid certificates are transferred and configured correctly. Over 35% of SSL certificate migrations result in improper installation or configuration, so treat SSL setup as a critical verification step, not an afterthought.
Getting Help and Finalizing Your Migration
Professional assistance can make migration much smoother, especially if your site is complex or you’re not comfortable with technical tasks. Knowing when to ask for help and how to confirm your migration is complete ensures you finish with confidence.
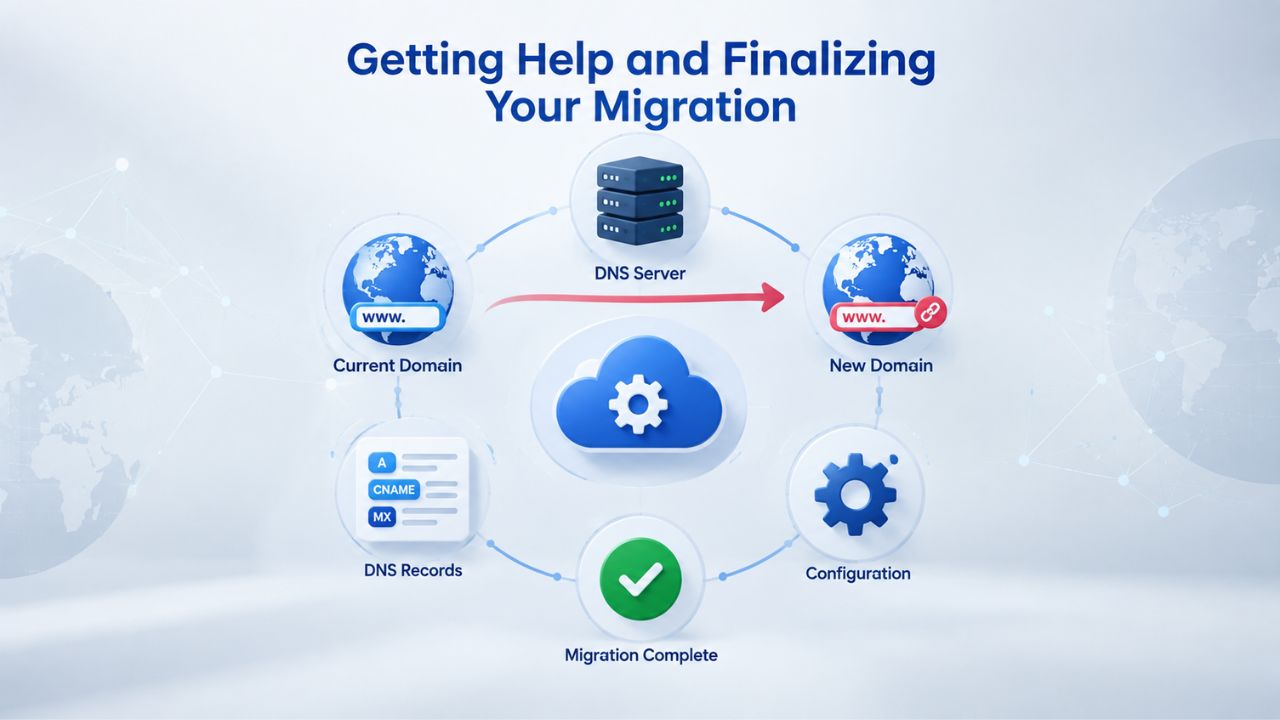
When to Contact Your Hosting Provider for Assistance
Most reputable hosting providers offer migration assistance. Many include free migration with a hosting purchase; you provide your old host’s cPanel login, and the provider’s support team handles the entire backup and restoration process. If you’re uncomfortable with any step, use that offer. Contact support early: before purchasing if you have compatibility questions, during setup if you need guidance on feature configuration, and during restoration if you encounter errors.
Contact your new hosting provider’s support team if you encounter errors during restoration, if your site doesn’t work as expected after migration, or if you see unexpected performance issues. Provide specific details: error messages from cPanel, which pages aren’t loading, database connection errors, SSL certificate warnings, or anything else unusual. The more information you provide, the faster support can diagnose and resolve your issue. Many hosting providers have migrated thousands of sites and have seen every problem that can occur; their experience is valuable.
Confirming Your Migration Is Complete and Successful
Your site is fully live, and your migration is complete once several conditions are met. First, you can access your full domain name (not the temporary URL) in a web browser and see your site load correctly. Second, DNS propagation has completed globally (confirmed with a DNS propagation tool); wait at least 48 hours after your DNS change before confirming this. Third, your new host’s DNS is answering queries for your domain around the world, your site’s pages load correctly, and all functionality (databases, email, forms, etc.) works as expected.
After you’ve confirmed everything is working correctly on the new host for at least one week, you can safely cancel your old hosting account and stop paying for duplicate hosting. There’s no rush; if you want to keep the old account for a month or longer as insurance, that’s reasonable. Once you’re fully confident in the new host, it’s safe to terminate the old account. The migration process is reliable and well established. With a backup in hand, a tested new environment, and a methodical approach, you’ll have your site running on your new host with minimal disruption and full confidence that your data is intact.
Ready to Migrate Your Web Hosting?
Smooth migration starts with a reliable new hosting provider, and proper planning includes comprehensive support to help you move without stress. Whether you handle the technical steps yourself or ask our team to guide you, we ensure your site transitions with minimal disruption and maximum data protection. Our support team is available throughout the migration process to answer questions, assist with setup, and troubleshoot any issues that arise.
Frequently Asked Questions
How long does a cPanel migration usually take?
For most small to medium sites (under 2 GB), the entire process from backup creation through DNS propagation completion takes 24–48 hours. Backup creation itself usually takes 15 minutes to 2 hours depending on site size. Restoration on the new host typically takes 15 minutes to 1 hour. DNS propagation is the longest step, taking 24–48 hours for complete global distribution, though many users see the change within a few hours.
Will my email be interrupted during migration?
During DNS propagation, some of your visitors’ ISPs may still send email to your old host’s mail server while others route it to your new host. To minimize email interruption, keep your old hosting account active for at least 48 hours after updating DNS. Many hosting providers offer email routing during migration to forward any mail received at the old host to the new host during the propagation window, so ask your provider about this service.
What if my backup file is larger than my internet connection can handle?
For very large backup files (over 5 GB), uploading can be slow or may time out. Contact your new hosting provider’s support team; many let you upload backup files directly via file transfer protocol or can help with large-file transfers through alternative methods. Some providers even accept backups delivered on external hard drives for enterprise-level migrations.
Do I need to update my domain registrar after migration?
Only if you’re changing nameservers. If your domain is registered with a different company than your hosting provider, you’ll update the domain’s nameserver settings at your registrar after migration. If your hosting provider also registers domains and you’re migrating within their ecosystem, you may only need to update nameservers in your hosting account instead.
Will my SEO rankings be affected by migration?
If you preserve your URL structure, set up 301 redirects for any changed URLs, and ensure your new host has reliable uptime, migration typically has minimal SEO impact. Search engines recognize domain moves and DNS changes as normal operations. Search rankings may fluctuate slightly during the propagation period but usually stabilize within a week or two.
Can I migrate a partial backup instead of a full backup?
Yes, cPanel Backup Wizard allows you to back up specific components (home directory files only, databases only, email configuration only, etc.) and restore them separately. However, a full backup and restore is simpler and less error-prone because it verifies all components together. For most site owners, a full backup is the safest approach.
What happens if restoration fails?
If restoration encounters an error, the backup file remains intact on your new host, and you can retry restoration. Common failures include insufficient disk space on the new plan, file corruption during upload, or database import errors. Contact your hosting provider’s support team with the specific error message; they can investigate and often retry the restoration successfully after resolving the underlying issue.
How do I know if my site is fully migrated and live?
Your site is fully live once you can access your full domain name (not the temporary URL) in a web browser and see your site load correctly, DNS propagation has completed globally (confirmed by a DNS propagation tool), and your new host’s DNS is answering queries for your domain. Allow 48 hours after your DNS change before considering the migration fully complete.
Can I roll back to my old host if something goes wrong?
If you’ve kept your old hosting account active and discovered a critical issue within 48 hours of going live, you can update your domain’s DNS back to your old host’s nameservers to restore service immediately. Your old site is still there and fully functional. Once you’ve resolved the issue on the new host, you can switch DNS back. This is why keeping the old account active matters.
Should I cancel my old hosting after migration?
Only after you’ve confirmed your new site is fully live, DNS propagation is complete, and your site has been functioning reliably on the new host for at least a week. Once you’re confident everything is working, you can cancel the old account and stop paying for duplicate hosting. There’s no downside to keeping it longer if you want extra security.
What if my website uses a specialized hosting feature my new plan doesn’t support?
Before purchasing your new plan, confirm it supports your specific needs (specific PHP version, multiple CMS installations, e-commerce functionality, API integrations, cron jobs, etc.). If you discover an incompatibility during testing, contact your new host about upgrading to a higher plan or enabling additional features. Some features may require a different hosting tier to accommodate your actual requirements.
Can cPanel migrations move a site to a different content management system?
No, cPanel migration preserves your existing site exactly as it is. To migrate from one CMS to another (e.g., from Joomla to WordPress), you’ll need to rebuild or convert your content separately using CMS-specific migration plugins or manual export/import. The cPanel backup covers your current site; content transformation is a separate step.
How do I migrate email accounts separately if my domain is moving to a different registrar?
If your domain registrar is changing, you may manage DNS in your new registrar’s system. Your hosting provider handles email account migration; your email accounts live on your hosting server and move with your site during the cPanel restoration. Update your domain’s MX records at your new registrar to point to your new hosting provider’s mail servers (usually provided in your hosting account’s information).
What security measures should I take during migration?
Keep your cPanel login credentials secure and never share them. Use strong, unique passwords for your hosting account. Ensure your backup file is stored securely and only transmitted over secure connections (SFTP rather than unencrypted FTP). Once you no longer need your old host, terminate the account completely to prevent unauthorized access to your legacy systems.
Can I test migration without affecting my live site?
Yes, that’s exactly what the temporary URL is for. Before updating your DNS, access your site via the temporary URL your new host provides and test everything thoroughly. Your live site remains on your old host and unaffected. Only after you’ve confirmed everything works correctly on the temporary URL should you update your DNS to make the migration live.
Glossary
- Backup: A complete copy of your website files, databases, email configuration, and account settings saved in a single compressed file (.tar.gz format) for safekeeping and restoration. A full backup captures your entire hosting account; partial backups allow you to export specific components.
- cPanel: A web-based control panel that allows you to manage your hosting account, including files, email, databases, DNS records, domains, and security settings, without requiring command-line knowledge. cPanel provides a graphical user interface to hosting account functions that would otherwise require technical expertise.
- DNS (Domain Name System): The global system that translates human-readable domain names (like yoursite.com) into numerical IP addresses that computers use to locate websites on the internet. When you type a domain name into your browser, DNS servers convert it to an IP address so your browser can connect to the correct server.
- DNS Propagation: The time it takes for DNS changes (like switching to a new host) to spread across the internet’s DNS caches worldwide. During propagation, different internet service providers and DNS servers update their records at different times, causing some visitors to see your old site while others see your new site. Propagation typically takes 24–48 hours but can complete much faster.
- phpMyAdmin: A web-based tool built into cPanel for managing MySQL databases directly. phpMyAdmin allows you to view database tables, run queries, troubleshoot database issues, and make repairs without using command-line tools. It’s commonly used to update WordPress configuration data after migration.
- TTL (Time-to-Live): A setting on DNS records that controls how long internet providers cache your DNS information. Lower TTL values speed up DNS propagation during migration but increase the load on DNS servers. During normal operation, a higher TTL (1–2 hours) is more efficient; before migration, temporarily lowering TTL to 300 seconds speeds up the final switch.
- SSL Certificate: A security certificate installed on your hosting server that encrypts data between your website and visitors’ browsers. SSL is indicated by the padlock icon in the address bar and the “https://” protocol in the URL. Free Let’s Encrypt certificates are available through cPanel; paid certificates offer extended validation and additional features.
- Temporary URL: A direct URL provided by your hosting provider that points to your new cPanel account without requiring a domain name or DNS change. The temporary URL allows you to test your migrated site before switching your domain’s DNS records. Example formats: newhost.com/~accountname or accountname.newhost.com.