What Is Node.js, and Why Host It?
Node.js represents a fundamental shift in how developers build server-side applications. Instead of using a traditional backend language, developers can write entire server applications in JavaScript, the same language that powers web browsers. This unified language approach simplifies development workflows and enables teams to work across frontend and backend without context switching. Understanding why Node.js has become so prevalent in modern web development is essential before deciding whether it fits your hosting needs.
Why Developers Choose Node.js for Modern Applications
Node.js is built on Google’s V8 engine, the same JavaScript runtime that powers Chrome browsers. What makes Node.js fundamentally different from traditional backend runtimes is its event-driven, non-blocking I/O model. Instead of creating a new thread or process for every request, Node.js handles thousands of concurrent connections on a single thread by queuing operations and processing them asynchronously. This architectural approach makes Node.js exceptionally efficient for I/O-heavy workloads, database queries, API calls, file operations, and WebSocket connections, where traditional request-per-thread models would struggle.
According to the 2025 Stack Overflow Developer Survey, 48.7% of professional developers worldwide actively use Node.js, making it the most-used web framework globally for the second consecutive year. This widespread adoption reflects Node.js’s real-world effectiveness for building APIs, real-time applications, microservices, and full-stack JavaScript projects. Many modern AI coding assistants now generate Node.js starter applications by default, further driving adoption among new developers. The JavaScript ecosystem offers mature frameworks like Express, Next.js, NestJS, and Fastify, each suited to different project requirements and complexity levels.
How Node.js Differs from Traditional PHP Hosting
Traditional shared hosting was architected around PHP and Apache. When a visitor requests a page, the web server spawns a new process, executes the PHP code, sends the response, and terminates the process. Each request gets its own isolated execution environment. This model works well for simple, stateless operations like rendering HTML pages, but becomes inefficient when applications need to maintain long-lived connections or handle hundreds of simultaneous users.
Node.js operates fundamentally differently. Your Node.js application runs continuously as its own process, actively listening for and handling incoming requests in real time. Rather than the hosting provider managing the process lifecycle for each request, your application stays resident in memory and manages its own connection pool and request queue. cPanel abstracts this complexity entirely; it manages process startup, port allocation, environment configuration, and restart behavior automatically. From your perspective, you upload your code, configure settings through a graphical interface, and cPanel handles all the infrastructure coordination needed to keep your Node.js process running and accessible.
Business Web Hosting Plans & Pricing
Choose the hosting plan that fits your website, WordPress site, or growing business. Compare features, storage, performance, security, and website capacity to find the right hosting environment for your needs.
cPanel Starter
cPanel Hosting that's easy, reliable and lightning-fast.
- 1 website
- 30 GB storage
- Unmetered bandwidth*

cPanel Economy
cPanel Hosting that's easy, reliable and lightning-fast.
- 1 website
- 100 GB space
- Unlimited bandwidth*
- 100 email accounts**
- 10 MySQL databases (1 GB ea.)
cPanel Deluxe
cPanel Hosting that's easy, reliable and lightning-fast.
- Unlimited websites
- Unlimited space
- Unlimited bandwidth*
- 500 email accounts
- 25 MySQL databases (1 GB ea.)
cPanel Ultimate
cPanel Hosting that's easy, reliable and lightning-fast.
- Unlimited websites
- Unlimited space
- Unlimited bandwidth*
- 1000 email accounts
- Unlimited MySQL databases (1 GB ea.)
- 2X Processing power & memory (available for Linux/cPanel only)
- Premium DNS
- 1-year SSL certificate to secure customer data and increase search rankings
*We don't limit the amount of storage and bandwidth your site can use as long as it complies with our Hosting Agreement. Should your website bandwidth or storage usage present a risk to the stability, performance or uptime of our servers, we will notify you via email and may be required to upgrade, or we may restrict the resources your website is using.
**Email account storage is limited to 100 email accounts with 100 MB of total storage.
WordPress Basic
A great way to get started.
- 1 website
- 10 GB NVMe storage
- Unmetered bandwidth
- Free SSL Certificate *
- WordPress pre-installed
- Weekly backups
- Web Application Firewall
- Daily malware scans
- One-time malware removal

WordPress Deluxe
Improve your site performance with Cloudflare CDN.
- 1 website
- 20 GB NVMe storage
- Unmetered bandwidth
- Free SSL Certificate *
- WordPress pre-installed
- Daily backups
- Web Application Firewall
- Daily malware scans
- One-time malware removal
- Up to 2x faster performance with global Cloudflare CDN **
- Enhanced security with DDoS protection
- Staging site
WordPress Ultimate
Add online marketing with more sites, storage and security.
- 1 website
- 30 GB NVMe storage
- Unmetered bandwidth
- Free SSL Certificate *
- WordPress pre-installed
- Daily + on-demand backups
- Web Application Firewall
- Daily malware scans
- Unlimited malware removal
- Up to 2x faster performance with global Cloudflare CDN **
- Enhanced security with DDoS protection
- Staging site
- WordPress code optimizer
- Smart WordPress plugin manager
- Sell online with WooCommerce
*An SSL certificate is included with every site and free for the life of the hosting plan. Certificates are automatically installed, validated and renewed.
Web Hosting Plus Launch
For multiple basic sites.
- 100 GB storage*
- 4 GB RAM
- 2 CPUs
- Unmetered traffic
- 50 websites & databases
- Free, unlimited SSL for all your websites**

Web Hosting Plus Enhance
For high-traffic WordPress, Joomla, and other sites.
- 200 GB storage*
- 8 GB RAM
- 4 CPUs
- Unmetered traffic
- 100 websites & databases
- Free, unlimited SSL for all your websites**
Web Hosting Plus Grow
For advanced eCommerce sites like Magento.
- 300 GB storage*
- 16 GB RAM
- 8 CPUs
- Unmetered traffic
- 150 websites & databases
- Free, unlimited SSL for all your websites**
Web Hosting Plus Expand
For multiple basic sites.
- 400 GB storage*
- 32 GB RAM
- 16 CPUs
- Unmetered traffic
- 200 websites & databases
- Free, unlimited SSL for all your websites**
*The total amount of usable storage capacity for your particular Hosting Service(s) may differ from the represented capacity as there is required space for the operating system(s), system file(s) and other supporting file(s).
**If you cancel the Web Hosting Plus product, you will lose the associated SSL certificate as well.
Understanding cPanel’s Node.js Support
cPanel’s approach to Node.js hosting represents a careful engineering compromise between simplicity and capability. The Application Manager (sometimes called the Node.js Selector depending on cPanel version) provides a graphical interface that abstracts away the complexity of process management, port allocation, reverse-proxy configuration, and environment isolation, tasks that traditionally required terminal access and systems administration knowledge.
How Node.js Applications Execute in cPanel Hosting
When a visitor accesses your Node.js application’s domain, the request flow follows a well-defined path managed entirely by cPanel. The initial HTTP request reaches the web server, typically Apache or Nginx, running on the same physical or virtual server. Rather than the web server attempting to execute your Node.js code directly (which it cannot do), the web server acts as a reverse proxy. This means the web server forwards the incoming request to your Node.js application running on a private internal port, and your Node.js application processes the request. It generates a response, and the web server returns it to the visitor.
This architecture provides several benefits. cPanel’s reverse proxy setup isolates each application, prevents port conflicts, and allows multiple Node.js apps to coexist on a single server. The web server handles SSL/TLS encryption, static file serving, and connection management, while your Node.js application focuses purely on business logic. cPanel automatically manages port allocation: when you create a new Node.js application, it assigns an available internal port, configures the reverse proxy rules, and handles all background coordination. No manual port binding or proxy configuration is required; the Application Manager interface handles everything automatically.
Node.js Hosting Plan Suitability Matrix
| Application Type | Typical Resource Profile | Recommended Plan Tier | Key Considerations |
|---|---|---|---|
| Portfolio or personal blog | Low CPU, minimal memory, few concurrent users | cPanel Starter | Cost-effective for low-traffic projects; adequate storage and bandwidth for content-focused sites |
| REST API or microservice | Moderate CPU, moderate memory, variable traffic | cPanel Economy | Database queries and external API calls drive resource consumption; test under anticipated peak load |
| Real-time collaboration tool | Higher CPU, moderate-to-high memory, many concurrent connections | cPanel Deluxe | WebSocket connections and continuous data synchronization require consistent resources; consider VPS if traffic grows |
| Content management system | Moderate CPU, moderate memory, high storage needs | cPanel Deluxe | Frequent file uploads and image processing increase storage; CDN recommended for media-heavy sites |
| Production SaaS application | Variable based on features; potentially high CPU/memory | cPanel Ultimate or VPS | Consider VPS if you’re running background jobs, scheduled tasks, or services alongside your main application |
cPanel’s Application Manager: Your Node.js Control Center
The Application Manager is the graphical hub where you deploy, configure, monitor, and manage Node.js applications. From a single unified interface, you can create new applications, select Node.js runtime versions, configure environment variables, view real-time logs, restart applications, and monitor resource usage. When you create a new application through the Application Manager, cPanel provisions an isolated Node.js environment specific to that application, installs dependencies from your package.json automatically, and starts your application when the server boots.
One of the Application Manager’s most valuable features is its log viewer. Every time your Node.js application outputs text to stdout or stderr, cPanel captures that output and displays it in the Logs section. When your application crashes or encounters errors, the logs show the exact error message and stack trace, dramatically speeding up debugging. This eliminates the need to SSH into the server and manually tail log files; everything is accessible through the familiar cPanel web interface. The Application Manager also shows your application’s current status (Running, Stopped, Error) and provides one-click controls to start, stop, or restart your application.
Choosing the Right Hosting Plan for Node.js
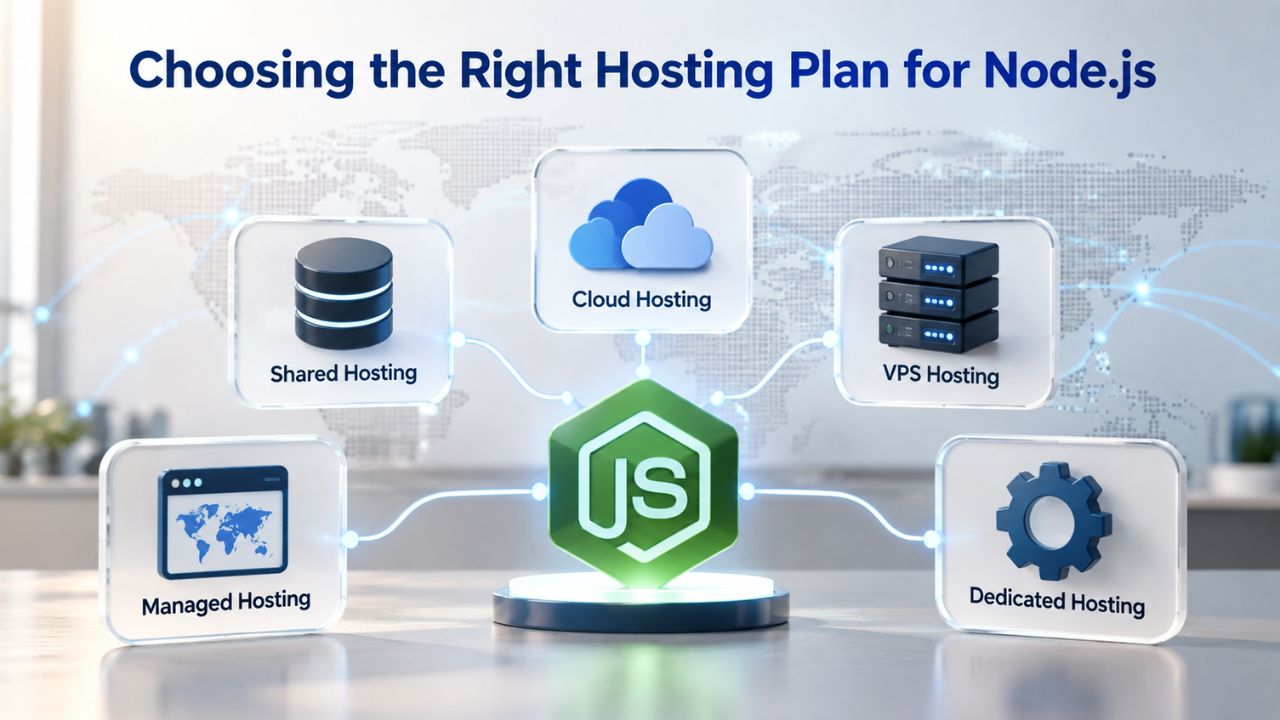
Selecting an appropriate hosting plan requires understanding your Node.js application’s resource profile and growth trajectory. Not all Node.js applications have identical resource demands. A simple REST API serving a handful of requests per minute may thrive on minimal resources. At the same time, a real-time collaboration tool handling WebSocket connections from hundreds of concurrent users requires substantially more CPU and memory. Planning your hosting tier thoughtfully prevents both over-provisioning (paying for unused resources) and under-provisioning (hitting resource limits that degrade performance).
Sizing Your Application to the Right Hosting Tier
Niya Digital offers four cPanel hosting tiers, each providing different storage allocations, database quotas, and email account limits. The Starter tier suits proof-of-concept projects, development environments, and low-traffic hobby applications where you’re testing an idea or building a personal portfolio.
As your application gains users and traffic increases, the Economy tier provides additional storage and database capacity. The Deluxe tier removes most storage and bandwidth constraints, making it suitable for production applications serving hundreds of customers. The Ultimate tier adds processing power and memory, suitable for mission-critical applications or sites managing high transaction volumes.
The critical insight is that resource allocation in shared hosting is genuinely limited. Your server’s CPU, RAM, and disk I/O are divided among many customers’ applications. If your Node.js application spawns numerous child processes, holds large data structures in memory, or attempts to serve thousands of concurrent connections, shared hosting will eventually become constrained.
The constraint can take different forms: you might hit memory limits and have your process terminated, experience CPU throttling during traffic spikes, or run into disk space limits if your database grows substantially. Monitor resource usage after launch and plan upgrades before you hit these limits to ensure smooth scaling and avoid emergency migrations during critical business moments.
Understanding Shared Hosting Resource Constraints
Shared hosting’s greatest strength is affordability; you split infrastructure costs with hundreds of other customers, making hosting accessible for small businesses and individual developers. However, this shared model creates real resource constraints you should understand. The “noisy neighbor” effect is common: when a nearby customer’s website gets unexpected traffic or runs an inefficient database query, all sites on that server may see slight latency increases. This is normal and typically unnoticeable, but it’s important to understand that your performance isn’t entirely isolated.
When your application genuinely needs dedicated resources, either because it requires high and consistent CPU allocation, manages large volumes of continuous background processing, or runs services alongside your Node.js app, you’ll likely outgrow shared hosting. Niya Digital’s VPS hosting tier provides dedicated CPU cores and guaranteed memory allocation, eliminating the noisy neighbor problem.
The transition from shared to VPS typically happens when you consistently use more than 25–50% of your shared hosting allocation, see recurring resource-limit errors in your logs, or need to run services like Redis, background job queues, or separate databases that shared hosting environments don’t support well.
Prerequisites and Preparation Before Deployment
Successful Node.js deployment on cPanel requires adequate preparation. While cPanel’s Application Manager automates many complex tasks, your application must be structured correctly to deploy smoothly. Skipping preparation steps often leads to deployment failures, cryptic error messages, and extended troubleshooting. Investing time upfront to verify your application meets these prerequisites prevents frustration and accelerates your path to a live application.
Essential Files and Configuration Your Application Needs
Every Node.js application deploying to cPanel must include a valid package.json file in its root directory. This file serves as your application’s identity document and dependency manifest. cPanel reads package.json to understand your application’s name, version number, entry point file, and all required npm packages. Without package.json, the Application Manager cannot proceed; it has no way to understand how to start or configure your application. Your package.json must declare a “main” field pointing to your application’s entry file (typically “server.js” or “app.js”) and a “start” script that cPanel will execute to launch your application.
Your application also needs a build script in package.json, even if it doesn’t require compilation. If your Node.js app runs directly without preprocessing, you can use a placeholder build script like “build”: “echo build”. Framework-based applications like Next.js or Nuxt require actual build commands (e.g., “build”: “next build”) that prepare optimized production bundles. The presence of a build script signals to cPanel that it should run this step before starting your application. Include a package-lock.json file to ensure consistent dependency versions across environments; without it, different npm installations might resolve to slightly different package versions, causing unexpected behavior.
Pre-Deployment Application Configuration Checks
Your Node.js application must listen on the port provided by the PORT environment variable. This is critical: cPanel will assign a dynamic internal port and pass it to your application via process.env.PORT, but your code must actively read this value rather than hard-coding a specific port like 3000. A standard pattern in your application’s main server file: const port = process.env.PORT || 3000; app.listen(port);. This ensures your app respects cPanel’s port assignment while providing a sensible development default.
All sensitive information, database credentials, API keys, and third-party service endpoints must be pulled from environment variables rather than hard-coded into your source files. cPanel’s Application Manager provides an environment variables interface where you can securely store secrets without committing them to version control. Your code accesses these values via process.env, like const dbPassword = process.env.DATABASE_PASSWORD;. This pattern keeps secrets out of your git repository, prevents accidental exposure during deployment, and lets you use different credentials for development, staging, and production without changing any code.
Deploying Your Node.js App on cPanel: Step-by-Step
The actual deployment process through cPanel’s Application Manager is straightforward once prerequisites are in place. Each step takes minutes, and cPanel provides visual feedback at every stage. The entire deployment, from file upload to a live application, typically completes within 15–20 minutes, with most time spent installing dependencies rather than configuring.
Creating Your Node.js Application in cPanel’s Application Manager
Begin by logging into your cPanel account and locating the Setup Node.js App tool, typically found in the Software section of the cPanel dashboard. Click it to open the Application Manager. If you’ve previously deployed Node.js applications, the Application Manager displays them in a list with their status (Running, Stopped, Error) and associated domains.
Node.js cPanel Deployment Workflow
| Step | What You Do in cPanel | What Happens Behind the Scenes | Typical Duration |
|---|---|---|---|
| Create Application | Select Node.js version, specify application root directory, choose domain | cPanel provisions directories, creates an isolated environment, and sets up reverse proxy rules | 30–60 seconds |
| Upload Files | Upload package.json, application source code, package-lock.json via File Manager | cPanel creates directories, stores files, prepares for dependency installation | 1–5 minutes |
| Install Dependencies | Click the Install Dependencies button in Application Manager | npm reads package.json, downloads all packages from npm registry, installs to isolated node_modules directory | 1–10 minutes |
| Start Application | Click Start button in Application Manager | cPanel launches Node.js process, forwards incoming requests through reverse proxy to your app | Seconds |
| Verify Deployment | Visit the application’s domain URL in browser; check that it loads correctly | Browser establishes HTTPS connection to reverse proxy, proxy forwards request to Node.js app, app returns response | Immediate |
Uploading and Installing Your Application
After cPanel creates the application skeleton, use cPanel’s File Manager to upload your application files to the directory you specified. Click into the application root directory, then upload your package.json, package-lock.json, and all application source files. Do not upload the node_modules directory; this folder can be gigabytes in size and is unnecessary, as cPanel will install dependencies automatically.
After you upload your files, return to the Application Manager and find your new application in the list. You’ll see an Install Dependencies button; click it to run npm install, which reads your package.json and installs all required packages into a virtual environment isolated to your application. Dependency installation typically takes a few seconds to several minutes depending on the number and size of your packages.
Starting Your Application and Verifying It Works
Once dependencies are installed, the Application Manager displays Start or Run buttons for your application. Click the Start button to launch your Node.js application. The status indicator updates to show “Running” if startup succeeds. Click the application’s domain URL (displayed in the Application Manager) to open it in your browser.
If your application loads without errors, deployment is complete. If you see error pages or unexpected behavior, click the Logs button in the Application Manager to view your application’s stderr and stdout output. cPanel captures everything your application writes to the console, making logs the first place to investigate any startup or runtime errors.
Ready to Deploy Your Node.js App?
Niya Digital’s cPanel Web Hosting provides everything necessary to get your Node.js application online. Your application’s success depends on proper planning, correct deployment, and ongoing monitoring, but with cPanel’s intuitive interface and comprehensive documentation, deploying and managing Node.js applications is straightforward.
Managing Your Node.js Application
Once your Node.js application is live and serving traffic, day-to-day management focuses on monitoring application health, adjusting configuration, and handling updates and restarts as needed. cPanel’s Application Manager provides all necessary management tools through its web interface.
Starting, Stopping, and Restarting Your Application
The Application Manager displays three primary control buttons for each application: Start, Stop, and Restart. Use the Stop button to temporarily pause your application when you need to perform maintenance, deploy code updates, or investigate issues without live traffic interfering. Stopping your application makes it inaccessible to visitors; they’ll see a server error or timeout if they attempt to access it. Use the Restart button after changing your application code or environment variables; it terminates the current process and launches a fresh instance that reflects your updates. This typically causes a brief interruption (seconds) during which visitors may see errors, but it ensures your application runs the latest code.
Proper restart discipline is essential for smooth updates. When you deploy new code, upload your updated files to the application directory, then click Restart. The old Node.js process terminates, and a new one starts, loading your updated code. Visitors experience a brief moment of unavailability but then reconnect to your refreshed application. For frequently updatedfrequently updated applications, some developers use zero-downtime deployment strategies with load balancers or process managers that run multiple instances, but shared hosting doesn’t support these advanced techniques, so a brief restart is normal.
Accessing Logs for Debugging and Monitoring
Every message your Node.js application writes to stdout or stderr gets captured by cPanel and displayed in the Application Manager’s Logs section. This includes startup messages, error stack traces, and any diagnostic output your code explicitly logs. When your application crashes, encounters errors, or behaves unexpectedly, logs are the first place to investigate. Common log patterns: “Application started on port XXXX” indicates successful startup; Node.js stack traces with “Error: Cannot find module ‘xyz'” indicate missing dependencies; “Connection refused” errors usually indicate the application can’t reach a database or external service.
Most troubleshooting follows a predictable pattern: check logs, identify the error, fix the underlying issue, redeploy if necessary, and restart. Critical errors appear prominently in logs. Connection timeouts, missing environment variables, and configuration errors all show up with descriptive messages. After fixing an issue in your code or configuration, upload the corrected files and click Restart to apply the fix. The Application Manager logs persist across restarts, so you can review the full history of what happened when your application experienced problems.
Managing Environment Variables and Application Configuration
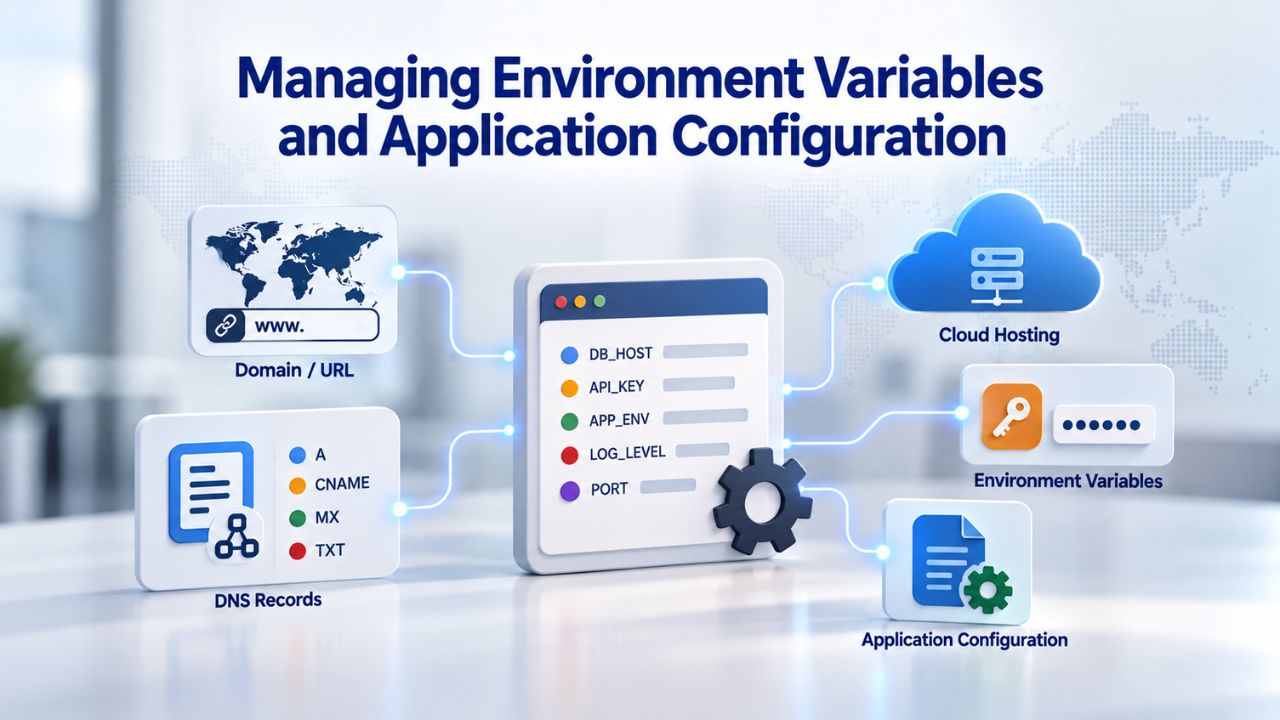
Environment variables allow you to store configuration that changes between environments (development, staging, production) without modifying your application code. This pattern is essential for security and operational flexibility.
Configuring Secrets and Environment-Specific Settings
The Application Manager provides an Environment Variables section where you store configuration values securely. Common environment variables include: DATABASE_URL for database connection strings, API_KEY for third-party service credentials, NODE_ENV set to “production” for production deployments, and LOG_LEVEL to control logging verbosity. Each variable is stored as a key-value pair on its own line in the format KEY=value. Your Node.js code accesses these variables anywhere in your application via process.env.KEY.
This approach keeps sensitive information out of your source code and version control system. A developer on your team can clone your repository without accidentally obtaining production database passwords or API keys. Each deployment environment (your laptop, staging server, production server) can have different values for the same variable names. This lets you use a development database during testing, a staging database for pre-release validation, and a production database for live users, without changing any application code.
Updating Variables and Restart Cycle
When you add new environment variables through the Application Manager, changes take effect after you click Restart. Your running Node.js process won’t see the new variables until it terminates and a fresh instance starts. This restart cycle is quick, typically less than a minute, but it does cause a brief interruption. Plan environment variable updates for low-traffic times if your application is actively serving users. After restarting, verify that your application still runs by checking logs and confirming that the status shows “Running”.
Performance, Resources, and Troubleshooting
Monitoring and optimization keep your application running smoothly and responsively as traffic grows. Understanding performance expectations and recognizing common failure modes helps you maintain a healthy deployment.
Common Deployment Issues and Their Solutions
Port conflicts occur when two applications attempt to listen on the same internal port. cPanel’s reverse proxy system prevents this at the platform level, but misconfigured application startup files sometimes try to bind to hard-coded ports, causing startup failures. Solution: ensure your application reads process.env.PORT and doesn’t hard-code port numbers like 3000. Memory limits matter when your application consumes too much RAM.
Shared hosting allocates finite memory to each user’s processes; if your Node.js app stores gigabytes of data in memory (for example, loading entire datasets without streaming or pagination), it will eventually hit the limit and the process terminates. Solution: optimize your code to stream data in chunks, paginate database results, or upgrade to a VPS with more memory.
Dependency installation failures occur when npm install encounters errors, often because a package requires native compilation and the hosting environment lacks build tools, or because a package references a private npm registry without configured credentials. Check the npm error message in the logs to identify the specific package causing problems.
Solution: verify all packages are in the “dependencies” section of package.json (not devDependencies), ensure package-lock.json isn’t pointing to private registries, and configure an .npmrc file if you genuinely need private packages. Silent crashes happen when your Node.js process starts but then exits immediately. The application status might show “Running” briefly, then “Stopped” or “Error”. Always check logs first; they reveal the root cause, usually missing environment variables, database connection failures, or unhandled exceptions in your startup code.
Typical Performance Characteristics and Expectations
A well-written Node.js application on shared hosting typically responds to requests within 50–200 milliseconds, provided your application logic is efficient. Response time fundamentally depends on what your application does: if each request queries a database, response time reflects query duration plus application processing. If your application makes external API calls, response time includes network latency to those external services. The hosting environment contributes to response time, but optimization begins with application code.
Research from Akamai and Google shows that one-second delays in page load time reduce conversions by approximately 7% on average, making performance a genuine business metric. Monitor your application’s performance from a visitor’s perspective using tools like Google Lighthouse, WebPageTest, or application performance monitoring (APM) services. If response times consistently exceed one second, investigate your application’s database queries first (are they indexed? are you fetching unnecessary data?), then external service calls (are they timing out?), and finally hosting resources (is your application hitting memory or CPU limits?). Most performance problems originate in application code rather than hosting infrastructure; optimize code before upgrading your hosting plan.
Scaling Your Node.js Application
As traffic and complexity grow, monitoring resource usage and recognizing when shared hosting has reached its limits is essential to maintain performance and reliability.
Recognizing When Shared Hosting Becomes Insufficient
cPanel displays resource usage metrics for your account. Review CPU, memory, and disk usage regularly. If you consistently hit memory limits (logs show “Out of memory” errors or processes terminate unexpectedly), CPU regularly maxes out during traffic peaks, or you’re approaching your storage limit, shared hosting constraints are affecting your application. Another signal: if you need to run services alongside your Node.js app, Redis for caching, MongoDB for document storage, or background job processors like Bull or RabbitMQ, shared hosting’s isolated application environment makes this difficult. Each additional service consumes memory and disk space, competing with your main application.
Operational complexity also signals readiness to migrate. If you’re managing dozens of Node.js applications, each with separate configurations and dependencies, shared hosting’s single account model becomes cumbersome. If you need to run custom scripts, install system-level packages, or configure specific network behavior, shared hosting restrictions can become limiting. These signals don’t necessarily mean shared hosting is failing; they mean your application has outgrown the shared hosting model and would benefit from the additional capabilities and dedicated resources of higher hosting tiers.
Moving to VPS or Managed Hosting
Niya Digital’s VPS hosting provides dedicated CPU cores and guaranteed RAM allocation, eliminating the noisy neighbor problem. A VPS gives you full root access and the ability to install additional software, run background services, and configure the server exactly as you need. The tradeoff: VPS hosting requires more technical knowledge to manage.
You’re responsible for security patches, system updates, and monitoring server health. VPS hosting is ideal for teams with DevOps expertise or hosting-specific knowledge. For teams that prefer to focus on application development rather than infrastructure management, managed VPS or application hosting platforms (where the hosting provider handles security updates and monitoring) offer a middle ground.
The migration from shared hosting to VPS typically takes a day or two. You’ll copy your application files, databases, and configuration to the new VPS, verify everything works, then point your domain to the new server. Niya Digital’s team can often help with this migration process, minimizing downtime and avoiding data loss. Planning this transition and testing on a staging VPS before cutting over production traffic prevents emergencies and ensures smooth scaling.
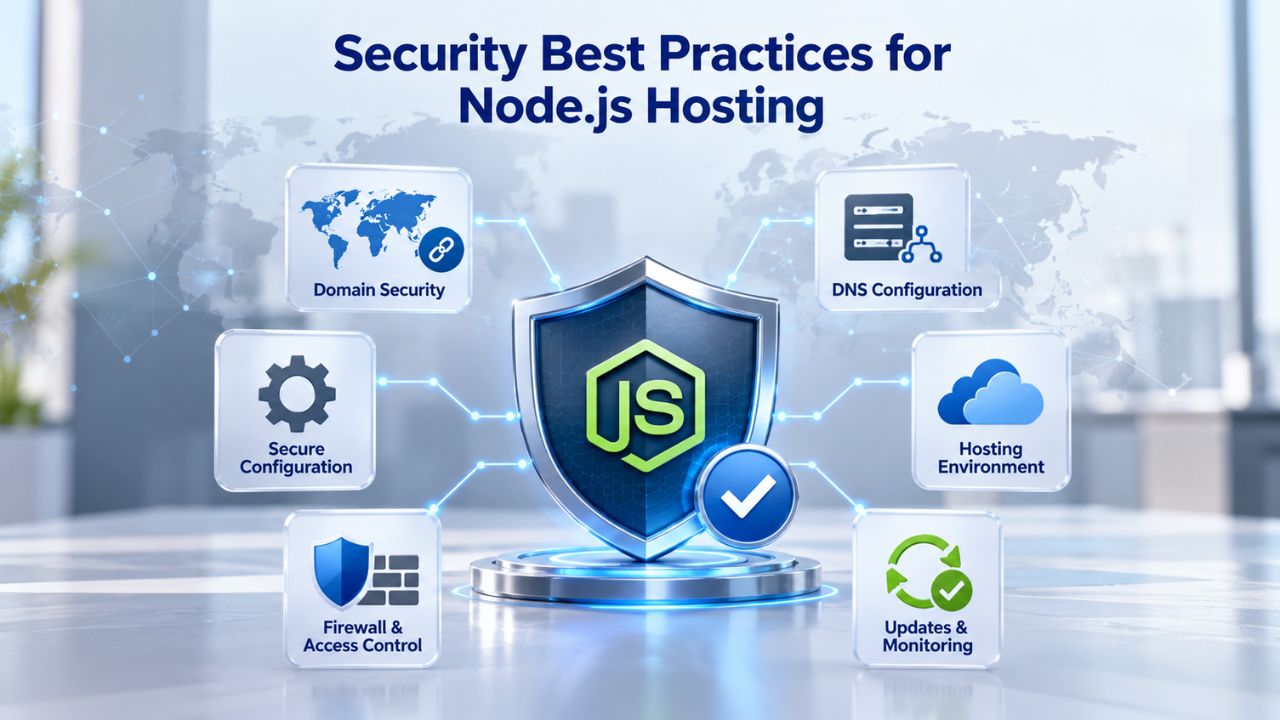
Security Best Practices for Node.js Hosting
Securing a Node.js application involves multiple layers: the hosting environment’s baseline security, your application’s code security practices, and your deployment and maintenance procedures. No single measure guarantees perfect security, but layered defenses dramatically reduce risk.
SSL/TLS, HTTPS, and Certificate Management
All modern hosting includes SSL/TLS certificates that enable HTTPS encryption. Niya Digital’s cPanel plans include free SSL certificates and optional managed SSL services that automatically renew certificates. Ensure your Node.js application is accessed exclusively over HTTPS, never plain HTTP. cPanel’s reverse proxy handles SSL termination automatically; your application communicates with the proxy via unencrypted HTTP on the internal port, while external visitors connect via encrypted HTTPS. This architecture is secure because the internal communication never traverses public networks.
Verify that your SSL certificate is valid and hasn’t expired. Most modern browsers display warnings when visiting sites with expired or invalid certificates, damaging user trust. Set your SSL certificate to auto-renew before expiration. Niya Digital’s managed SSL service handles renewal automatically, removing the possibility of an expired certificate sneaking up on you. Check your certificate status monthly; most hosting providers offer tools or dashboards that show certificate expiration dates.
npm Package Security and Dependency Management
Your Node.js application depends on hundreds of npm packages installed from the npm registry. Like all software, these packages occasionally contain security vulnerabilities. Best practices: run npm audit regularly to scan your dependencies for known vulnerabilities. If vulnerabilities are found, update the affected packages to patched versions. Keep your package-lock.json in version control and commit it alongside package.json; this ensures consistent dependency versions across development, staging, and production environments and prevents subtle bugs that occur when different versions behave differently.
Only install packages from trusted sources. The npm registry is public, and anyone can publish packages; before adding a dependency, verify it’s the legitimate package and is actively maintained. Check download volume, GitHub stars, recent commit history, and contributor reputation. Avoid experimental or abandoned packages in production; they’re more likely to contain unpatched security issues. After deployment, establish a routine to check for updated packages monthly and assess whether updates include security patches (high priority) or routine improvements (lower priority).
Firewall Protection and OWASP Baseline Hardening
Niya Digital’s Web Hosting plans include a web application firewall and 24/7 security monitoring at the hosting infrastructure level. This provides baseline protection against common attack patterns like SQL injection, cross-site scripting (XSS), and distributed denial-of-service (DDoS) attempts. However, infrastructure-level protection is a foundation, not a complete solution. Your responsibility includes: validating all user input before processing it, encoding output to prevent XSS attacks, using parameterized database queries to prevent SQL injection, and following OWASP Top 10 guidelines specific to your application framework.
Regular updates are essential. Keep your Node.js runtime current, update your npm packages when security patches are released, and monitor your application’s dependencies for advisories. Many security breaches exploit known vulnerabilities in outdated packages; staying current eliminates these low-hanging vulnerabilities. Implement rate limiting on your API endpoints to prevent abuse. Log suspicious activity and review logs regularly. The combination of hosting-level protection, application-level security practices, and ongoing maintenance creates defense in depth that minimizes breach risk.
Getting Help and Support Resources
Successfully deploying and maintaining Node.js applications on shared hosting benefits from good support, clear documentation, and knowing when to ask for help. Most issues resolve quickly when addressed early, rather than when users troubleshoot alone for extended periods.
Support Channels and When to Contact Hosting Providers
Niya Digital’s team has found that proactive communication during deployment reduces friction dramatically; most setup issues resolve within 24 hours when users contact support early rather than troubleshooting independently. If you encounter errors during deployment or aren’t sure whether your configuration is correct, contact support. Hosting providers have access to server-side logs and system information that help them diagnose issues quickly. Describe your problem clearly, include relevant log excerpts, and mention the exact steps you took before the problem occurred.
cPanel’s official documentation provides comprehensive guides for Node.js hosting, including step-by-step tutorials and troubleshooting sections. Node.js’s own documentation is extensive and freely available for reference. Stack Overflow and the Node.js community forums provide peer-to-peer support; search for your specific problem before posting; your question likely has existing answers. GitHub issues for your application’s dependencies often provide solutions to common configuration problems.
Long-Term Planning and Scaling Strategy
Plan your hosting tier around anticipated growth, not just current needs. If you expect your user base to double in six months, upgrading to a higher cPanel tier or a VPS now prevents emergency scaling as you grow. Emergency migrations during traffic spikes risk data loss and downtime. If you’re building a product intended to become substantial, research VPS or managed hosting options early and understand the migration path. Some hosting providers offer seamless upgrades; others require full migration. Understanding your provider’s capabilities helps you make informed scaling decisions.
Document your application’s deployment procedure. Record which environment variables are required, where configuration files live, and what external services your application depends on. This documentation becomes invaluable when you need to migrate to new hosting, onboard new team members, or recover from a disaster. Automated backups are essential; configure your hosting provider’s backup system to protect your application code, databases, and configuration. Test backup restoration periodically to ensure backups are valid and you can recover quickly if needed.
Scaling Your Application with Confidence
As your Node.js application grows beyond shared hosting capabilities, Niya Digital offers a seamless upgrade path to more powerful hosting tiers. Whether you need additional resources on a higher cPanel plan or the dedicated performance of a VPS, you can migrate with minimal downtime. Planning your scaling strategy early helps keep your application responsive and reliable as user demand increases.
Frequently Asked Questions
What is Node.js, and how does it differ from PHP or other server-side technologies?
Node.js is a JavaScript runtime environment that runs on servers rather than in browsers. Unlike PHP, which processes requests serially (one per thread or process), Node.js uses an event-driven, non-blocking architecture that efficiently handles many concurrent connections on a single thread. This makes Node.js ideal for I/O-intensive applications like APIs, real-time apps, and microservices. JavaScript knowledge transfers between frontend and backend, enabling full-stack development in one language.
Can I deploy Node.js applications on Niya Digital’s cPanel hosting plans?
Yes, all Niya Digital cPanel hosting tiers include full Node.js support through the Application Manager. You can deploy multiple Node.js applications on the same account, each with separate configurations, environment variables, and Node.js versions. Application Manager provides a graphical interface for all deployment and management tasks, with no terminal access required.
What Node.js versions are available, and how do I choose which version to use?
cPanel typically supports multiple LTS (Long-Term Support) versions such as 18.x, 20.x, and newer releases. When you create an application in Application Manager, you select the version you want. For new projects, use the newest available LTS version for the longest support window. For existing projects, use the version your application was developed and tested with to ensure compatibility.
Do I need SSH or command-line access to deploy Node.js on cPanel?
No. The Application Manager provides a complete graphical interface for creating, configuring, and managing Node.js applications. SSH access is optional and useful only for advanced tasks like reviewing logs via terminal or accessing your server directly. Beginners can deploy and manage Node.js applications entirely through cPanel’s web interface.
How do I set environment variables for my Node.js application, and why are they important?
The Application Manager includes an Environment Variables section where you enter configuration key-value pairs. Your Node.js code accesses these variables via process.env.VARIABLE_NAME. Environment variables store secrets (database passwords, API keys), configuration (database URLs, feature flags), and deployment-specific settings without hard-coding them into source files. This pattern keeps secrets out of version control and lets you use different values per environment.
What’s the difference between the various cPanel hosting tiers for Node.js applications?
All cPanel tiers include identical Node.js support and access to the Application Manager. Differences lie in storage capacity, bandwidth allocation, MySQL database limits, and email account quotas.
Starter plans suit small hobby projects; Economy plans support growing applications; Deluxe and Ultimate plans remove most resource limits and provide additional processing power, making them suitable for production systems.
How do I troubleshoot errors when my Node.js application fails to deploy or crashes unexpectedly?
Always check the Application Manager’s Logs section first. cPanel captures all stdout and stderr output from your application, showing exact error messages and stack traces. Common issues include missing dependencies (verify package.json is complete), unhandled exceptions in startup code (review error messages), missing environment variables (confirm all variables are set), and an incorrect entry point file (verify the file exists and the path is correct). Fix the underlying issue, redeploy if necessary, and click Restart.
Can I run multiple Node.js applications on one hosting account?
Yes. The Application Manager allows unlimited Node.js applications per account, each with its own domain, Node.js version, and environment configuration. Each application runs in an isolated environment. Ensure you have adequate storage and capacity across all applications; if resources become constrained, upgrade to a higher hosting tier.
How do I monitor my Node.js application’s performance, and what metrics should I track?
cPanel displays resource usage (CPU, memory, disk) for your account. Review application logs for performance clues. For user-facing performance, use external tools like Google Lighthouse, WebPageTest, or application performance monitoring services. Track response time (how quickly your application answers requests), error rate (what percentage of requests fail), and uptime (availability over time). Performance expectations are 50–200ms average response time for well-written applications.
When should I upgrade from shared hosting to a VPS or higher tier?
Upgrade when you consistently hit memory or CPU limits (evidenced by “Out of memory” errors or process terminations), need to run additional services (background job processors, caching layers, extra databases), manage dozens of applications, require higher concurrent user support, or need full root access and custom server configuration. Migration to VPS is typically straightforward and takes one to two days.
How do I deploy updates to my Node.js application after it’s already live?
Upload updated files to your application directory via cPanel’s File Manager or FTP. If you modified package.json dependencies, click Install Dependencies in the Application Manager. Click Restart to launch the new code. The restart causes brief unavailability (seconds); plan updates for low-traffic periods if possible. For frequent deployments, consider Git-based workflows or CI/CD tools that automate this process.
What security measures should I implement for my Node.js application on shared hosting?
Enable HTTPS (included automatically with your hosting plan), keep npm dependencies updated and run npm audit regularly, validate all user input before processing, use parameterized database queries to prevent injection attacks, store secrets in environment variables (never in code), and enable automatic SSL certificate renewal. Niya Digital’s firewall provides baseline infrastructure protection; you’re responsible for application-level security.
How do I back up my Node.js application and database?
cPanel includes automated backup features; configure backups to run daily or weekly and store them remotely. Backup your application source code, environment configuration file, and database. Test that backups restore correctly by attempting a recovery in a staging environment. Regular backups protect against data loss and enable quick recovery if problems occur.
Can I use databases like MongoDB or PostgreSQL with my Node.js application on cPanel hosting?
cPanel includes MySQL by default, which works well with Node.js. For PostgreSQL, check with your hosting provider about availability. MongoDB requires installation and is typically not available on shared hosting; you’d need to use a managed MongoDB service (like MongoDB Atlas) and connect your application to the external database. Most Node.js frameworks and database libraries work seamlessly with databases accessible over the network.
How long does typical Node.js deployment take from uploading files to going live?
Minutes to around 15–20 minutes total. File upload takes 1–5 minutes depending on file size. npm install (dependency installation) takes 1–10 minutes depending on how many packages your application requires. Application Manager setup and startup take seconds. Most time is spent installing dependencies rather than configuration. Once deployment completes, your application is live immediately.
What should I do if my Node.js application works on my local development computer but fails when deployed to cPanel?
Environment differences are common. Check that: your application is using the correct Node.js version (use the same version locally as on the server), all dependencies in package.json are installed (run npm install locally and verify it succeeds), environment variables are set correctly (environment variables differ between local and server), and your application uses process.env.PORT instead of hard-coding a port. cPanel’s logs will show specific errors; review them carefully.
Glossary
- Node.js: An open-source JavaScript runtime environment enabling developers to execute JavaScript code on servers and build backend applications, APIs, and real-time services using JavaScript outside the browser environment.
- cPanel: A web hosting control panel providing a graphical user interface for managing hosting accounts, domains, databases, email accounts, and applications without requiring command-line or terminal access.
- Application Manager: cPanel’s tool for creating, deploying, configuring, and managing Node.js applications, providing features like version selection, environment variable management, log viewing, and process control.
- Deployment: The process of uploading application source code to a web hosting server, configuring necessary settings and environment variables, and launching the application so users can access it over the internet.
- Reverse Proxy: A server component that receives incoming requests from clients on the public internet and forwards them to a backend application (like a Node.js server) running on an internal port, then returns the application’s responses to clients.
- Environment Variables: Configuration values stored in the hosting environment and accessed by applications at runtime through code like process.env.VARIABLE_NAME, typically used for storing secrets, API keys, configuration options, and deployment-specific settings.
- npm (Node Package Manager): The standard package manager for JavaScript and Node.js that downloads, installs, and manages third-party code libraries (packages) that Node.js applications depend on.