Understanding Next.js and Why It’s Growing in 2026
Next.js is a React-based meta-framework that lets developers build full-stack web applications with server-side rendering, static generation, API routes, and more, all in a single codebase. The framework has matured significantly over the past few years, and the market adoption reflects that maturity: 78% of new React applications use Next.js, according to industry surveys, and over 319,000 companies now use Next.js in production, including enterprise brands like TikTok, Twitch, Shopify, Hulu, Amazon, IBM, and McDonald’s.
Developers choose Next.js for a straightforward reason: it eliminates boilerplate and provides built-in solutions for common web development problems. Instead of wiring up routing, data fetching, deployment, and optimization separately, Next.js handles these patterns out of the box. For startups and small teams, this means faster time to market. For enterprises, it reduces development costs while maintaining scalability and allowing teams to move quickly without sacrificing code quality or maintainability.

Static Export vs. Server-Side Rendering: Core Rendering Modes
Next.js offers two core rendering strategies, each suited to different project needs. Static Generation generates HTML at build time and reuses it on each request, creating pre-built files that serve instantly. According to the Next.js documentation, Static Generation is recommended for performance reasons because statically generated pages can be cached by a content delivery network (CDN) with no extra configuration, resulting in near-instant page loads for users worldwide.
Server-Side Rendering, by contrast, generates HTML on each request, allowing the server to customize content per user before sending it to the browser. This approach is slower because a CDN cannot cache the page; every visit triggers a fresh render on the server. However, Server-Side Rendering keeps content up to date and supports user authentication, personalized data, and real-time information that changes between requests. Choosing the right mode prevents over-provisioning and ensures your site performs well for the use cases you serve.
Why cPanel Hosting Isn’t a Compromise for Next.js Applications
Platforms built specifically for Next.js (like Vercel or Netlify) offer excellent developer experience and specialized optimization, but they charge per-user or per-request, meaning costs scale with traffic. Running Next.js on existing cPanel infrastructure lets you host a production full-stack application, with server-side rendering, API routes, and database connections, for the cost of standard shared hosting, making it a meaningful option for smaller projects, bootstrapped startups, or budget-conscious launches that don’t need edge-network scale or global CDN distribution.
cPanel-based hosting makes this possible because modern cPanel includes Node.js support via the Node.js Selector tool, a built-in application server that manages Node.js runtime environments. The Node.js Selector lets you run multiple Node.js applications side by side, each in its own isolated environment with its own Node.js version, and host apps on your main domain, subdomains, or subdirectories. For static exports or moderate-traffic server-side rendering applications, this infrastructure is not only sufficient, but it’s also a practical, cost-effective solution that lets your team focus on building features rather than managing infrastructure.
Next.js Rendering Modes Comparison
| Rendering Mode | Best For | Key Trade-off | Resource Requirement | Deployment Complexity |
|---|---|---|---|---|
| Static Export | Marketing sites, blogs, documentation, product catalogs | Content is fixed at build time; updates require rebuild and redeploy | Minimal server resources; mostly file serving | Simplest; rebuild and upload new files |
| Server-Side Rendering | Dashboards, personalized content, real-time data, user authentication | Slower response time; uses server CPU on every request | Higher; needs persistent Node.js process | Moderate; configure entry point and environment |
| API Routes + Static | Hybrid: static pages with dynamic API endpoints | Combines benefits; more complex architecture | Medium; balance between static and dynamic | Moderate; some static pages, some dynamic |
| Incremental Static Regeneration | Content that changes periodically but not per-request | Background regeneration; stale content briefly possible | Medium; revalidation at intervals | Moderate; configure revalidation settings |
Business Web Hosting Plans & Pricing
Choose the hosting plan that fits your website, WordPress site, or growing business. Compare features, storage, performance, security, and website capacity to find the right hosting environment for your needs.
cPanel Starter
cPanel Hosting that's easy, reliable and lightning-fast.
- 1 website
- 30 GB storage
- Unmetered bandwidth*

cPanel Economy
cPanel Hosting that's easy, reliable and lightning-fast.
- 1 website
- 100 GB space
- Unlimited bandwidth*
- 100 email accounts**
- 10 MySQL databases (1 GB ea.)
cPanel Deluxe
cPanel Hosting that's easy, reliable and lightning-fast.
- Unlimited websites
- Unlimited space
- Unlimited bandwidth*
- 500 email accounts
- 25 MySQL databases (1 GB ea.)
cPanel Ultimate
cPanel Hosting that's easy, reliable and lightning-fast.
- Unlimited websites
- Unlimited space
- Unlimited bandwidth*
- 1000 email accounts
- Unlimited MySQL databases (1 GB ea.)
- 2X Processing power & memory (available for Linux/cPanel only)
- Premium DNS
- 1-year SSL certificate to secure customer data and increase search rankings
*We don't limit the amount of storage and bandwidth your site can use as long as it complies with our Hosting Agreement. Should your website bandwidth or storage usage present a risk to the stability, performance or uptime of our servers, we will notify you via email and may be required to upgrade, or we may restrict the resources your website is using.
**Email account storage is limited to 100 email accounts with 100 MB of total storage.
WordPress Basic
A great way to get started.
- 1 website
- 10 GB NVMe storage
- Unmetered bandwidth
- Free SSL Certificate *
- WordPress pre-installed
- Weekly backups
- Web Application Firewall
- Daily malware scans
- One-time malware removal

WordPress Deluxe
Improve your site performance with Cloudflare CDN.
- 1 website
- 20 GB NVMe storage
- Unmetered bandwidth
- Free SSL Certificate *
- WordPress pre-installed
- Daily backups
- Web Application Firewall
- Daily malware scans
- One-time malware removal
- Up to 2x faster performance with global Cloudflare CDN **
- Enhanced security with DDoS protection
- Staging site
WordPress Ultimate
Add online marketing with more sites, storage and security.
- 1 website
- 30 GB NVMe storage
- Unmetered bandwidth
- Free SSL Certificate *
- WordPress pre-installed
- Daily + on-demand backups
- Web Application Firewall
- Daily malware scans
- Unlimited malware removal
- Up to 2x faster performance with global Cloudflare CDN **
- Enhanced security with DDoS protection
- Staging site
- WordPress code optimizer
- Smart WordPress plugin manager
- Sell online with WooCommerce
*An SSL certificate is included with every site and free for the life of the hosting plan. Certificates are automatically installed, validated and renewed.
Web Hosting Plus Launch
For multiple basic sites.
- 100 GB storage*
- 4 GB RAM
- 2 CPUs
- Unmetered traffic
- 50 websites & databases
- Free, unlimited SSL for all your websites**

Web Hosting Plus Enhance
For high-traffic WordPress, Joomla, and other sites.
- 200 GB storage*
- 8 GB RAM
- 4 CPUs
- Unmetered traffic
- 100 websites & databases
- Free, unlimited SSL for all your websites**
Web Hosting Plus Grow
For advanced eCommerce sites like Magento.
- 300 GB storage*
- 16 GB RAM
- 8 CPUs
- Unmetered traffic
- 150 websites & databases
- Free, unlimited SSL for all your websites**
Web Hosting Plus Expand
For multiple basic sites.
- 400 GB storage*
- 32 GB RAM
- 16 CPUs
- Unmetered traffic
- 200 websites & databases
- Free, unlimited SSL for all your websites**
*The total amount of usable storage capacity for your particular Hosting Service(s) may differ from the represented capacity as there is required space for the operating system(s), system file(s) and other supporting file(s).
**If you cancel the Web Hosting Plus product, you will lose the associated SSL certificate as well.
Pre-Deployment Checklist and Selecting the Right Plan
Before uploading a single file, confirm your hosting plan supports what you’re about to deploy. Not every Web Hosting provider includes a Node.js Selector in every plan tier, and not every plan tier has the same Node.js versions available on their servers. Running through a quick checklist now prevents frustration later and saves troubleshooting time once deployment begins.
Verifying Node.js Availability and cPanel Compatibility
Start by logging into cPanel and navigating to the Setup Node.js App tool, sometimes called the Node.js Selector. If you don’t see this tool in your cPanel interface, your plan doesn’t include Node.js hosting yet, and you’ll need to contact your hosting provider’s support team to enable it or upgrade your plan. Confirm which Node.js versions are available in the Setup Node.js App interface, as supported versions vary by host and account; some providers offer Node.js 18, 20, and 22, while others may offer older versions like Node.js 16.
Next, check your Next.js version against the available Node.js versions. Modern Next.js (version 14 and newer) is compatible with Node.js 18, 20, or newer versions. If cPanel only offers Node.js 16, you may need to upgrade your hosting plan or downgrade your Next.js version to maintain compatibility. Most cPanel hosts update available versions regularly, so if you’re missing a version your app requires, ask your hosting provider’s support team; they can often enable newer versions quickly without a plan upgrade.
Standalone Output and Preparation for Efficient Deployment
Next.js 14 and above introduced the standalone output feature, which creates a self-contained deployment package containing only the essential dependencies your app actually uses. This approach reduces deployment package size dramatically, by 50 to 100 megabytes compared to 300 to 500 megabytes when shipping the full node_modules folder, while also resulting in faster application startup times and higher compatibility with shared cPanel hosting environments that have memory constraints.
To enable standalone output, update your next.config.js file in your project root to include the output setting. This single configuration change can make the difference between a smooth, fast deployment and memory or CPU exhaustion errors on a shared server. Once you enable this setting and run your build locally, Next.js will create a .next/standalone folder containing everything needed to run your application on a server without shipping hundreds of megabytes of dependencies.
| Checklist Item | What to Verify | Why It Matters | Common Issue if Skipped |
|---|---|---|---|
| Node.js version available | Check Setup Node.js App in cPanel for available versions; match your Next.js requirements | Version mismatch causes module incompatibility or missing features | App fails to start with “Node version not supported” error |
| cPanel has Node.js Selector | Navigate to Setup Node.js App; confirm tool exists and is enabled | Without it, you cannot deploy Node.js apps | Deployment cannot proceed; need plan upgrade |
| package.json exists and is valid | Root of project has package.json with name, version, and start script | Defines dependencies and startup instructions | cPanel cannot install dependencies or start app |
| Dependencies in “dependencies” not “devDependencies” | Verify runtime packages are under “dependencies” section | cPanel runs production install, which excludes devDependencies | Missing packages at runtime; app crashes |
| .gitignore excludes node_modules | Check .gitignore has “node_modules/” entry | Prevents uploading 300+ MB folder to server | Upload fails or times out; wastes bandwidth |
| .next folder built locally | Confirm .next/ folder exists after running npm run build locally | Avoids memory exhaustion on server during build | Build fails on cPanel; server resources exhausted |
| package-lock.json present | Include package-lock.json in upload alongside package.json | Ensures exact dependency versions match development | Different versions deployed; unexpected bugs in production |
| Environment variables planned | List which variables your app needs (DATABASE_URL, API_KEY, etc.) | Prevents crashes due to missing config | App fails to connect to database or external services |
| Entry point file identified | Know whether you’re using standalone output or custom server.js | Passenger needs correct file name to start app | App fails to start; 502 error in browser |
| Static vs. SSR decision made | Determine which pages render statically and which use SSR | Affects resource usage, response time, and update strategy | Over-provisioned resources or poor performance |
Building Your Next.js Application Locally Before Upload
The most common mistake in deploying Next.js to cPanel is attempting to build on the server itself. Shared hosting environments enforce strict resource limits to prevent any single account from consuming excessive CPU or memory. Building Next.js locally before upload avoids hitting these limits, prevents timeouts and out-of-memory errors, and ensures consistent, repeatable deploys every single time you update your application.
The Local Build Process and File Generation
Run next build on your local machine using your development environment, never on the shared hosting server itself, as this pre-compiles your app into the .next directory and avoids the memory and CPU exhaustion that can occur when compiling directly on a shared server. Open your terminal in your project root directory and run npm run build, which triggers the Next.js compiler. The build process takes 1 to 5 minutes depending on your project’s size and complexity. When it completes, Next.js has generated three key directories and configuration files that contain everything needed to run your application.
The three key outputs are the .next folder (your compiled application code and optimizations), the public folder (static assets like images, fonts, and downloaded files), and configuration files including package.json and package-lock.json (which list your dependencies and their exact versions). These are the only files you need to upload to cPanel, nothing else. The build process is complete and ready to run; you don’t need to rebuild on the server unless you make local code changes and want to push them live.
Preparing and Organizing Files for cPanel Upload
Once your build is complete locally, organize the files you’ll upload to cPanel. You need the .next folder, the public folder, package.json, and package-lock.json. Don’t upload the node_modules folder; it’s large (often 300+ megabytes), and cPanel will install dependencies fresh when you set up the Node.js application. Include your .env.production file if your app requires environment variables for database connections or API keys, but never commit production secrets to version control; instead, set them in cPanel later so they remain secure and separate from your code repository.
Create a folder on your hosting account via cPanel’s File Manager (for example, /public_html/my-nextjs-app/ or a subdomain like /public_html/nextjs-subdomain/) and upload these files via cPanel’s File Manager interface or via an FTP client. The upload typically takes 1 to 5 minutes depending on your internet connection speed. Once files are uploaded and you’ve confirmed they’re on the server, you’re ready to configure the Node.js application in cPanel and bring your application online.
Setting Up Node.js Selector in cPanel
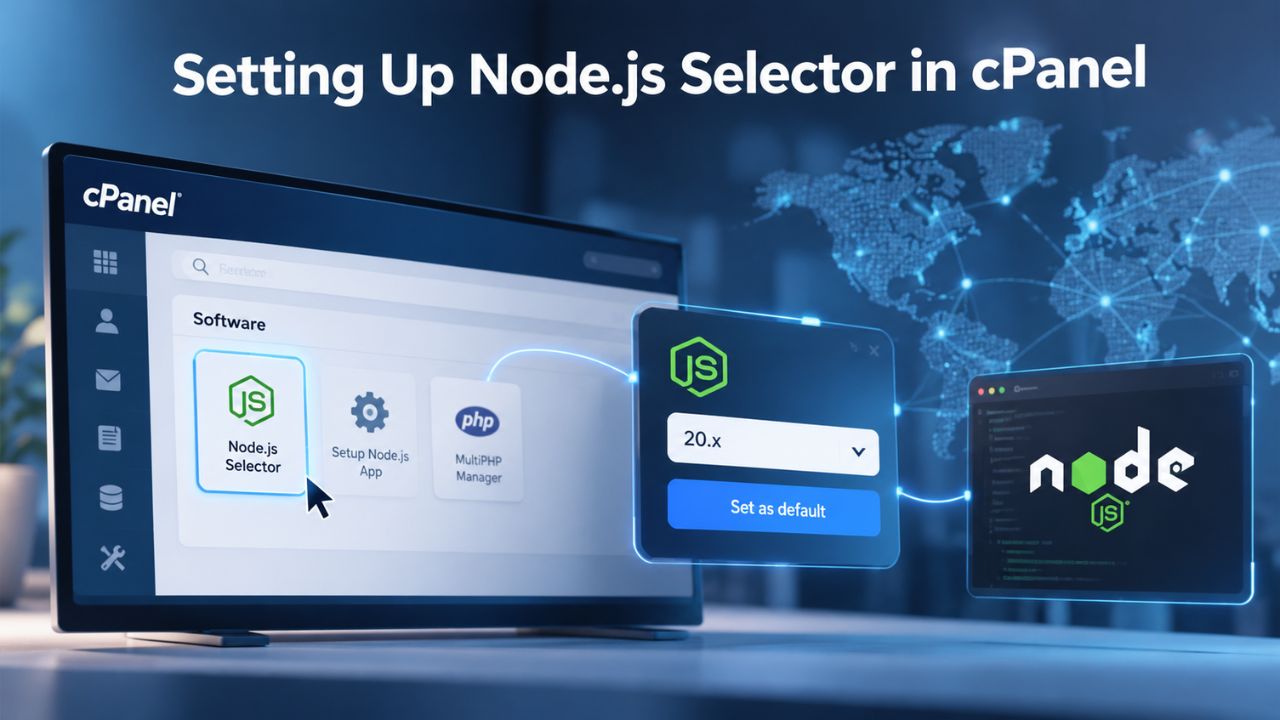
Once files are uploaded to your hosting account, cPanel’s Node.js Selector configures the application runtime and manages the environment where your Next.js app will run. This tool handles environment setup, dependency installation, and process management behind the scenes, so you don’t have to configure ports or process managers manually. The setup process takes 5 to 10 minutes and requires a few configuration choices.
Creating the Node.js Application and Configuring Basics
Log in to cPanel and open the Setup Node.js App tool. Click the Create Application button to start the configuration wizard. You’ll need to fill in several fields: first, set App Mode to “production” to ensure your Next.js app runs with production optimizations enabled. Next, select the Node.js Version from the dropdown you verified earlier, and choose the version that matches your app’s requirements (for example, Node.js 20 or Node.js 22, if available).
In the Application Root field, enter the path to your uploaded folder on the server (for example, /home/username/public_html/my-nextjs-app). Then select your domain or subdomain from the App URL dropdown; this is the domain where your Next.js app will be accessible to visitors. Finally, specify the App Startup File name; for Next.js apps using standalone output, this is typically server.js in your root folder, or you can use the full path .next/standalone/server.js if your setup requires it. After clicking Create, cPanel automatically runs npm install in your application directory, downloading and installing all dependencies listed in your package.json file.
Understanding Passenger and Configuring the Entry Point
cPanel’s Node.js Selector uses Phusion Passenger as the web server that manages your application. Passenger is an application server that handles traffic routing and process management automatically, sitting between Apache and your Node.js app. Unlike traditional Node.js deployments where you call app.listen() to bind to a port, Passenger manages ports for you; instead, your app should export the app object so Passenger can handle incoming web requests.
With standalone output enabled in Next.js, the build process automatically creates the necessary server.js entry point file in your .next/standalone/ folder, eliminating the need to write custom server code. When Passenger starts your application, it sets the PORT environment variable, and your app reads it automatically. The configuration is simple: Passenger reads the Node.js entry file, starts the process, and routes all HTTP traffic from your domain to your application. If you’re not using standalone output, you would need to create a custom server.js file that listens on process.env.PORT and handles requests, but standalone output avoids this entirely.
Common Deployment Pitfalls and How to Avoid Them
Knowing the most common mistakes and how they show up in cPanel helps you avoid them before they cause issues. The three mistakes that most often cause deployments to fail involve port configuration, environment variables, and building on the server instead of locally. Understanding what goes wrong and why helps you troubleshoot quickly if something unexpected happens.
Hardcoding Ports and Missing Environment Variables
The most common reason Next.js fails on cPanel is hardcoding a port number like 3000 in your application code. Never hardcode a port number in your app; always use the process.env.PORT variable that Passenger provides automatically. If your code ignores this environment variable and tries to bind to a fixed port like 3000, Passenger won’t find the process listening on the correct port, and your app will crash or become inaccessible to visitors.
The second frequent mistake is hardcoding API URLs or database connection strings directly in your code or configuration files. If your application references localhost or a development server URL, your app won’t reach the actual production API endpoints when deployed. Instead, store all external URLs and credentials as environment variables, database hosts, API endpoints, authentication services, and third-party credentials. Set these variables in cPanel’s Node.js Selector environment variables interface after you create the application, so your Next.js code reads them from process.env at runtime. This approach keeps secrets out of version control and makes configuration portable across environments.
Building on the Server and Including node_modules in Uploads
Building locally is faster, avoids resource limits on shared hosting environments, and leads to fewer issues overall. If you built your app locally (which we recommend), you can skip the build step on the server entirely. If you didn’t build locally and upload the compiled output, you’ll need to run npm run build on the server instead, which risks hitting memory limits on a shared account. Building on cPanel’s shared hosting is tempting when you’re troubleshooting. Still, it consumes significant resources and often runs out of memory, especially if your dependencies are large or your site contains thousands of images to optimize.
A related mistake is uploading node_modules as part of your archive. The result is a 300+ megabyte upload that takes forever to transfer, often exceeds your account’s upload limits, times out mid-transfer, and then gets overwritten anyway when cPanel runs npm install. Always exclude node_modules from uploads; your .gitignore file should already have it configured, but before uploading, double-check that node_modules/ is not in the archive you’re sending. Let cPanel install fresh dependencies; it’s faster, cleaner, and guarantees you’re running the exact versions specified in your package-lock.json file.
Ready to Deploy Your Next.js Application?
Your Next.js app is ready to go live. Niya Digital’s Web Hosting plans include built-in Node.js Selector and cPanel access on shared and managed tiers, designed for developers building modern web applications. Deploy your Next.js site in minutes without managing servers or infrastructure; focus on building features while we handle the hosting.
Understanding Phusion Passenger and How It Runs Your Application
cPanel’s Node.js hosting uses Phusion Passenger as the application server, and understanding how Passenger works helps you set realistic expectations for performance and gives you context for troubleshooting if something unexpected happens. Passenger is a mature, production-ready application server used by thousands of hosting providers, and it automates much of what you’d manually configure on a dedicated server.
How Passenger Routes Traffic and Manages Processes
cPanel doesn’t run Node.js natively; instead, it uses Phusion Passenger, an application server that sits between Apache and your Next.js app. Passenger automatically assigns your app a port via the PORT environment variable and routes all incoming HTTP traffic to it- no manual port configuration, no firewall rules, no networking setup needed. From your app’s perspective, you read the PORT environment variable and listen on it; Passenger handles all the complexity of accepting connections, managing load, and distributing traffic.
Unlike a dedicated Node.js server where your app runs continuously in the foreground, Passenger uses a spawn-on-demand model. Your application starts only when traffic arrives, and if the server is idle for a while, Passenger may stop the process to free up memory for other accounts on the shared server. This design makes shared hosting economical: the server can host many applications, with each one consuming resources only when serving requests. From a developer’s perspective, this is similar to serverless architecture, but running on a traditional shared hosting server.
Cold Starts, Performance Expectations, and Optimization Strategies
Because Passenger runs Node.js apps on demand rather than as permanently running processes, your app “wakes up” when a request arrives, meaning the first request after idle time can take 10 to 15 seconds to spin up. At the same time, Node.js initializes and loads your application. This is normal on shared hosting; it’s not a bug or misconfiguration. Subsequent requests are much faster because the process is already running and warmed up. If your site is internal-only, low-traffic, or gets consistent traffic, occasional cold starts may be barely noticeable to users.
To minimize cold-start impact and improve perceived performance, use static export for as much content as possible. Statically generated pages have zero cold-start latency; they’re already HTML files served by Apache directly, without invoking Node.js at all. Only pages that truly need server-side rendering, API routes, or user authentication should run through the Node.js app. With Next.js’s hybrid rendering model, you can export 95% of your site statically (marketing pages, documentation, product listings, blog posts) and let only your dashboard, personalized pages, or dynamic API routes run on Node.js. This architecture minimizes reliance on the Node.js runtime and keeps response times fast.
Post-Deployment Verification and Health Checks
Once the Node.js app is set up and running, verify that everything is working correctly before you declare success. Taking a few minutes to test key functionality and review logs prevents surprises later and gives you confidence that your deployment is solid.

Checking Logs and Diagnosing Startup Errors
cPanel’s Node.js Selector includes a logs viewer that shows your application’s console output in real time. In the Setup Node.js App interface, click on your application and scroll down to the Application Output section; you’ll see the last few lines of console output from your app. If the app fails to start, error messages will appear here; common issues include missing environment variables, an incorrect entry-point file name, the wrong Node.js version, or syntax errors in your code.
If logs show no errors but your site returns a 502 or 503 error in the browser, check that your app is actually listening on the correct port via process.env.PORT. Add a console.log statement in your server startup code to confirm: log the port value when the server starts. The log should appear in the Application Output section within seconds of a fresh request, confirming that your app is running. If logs show nothing when you visit your app, the process may not be starting at all, which points to a cPanel configuration issue.
Testing Health Endpoints and Real-World Performance
Visit your application’s URL in a web browser and confirm that it loads without errors. If you see your Next.js app render, congratulations, the deployment succeeded. The first request may take 10 to 15 seconds due to the cold-start behavior described in the previous section; subsequent requests should load much faster, within 1 to 2 seconds. If you see an error page instead, work through the checklist: confirm the entry-point file exists at the path you specified in cPanel, verify that package.json is valid and has a start script, check that npm install completed without errors in the logs, and ensure that all environment variables your app needs are set in cPanel’s configuration.
Once the app responds without errors, test a few key pages to ensure rendering and routing work correctly. If your app has a static home page, load it and confirm the layout and content appear as expected. Test an API route if you have one by hitting the endpoint and confirming it returns the expected JSON response. For a blog or content site, test both a static page and any dynamic routes to confirm that server-side rendering, data fetching, and personalization work as expected. Once you’ve verified the core functionality, your deployment is complete, and your Next.js app is live.
Environment Variables and Configuration Management
Keeping secrets and configuration out of code is essential for security and allows your application to work in multiple environments, development, staging, and production, without code changes. cPanel’s Node.js Selector lets you set environment variables at runtime, separate from your codebase and version control.
Setting and Managing Production Environment Variables
Before your app starts, cPanel reads environment variables you define in the Node.js Selector interface and injects them into the Node.js process. These variables become available via process.env.KEY_NAME in your code at runtime. Click your application in Setup Node.js App, then scroll to the Environment Variables section. Add each key-value pair your app needs, database URLs, API keys, external service endpoints, JWT secrets, authentication tokens, and any other configuration that changes between environments.
Best practice: store a template .env.example file in your repository showing which environment variables are required and what format they should be in, but never commit an actual .env.production file with real secrets to version control. Instead, define variables in cPanel’s Node.js Selector UI, where they’re stored securely on the server and never exposed in your code repository. When cPanel starts your app, these variables are injected as process.env.KEY_NAME in server-side code, and for variables you want accessible in the browser, use the NEXT_PUBLIC_ prefix (e.g., NEXT_PUBLIC_API_URL) so Next.js makes them available to client-side code during the build and at runtime.
Debugging Configuration Issues and Missing Variables
If your app starts but behaves unexpectedly, connections fail, API calls return errors, or authentication doesn’t work, missing or incorrect environment variables are often the culprit. Add temporary debug logging to confirm environment variable values at startup: log each critical variable to the console, masking sensitive data like passwords (log API_KEY ? ‘[set]’: ‘[missing]’ rather than the actual key). Check the Application Output logs. If a variable says [missing], you forgot to set it in cPanel; if it says [set], confirm the value is correct and matches your production configuration.
If a variable is set in cPanel but your app isn’t seeing it, you may need to restart the application in Node.js Selector for the change to take effect. Click your app in Setup Node.js App and select Restart. The restart takes a few seconds, and the new variables are injected when the app restarts. If variables still aren’t appearing after a restart, double-check the spelling and format in cPanel; environment variable names are case-sensitive. If you mistyped the name, your code won’t find it.
Monitoring, Logs, and Ongoing Maintenance
Deploying is only the first step; monitoring helps you catch issues before users do and gives you visibility into how your application behaves in production. cPanel provides the tools you need to monitor and maintain your deployed Next.js app.
Reading Logs and Identifying Runtime Errors
cPanel’s Node.js Selector logs show your app’s console output, including errors, warnings, and debug statements you print from your code. Configure your Next.js app to log important events, database connections, API responses, errors, and performance metrics, so you have visibility into production behavior. Many developers add a logging library (like Pino or Winston) to structure logs and make them easier to parse. Still, even simple console.log statements appear in cPanel’s Application Output and help with troubleshooting.
If your app crashes repeatedly and restarts, cPanel will show the error message in the logs. Common causes of crashes include unhandled promise rejections (async errors that aren’t caught), missing environment variables (your code tries to use process.env.DATABASE_URL, but it’s not set), or dependency conflicts (two packages require incompatible versions of a common library). If the logs show a cryptic error message, try running the app locally with the same environment variables and Node.js version to reproduce the issue and understand what’s failing. Local reproduction is much faster than repeatedly deploying test changes.
Restarting, Redeploying, and Pushing Updates
If your app hangs, becomes slow, or behaves oddly, restart it via cPanel: in Setup Node.js App, click your application and select the Restart button. This kills the current process and starts a fresh one, which often resolves transient issues like memory leaks or stuck connections. A restart takes a few seconds, and your app is responsive again immediately. If a restart doesn’t help, check the logs and review your recent code changes to identify what might be causing the problem.
For code updates, the deployment flow is simple: build locally (npm run build), upload the new .next folder and updated package.json (if you added or removed dependencies) to your server via File Manager or FTP, then restart the app in cPanel. You don’t need to re-run npm install unless you’ve added new packages to package.json; just uploading the new compiled output and restarting is sufficient. Niya Digital’s team has found that most deployments take under 5 minutes once the initial setup is complete, making iteration quick and predictable so that you can push updates frequently and confidently.
Scaling and Understanding When to Upgrade Your Plan
As your Next.js application grows- more traffic, more features, more complexity- shared hosting’s resource limits will eventually become a constraint. Knowing the signs tells you when it’s time to move up and what steps to take.

Recognizing Resource Limits and Planning Upgrades
Shared hosting allocates a fixed amount of RAM, CPU cores, and concurrent processes per account to ensure fair distribution among many users. If your site generates high traffic, runs heavy computations, or processes large datasets, you’ll eventually hit these limits; your app becomes slow under load, or you see memory or CPU errors in the logs. Early warning signs include increasing response times during traffic spikes, users reporting timeouts or errors, or cPanel notifications about resource usage. Before upgrading, optimize the app: switch more pages to static export, implement caching for database queries, offload heavy processing to background jobs, or use a content delivery network (CDN) to cache responses and reduce server load.
Often, optimization alone lets you stay on shared hosting longer without upgrades. If optimization doesn’t sufficiently improve performance, it’s time to upgrade to a VPS plan (which gives you dedicated CPU and RAM) or a managed tier (which handles scaling and updates for you). The good news is that your Next.js app doesn’t change when you upgrade; the same codebase runs on a VPS with more resources, just with better performance. You don’t need to refactor code or change your deployment process; you move to a plan with more capacity.
Monitoring Growth and Choosing the Right Upgrade Path
Track your application’s resource usage over time by checking cPanel’s resource-usage reports, typically available in a Metrics or Usage section. Monitor RAM usage percentage, CPU consumption, and concurrent connection count monthly. Gradual growth is expected and normal; sudden spikes suggest something changed, a traffic surge, a code change introducing inefficiency, or a new feature that’s resource-intensive. Identify the cause and address it before it becomes a problem.
Plan upgrades before you hit limits, not after a crash forces you to act. If you’re at 70% of shared hosting’s memory limit and your user base is still growing, start testing your app on a VPS or managed tier now rather than waiting for performance to degrade. Niya Digital’s Web Hosting service offers smooth upgrade paths from shared to managed to reseller tiers; scaling up doesn’t require rebuilding your deployment process or migrating to a completely different provider. Your app keeps running while you upgrade, and the configuration remains familiar. This flexibility lets you start small, prove your concept, and scale as revenue and usage grow.
Start Hosting Your Next.js Application Today
You now have everything you need to deploy Next.js on cPanel and understand how to keep it running smoothly as your application grows. Niya Digital’s Web Hosting plans support Node.js Selector and cPanel out of the box, designed for developers building modern applications. Deploy without infrastructure overhead and focus entirely on building features and serving users.
Frequently Asked Questions
Do I need to upload node_modules to cPanel?
No, never upload node_modules. This folder is often 300+ megabytes and exceeds typical upload limits. Instead, upload only .next, public, package.json, and package-lock.json. When you create the Node.js application in cPanel, it automatically runs npm install to fetch and install all dependencies from npm’s registry on the server. This ensures you’re running the exact versions specified in package-lock.json and keeps uploads fast and reliable.
Can I deploy Next.js to cPanel without using standalone output?
Yes, but standalone output is strongly recommended because it eliminates boilerplate and significantly reduces package size. Without standalone output, you’ll need to create and maintain a custom server.js file to start Next.js, add more configuration, and upload a larger deployment package.
If you’re using Next.js 13 or older (before standalone was introduced), you can still deploy; write the server wrapper and follow the same cPanel setup process, but you’ll benefit from upgrading to a newer Next.js version to access standalone output.
Why does my app take 10–15 seconds to load after being idle?
Phusion Passenger uses a spawn-on-demand model where apps are stopped when idle to save memory, then restarted when traffic arrives (called a cold start). This latency is normal on shared hosting and unavoidable; it’s the trade-off for affordable hosting. Minimize impact by exporting as much content as static HTML as possible; static pages have zero cold-start time because Apache serves them directly, bypassing Node.js entirely.
How do I update my Next.js application after it’s deployed?
Rebuild locally by running npm run build, upload the new .next folder and any updated package.json (if dependencies changed) to cPanel via File Manager or FTP, then restart the app in Setup Node.js App by clicking Restart. You don’t need to re-run npm install unless you added new packages. Total update time is usually under 5 minutes, making iteration fast.
What Node.js versions are supported on cPanel?
It depends on your hosting provider. Common versions available are Node.js 18, 20, and 22, but some providers offer older versions like Node.js 16. Check the Node.js Selector dropdown in your cPanel to see what’s available on your account. If you need a newer version and it’s not listed, contact your hosting provider’s support team; they can often enable additional versions on request.
Can I run multiple Next.js apps on one cPanel account?
Yes. Create separate application folders for each app (for example, /public_html/app1/, /public_html/app2/), then create a separate Node.js application in Node.js Selector for each one. Assign each app to a different domain or subdomain. Each app runs in its own isolated Node.js environment with independent configuration, dependencies, and logs.
How do I set database credentials and API keys securely?
Store them as environment variables in cPanel’s Node.js Selector, never in code. Click your application in Setup Node.js App, scroll to Environment Variables, and add each key-value pair (for example, DATABASE_URL, STRIPE_API_KEY).
Your Next.js app reads them via process.env.DATABASE_URL at runtime. Never commit .env.production with real secrets to version control; environment variables set in cPanel are secure and separate from your code repository.
My app crashes with an out-of-memory error. What should I do?
Out-of-memory errors usually happen during the build process on the server. Always build locally (npm run build) before uploading to avoid this. If you built locally and still see memory errors at runtime, your app may be too large or resource-intensive for the shared hosting tier you’re using. Try optimizing your app by reducing dependencies, lowering image quality, or implementing caching before upgrading; if optimization doesn’t help, upgrade to a VPS plan with more RAM.
Can I use a custom domain with my Next.js app?
Yes. When creating the Node.js application in Node.js Selector, choose your custom domain or subdomain from the App URL dropdown. Ensure your domain’s DNS and registration are already set up with your hosting provider, then cPanel routes traffic to your app automatically. cPanel’s free SSL handles HTTPS (Let’s Encrypt) and applies it automatically; no configuration needed.
What’s the difference between static export and server-side rendering?
Static export generates all HTML at build time, creating fast, cacheable pages for fixed content. Server-Side Rendering generates HTML on each request, enabling personalization and real-time data but using more server resources. Use static for blogs, marketing sites, and product catalogs; use SSR for dashboards and personalized content. Next.js lets you use both in the same app on different pages.
How do I add an SSL certificate to my Next.js site?
cPanel includes free SSL (Let’s Encrypt) by default. Go to SSL/TLS in cPanel, auto-issue a certificate for your domain, and it applies immediately. Your site becomes accessible via HTTPS automatically; no configuration is needed in your Next.js code. cPanel renews the certificate automatically before it expires, so HTTPS stays active.
Can I connect a CDN to my cPanel-hosted Next.js app?
Yes. Configure your CDN (such as Cloudflare) to point to your cPanel domain, then update your DNS to point to the CDN instead. The CDN caches static assets and responses, reducing load on your cPanel server. For Next.js, CDN caching of static export pages is especially effective because those pages never change and can be cached forever.
What should I do if my app shows a 502 or 503 error?
These errors mean cPanel’s web server can’t reach your Node.js app. Check the Application Output logs in Node.js Selector for error messages. Common causes include a wrong entry-point file name, missing environment variables, or a Node.js version mismatch. Verify the App Startup File path in Setup Node.js App exactly matches your entry point file, ensure all required environment variables are set, and confirm you selected the correct Node.js version.
How often should I restart my Next.js app?
Only restart when you deploy code updates or if the app hangs or becomes unresponsive. Frequent restarts (more than once per deployment) suggest something is wrong; check the logs for errors. In normal operation, your app runs continuously without needing restarts, and users experience no interruption.
Is cPanel Web Hosting suitable for high-traffic Next.js applications?
Shared hosting works well for low-to-moderate traffic; for thousands of concurrent users, consider upgrading to a VPS or managed tier for dedicated resources. Use static export and caching aggressively to reduce server load. For very high traffic, a container platform like Vercel offers better scalability, though at a higher cost. Shared hosting is ideal for getting started and scaling as revenue grows.
Glossary
- Node.js: A JavaScript runtime environment that executes code server-side outside a web browser, enabling application logic, database connections, API endpoints, and dynamic content generation on web servers.
- cPanel: A web hosting control panel interface providing graphical tools for server management, file uploads via File Manager, database administration, email configuration, and application deployment without requiring command-line access.
- Phusion Passenger: An application server used by cPanel to run Node.js and Python applications alongside Apache, handling process spawning, traffic routing, and automatic restarts without manual configuration.
- Server-Side Rendering (SSR): Generating a web page’s HTML on the server for each user request, necessary for dynamic content, per-user personalization, and real-time data that changes between requests.
- Static Generation: Pre-building HTML pages at deployment time during the build process rather than on each request, resulting in fast, CDN-cacheable pages suitable for content that doesn’t change frequently.
- Standalone Output: A Next.js build mode that bundles only essential dependencies and a minimal server into the .next/standalone folder, enabling efficient deployment to shared hosting without shipping full node_modules.