Switching web hosting providers can feel risky, but proper planning eliminates downtime and data loss. Niya Digital is an authorized reseller of GoDaddy-powered web hosting infrastructure, not an operator of independent data centers or server hardware. Overall website performance, uptime, and security depend on multiple factors beyond any single provider’s control, including site configuration, application code, traffic patterns, and your own security practices.
Why Migrate & When It Makes Sense
Deciding to switch web hosting providers is rarely made lightly. Most site owners stay with their current host until a specific pain point becomes unavoidable: renewal costs spike beyond budget, performance degrades under traffic, or support quality drops when you need help most. Understanding what triggers a migration, and whether your situation genuinely warrants one, is the first step to a successful switch. A migration is a deliberate choice, not a reaction to a single bad support ticket, so this section helps you weigh whether the effort and timing are justified.
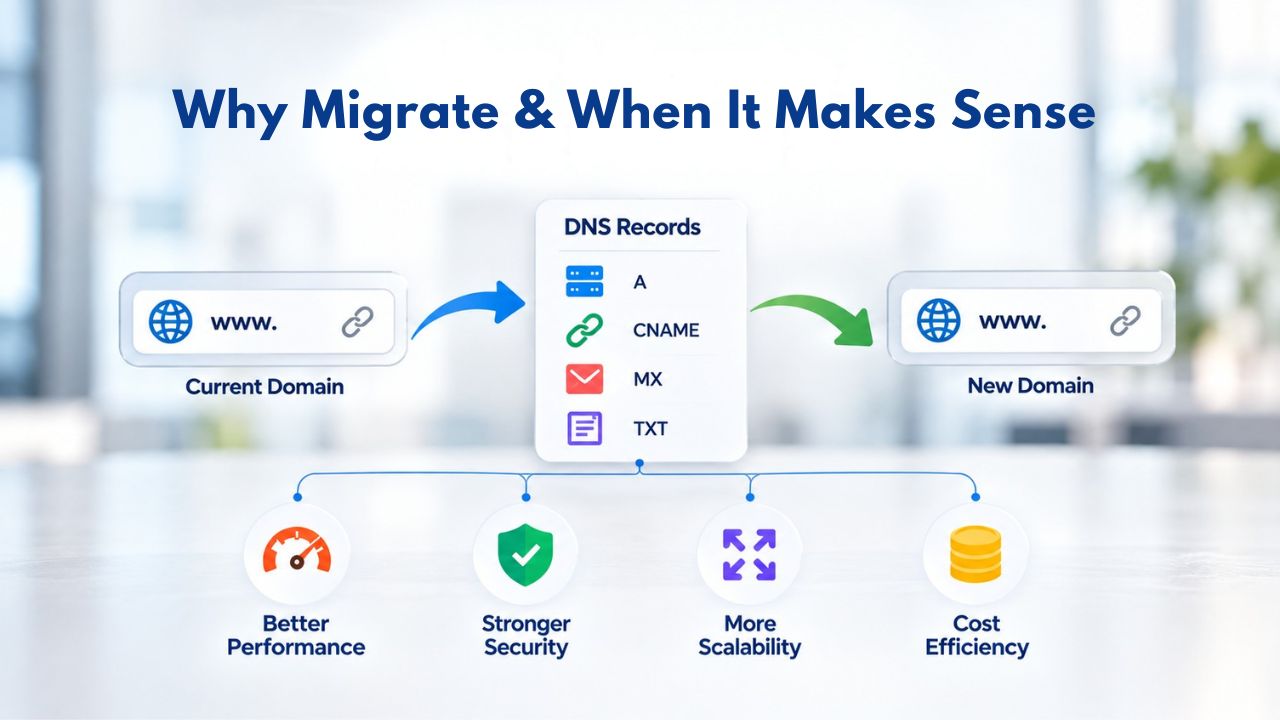
Common Reasons to Switch Web Hosting
A site owner typically migrates when current limitations no longer fit their growth trajectory. Renewal shock is one of the most common drivers: a business renews a shared Web Hosting plan’s first-year term only to discover the renewal cost has doubled or tripled when the introductory rate expires.
Other migrations happen when a site outgrows its plan’s bandwidth or storage limits, pages slow during traffic spikes, or the site hits its storage ceiling and can no longer accept new uploads. Still others seek better-managed support for their specific technology stack. A WordPress site might need a host that offers native WordPress staging and one-click backup tools. A developer might require a hosting environment with native support for Python, Node.js, or a specific framework their application depends on.
A smaller group migrates for compliance or data-residency reasons. If your business handles customer data subject to GDPR, CCPA, or similar regulations, confirming that your hosting provider meets those data-handling and data-residency requirements becomes mandatory. Some site owners also switch providers after an acquisition, price increase, or public service-quality issue reported by their current host. Performance concerns, such as a site that is consistently slow even during normal traffic, are another legitimate driver. However, slow performance is often fixable through caching or optimization on your current host rather than requiring a full migration.
When Staying Put Is the Right Call
Not every dissatisfaction warrants a migration. If your current plan still covers your site’s actual resource needs, and support remains responsive when you contact them, the cost and effort of migration may outweigh the benefit of switching. Migrations are time-intensive; even with perfect execution, there’s a small risk of misconfiguration or temporary service interruption that affects your live site. A renewal increase that’s manageable within your budget, or a minor performance issue fixable through caching plugins or image optimization on your current host, may not justify the disruption to your business. Assess the scale of your frustration against the effort required, and proceed only if the balance favors migration.
Business Web Hosting Plans & Pricing
Choose the hosting plan that fits your website, WordPress site, or growing business. Compare features, storage, performance, security, and website capacity to find the right hosting environment for your needs.
cPanel Starter
cPanel Hosting that's easy, reliable and lightning-fast.
- 1 website
- 30 GB storage
- Unmetered bandwidth*

cPanel Economy
cPanel Hosting that's easy, reliable and lightning-fast.
- 1 website
- 100 GB space
- Unlimited bandwidth*
- 100 email accounts**
- 10 MySQL databases (1 GB ea.)
cPanel Deluxe
cPanel Hosting that's easy, reliable and lightning-fast.
- Unlimited websites
- Unlimited space
- Unlimited bandwidth*
- 500 email accounts
- 25 MySQL databases (1 GB ea.)
cPanel Ultimate
cPanel Hosting that's easy, reliable and lightning-fast.
- Unlimited websites
- Unlimited space
- Unlimited bandwidth*
- 1000 email accounts
- Unlimited MySQL databases (1 GB ea.)
- 2X Processing power & memory (available for Linux/cPanel only)
- Premium DNS
- 1-year SSL certificate to secure customer data and increase search rankings
*We don't limit the amount of storage and bandwidth your site can use as long as it complies with our Hosting Agreement. Should your website bandwidth or storage usage present a risk to the stability, performance or uptime of our servers, we will notify you via email and may be required to upgrade, or we may restrict the resources your website is using.
**Email account storage is limited to 100 email accounts with 100 MB of total storage.
WordPress Basic
A great way to get started.
- 1 website
- 10 GB NVMe storage
- Unmetered bandwidth
- Free SSL Certificate *
- WordPress pre-installed
- Weekly backups
- Web Application Firewall
- Daily malware scans
- One-time malware removal

WordPress Deluxe
Improve your site performance with Cloudflare CDN.
- 1 website
- 20 GB NVMe storage
- Unmetered bandwidth
- Free SSL Certificate *
- WordPress pre-installed
- Daily backups
- Web Application Firewall
- Daily malware scans
- One-time malware removal
- Up to 2x faster performance with global Cloudflare CDN **
- Enhanced security with DDoS protection
- Staging site
WordPress Ultimate
Add online marketing with more sites, storage and security.
- 1 website
- 30 GB NVMe storage
- Unmetered bandwidth
- Free SSL Certificate *
- WordPress pre-installed
- Daily + on-demand backups
- Web Application Firewall
- Daily malware scans
- Unlimited malware removal
- Up to 2x faster performance with global Cloudflare CDN **
- Enhanced security with DDoS protection
- Staging site
- WordPress code optimizer
- Smart WordPress plugin manager
- Sell online with WooCommerce
*An SSL certificate is included with every site and free for the life of the hosting plan. Certificates are automatically installed, validated and renewed.
Web Hosting Plus Launch
For multiple basic sites.
- 100 GB storage*
- 4 GB RAM
- 2 CPUs
- Unmetered traffic
- 50 websites & databases
- Free, unlimited SSL for all your websites**

Web Hosting Plus Enhance
For high-traffic WordPress, Joomla, and other sites.
- 200 GB storage*
- 8 GB RAM
- 4 CPUs
- Unmetered traffic
- 100 websites & databases
- Free, unlimited SSL for all your websites**
Web Hosting Plus Grow
For advanced eCommerce sites like Magento.
- 300 GB storage*
- 16 GB RAM
- 8 CPUs
- Unmetered traffic
- 150 websites & databases
- Free, unlimited SSL for all your websites**
Web Hosting Plus Expand
For multiple basic sites.
- 400 GB storage*
- 32 GB RAM
- 16 CPUs
- Unmetered traffic
- 200 websites & databases
- Free, unlimited SSL for all your websites**
*The total amount of usable storage capacity for your particular Hosting Service(s) may differ from the represented capacity as there is required space for the operating system(s), system file(s) and other supporting file(s).
**If you cancel the Web Hosting Plus product, you will lose the associated SSL certificate as well.
Assessing Your Current Hosting Needs & Bottlenecks
Before hunting for a new provider, you need to understand what your current hosting setup provides, how much you’re actually using, and where the gaps are. This assessment prevents you from repeating the same limitations at a new host and ensures you choose a plan that genuinely fits your site’s needs.
Measuring Your Current Plan’s Usage
Log in to your current hosting control panel, usually cPanel or Plesk, and note your bandwidth usage, storage used, number of add-on domains, databases, and email accounts. Most control panels display this data prominently in a dashboard summary. Compare your actual monthly usage against your plan’s stated limits. If you’re consistently hitting 70–80% of any limit during normal months, your current plan is too tight for sustainable growth without future migration. Conversely, if you’re using well under half your allocation month after month, you may be over-provisioned and paying for capacity you don’t need on a shared hosting plan.
Also document which server-side technologies and features your site depends on: the PHP version your site requires, database type (MySQL or MariaDB), installed server extensions or modules, SSL certificate setup (shared or dedicated IP), and any automation tools like cron jobs or scheduled backups that run on the server. These technical details matter when evaluating whether a new provider’s shared hosting plan will actually support your site as-is. If your current host runs PHP 7.4 and you’re relying on a WordPress plugin that requires PHP 8.1, that’s a critical gap to address before migration. Testing technology compatibility ahead of time prevents setup failures on your new host.
Identifying Performance & Support Gaps
Performance issues during high-traffic periods are often traceable to plan-tier limitations, not provider quality. If your site slows to a crawl or becomes unresponsive during traffic spikes, you may have hit your shared plan’s CPU or memory ceiling, limits your current host imposes to protect other customers on the same server. If backups are infrequent (weekly or monthly) or manual (requiring you to download them), data-loss risk is high. If support response time is measured in days rather than hours, critical issues affecting your business linger unresolved while you wait. Document these gaps clearly; they define what to prioritize in a new provider and help you evaluate whether their offerings address your pain points.
Resource Sizing Guide for Web Hosting Plans
| Site Type | Typical Visitors/Month | Recommended Storage | Recommended Bandwidth | Best Hosting Tier |
|---|---|---|---|---|
| Personal blog | Under 5,000 | 5–10 GB | 25–50 GB | Entry-level shared hosting |
| Small business (5–20 pages) | 5,000–25,000 | 10–25 GB | 50–100 GB | Standard shared hosting |
| Content site or portfolio | 25,000–100,000 | 25–50 GB | 100–200 GB | Advanced shared hosting |
| E-commerce store (100–500 products) | 50,000–200,000 | 25–50 GB | 100–300 GB | Managed shared or VPS |
| High-traffic blog or SaaS site | 200,000+ | 50+ GB | 300+ GB | VPS or dedicated hosting |
Choosing a New Web Hosting Provider
Choosing a new host that fits your needs prevents you from repeating the same mistakes. The best provider for a corporate e-commerce store differs from the best choice for a nonprofit blog or a developer building a custom application. Careful evaluation up front saves regret later.
Key Evaluation Criteria
Start with plan-tier alignment. Does the new provider’s shared Web Hosting plans include the storage, bandwidth, and resource allocations your current usage demands? Is there headroom for growth without immediately jumping to a VPS or dedicated tier? Next, verify technology support by checking the new host’s specifications page. Does it run the PHP version your site requires? Does it support the database type (MySQL, MariaDB, PostgreSQL) your application depends on? Are server-side extensions or modules you use available? Many hosting providers list their tech-stack specifications on their feature or plans pages; review these before committing.
Support quality matters far more after migration than marketing claims suggest. Test the new provider’s support before signing up: send a pre-sales question via email and note how quickly and thoroughly they respond. Check independent reviews or community forums (like web hosting Reddit communities) to see whether users report responsive, knowledgeable support during setup and troubleshooting. A provider with managed migration support, a team member who guides you through the technical steps, reduces stress and risk during the transfer. Ask explicitly whether migration assistance is included with your plan.
Comparing Cost & Long-Term Value
Evaluating true cost requires looking beyond the introductory rate. Many hosting providers advertise a low first-year rate, but the renewal rate (charged after year one) is what you’ll pay long term. Ask your prospective new provider explicitly for their renewal rate, not just the promotional first-year cost. Some providers publish this information transparently on their plans page, while others require you to ask during a sales conversation. Compare the total cost of ownership over three years, not just year one, to avoid repeating the renewal-shock trap that likely prompted your migration in the first place.
Preparing for Migration: Pre-Flight Checklist
A structured migration minimizes the risk of data loss, downtime, or misconfiguration. Before you touch anything on your existing setup, prepare a complete inventory and a cutover plan. This preparation phase takes a few hours but can prevent disasters during the migration.
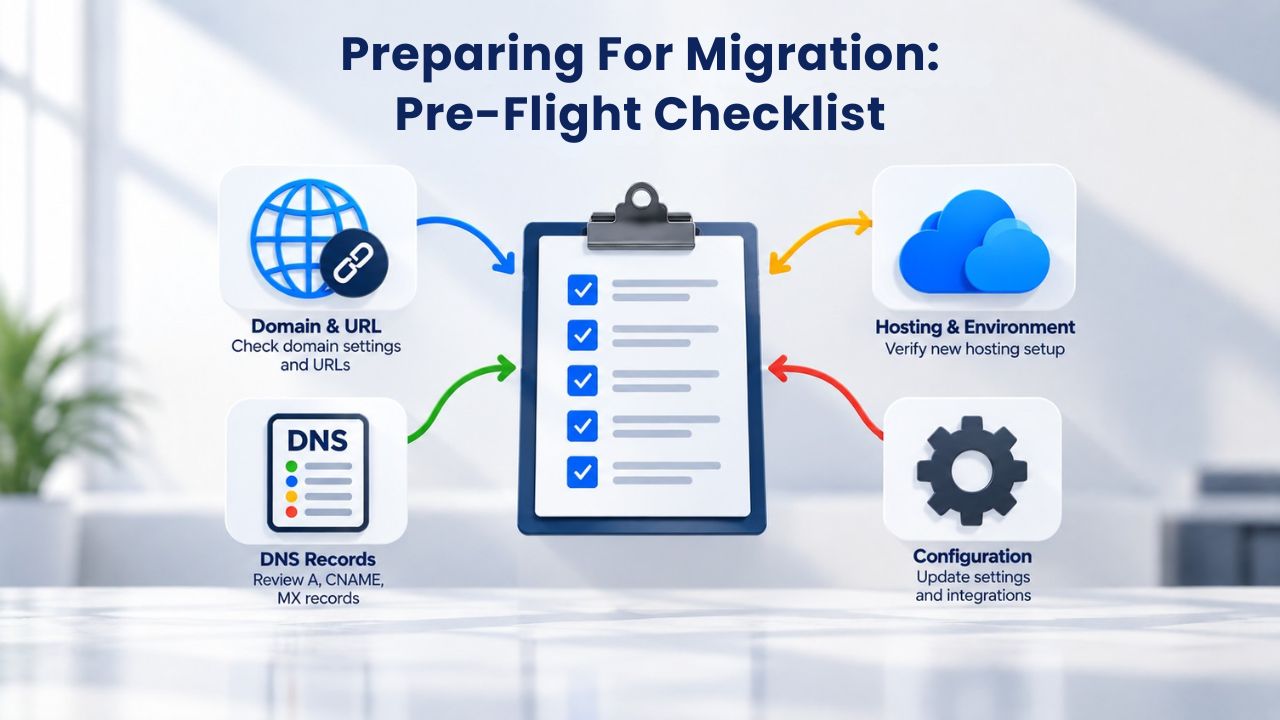
Create a Comprehensive Backup
Before initiating any migration, create a full backup of your site, databases, and email accounts from your current host. Most hosting control panels, cPanel, Plesk, and others, include a one-click full-account backup feature that archives everything into a single compressed file. Download this backup to your local computer and store it securely. If your current host’s backup tool doesn’t exist or you’re concerned about its reliability, manually export your databases using phpMyAdmin and download your site files via SFTP or File Manager as a secondary safety measure.
Document your backup date and location clearly, ideally on an external drive or cloud storage separate from your current hosting account. Include a checklist of what the backup covers: website files (HTML, CSS, images, plugins, themes), databases (content, users, configuration), email accounts, SSL certificates, and any custom configurations or scripts your site relies on. This documentation ensures you know exactly what you’re restoring if something goes wrong during migration.
Document All Account Details
Create a spreadsheet listing every element of your current hosting setup. Include domain names and their registrar (if different from your hosting provider), add-on domains, subdomains, email accounts with their current settings (forwarding rules, autoresponders, any third-party integrations), databases and their names, FTP/SFTP credentials, SSH access information (if you use command-line tools), and any third-party integrations like DNS providers or CDNs. Separately, note any custom DNS records or nameservers currently in use. If you’re using a third-party DNS service or content delivery network, document those endpoints because you’ll need them to maintain service during the cutover.
Migration Checklist & Timeline
| Step | Task | Timing | Notes |
|---|---|---|---|
| 1 | Assess current hosting usage and document all account details | 1–2 hours | Note bandwidth, storage, database types, PHP version, email accounts |
| 2 | Create and test full backup | 2–4 hours | Download and verify backup opens without corruption |
| 3 | Evaluate new hosts and purchase Web Hosting plan | 1–2 hours | Verify technology support, get renewal rates, test support responsiveness |
| 4 | Set up account on new host and create databases | 1–2 hours | Configure add-on domains, select PHP version, create new databases |
| 5 | Upload site files and restore database | 2–6 hours | Use SFTP for large files, import SQL via phpMyAdmin |
| 6 | Test site on temporary domain | 1–2 hours | Verify pages load, forms work, admin login functions |
| 7 | Update nameservers at domain registrar | 15 minutes | Switch DNS to new host nameservers |
| 8 | DNS propagation (wait) | 24–48 hours | Avoid content changes during this window |
| 9 | Update MX records for email | 15 minutes | Point email to new host or third-party email service |
| 10 | Verify all services live on new host | 1–2 hours | Test website, email, integrations, analytics |
| 11 | Deactivate old hosting account | 5 minutes | Cancel after 30-day grace period |
Backing Up Your Site & Database
A migration is not reversible without a backup. Backup discipline before cutover is non-negotiable to protect business continuity.
Full Website & Database Backup
Your backup must include every component of your site. Website files (HTML, CSS, JavaScript, images, plugin and theme code if using a CMS like WordPress) are the visible part. Still, your database holds your site’s content, user accounts, settings, and configuration. For a WordPress site, the database is the engine: without it, you have an empty shell with no posts, pages, categories, or user data. Using your hosting control panel’s backup tool is the simplest approach. Most panels provide a Backup Wizard or similar feature that captures the entire account, files, databases, and email into a single compressed archive.
If your account is very large (several gigabytes of data), consider scheduling the backup during off-peak hours, late evening or early morning, to avoid slowing your live site during the backup process. The backup process can consume server resources, and running it during low-traffic periods minimizes impact on visitor experience.
Test the Backup Before Migration
Do not trust a backup until you’ve verified it works. Download the backup file and attempt to decompress it on your local machine to confirm it opens without errors. If you can see the file structure inside (folders, site files, database SQL files), you have a valid backup. If decompression fails or the file is corrupted, create a new backup and test it again. This step takes minutes and prevents the catastrophe of discovering a corrupted backup only after you’ve already cut over to your new host and deleted your old account.
Ready to Move Your Site?
Niya Digital’s Web Hosting service includes managed migration support and one-click installers for WordPress, WooCommerce, and other popular platforms. Our team can guide you through every step, from backup and setup to DNS cutover and email configuration. If you’re concerned about downtime or technical complexity, explore our Web Hosting plans and onboarding options.
Setting Up Your Account on the New Host
Once your backup is in place and your new account is provisioned, you’re ready to set up your environment on the new host. This phase involves creating the necessary directories, databases, and configurations so your site runs smoothly once you upload the files.
Provision Your New Hosting Account
After purchase, your hosting provider activates your account and sends your control panel login credentials. For hosts using cPanel, you’ll receive your account URL (typically something like https://yourdomain.com:2083 or an IP-based URL), username, and password. For Plesk-based hosts, the interface is similar: a web-based control panel with menu options for managing your account. Log in immediately and confirm that your account is active, your disk space and bandwidth allocations are displayed, and you can navigate the core sections like File Manager, Databases, Email, and Domains.
Set up any add-on domains, subdomains, or aliases you’re migrating from your old host. Each requires its own directory within your hosting account and sometimes its own database. If your current account hosts five domains (your primary domain plus four add-on domains), replicate that structure in your new account. This task is repetitive but straightforward: the control panel walks you through adding each domain, and it creates the necessary directories automatically.
Install Necessary Server-Side Technologies
If your site uses PHP, ensure the new host’s default PHP version matches or exceeds your site’s requirement. Most hosting control panels allow you to select the PHP version per domain rather than applying one version site-wide. If your WordPress site requires PHP 8.0 or higher but the new host defaults to PHP 7.4, you’ll need to manually change the version for your domain before uploading site files. If you don’t, your site may fail with cryptic error messages after migration.
Similarly, confirm that your required database type is available and installed. Create the new database and note its name, username, and password; these credentials differ from your old host’s setup and must be used by your site once it’s live on the new host. Store these credentials in a secure location (password manager, encrypted spreadsheet) so you can reference them during site configuration.
Uploading Files, Database & Testing
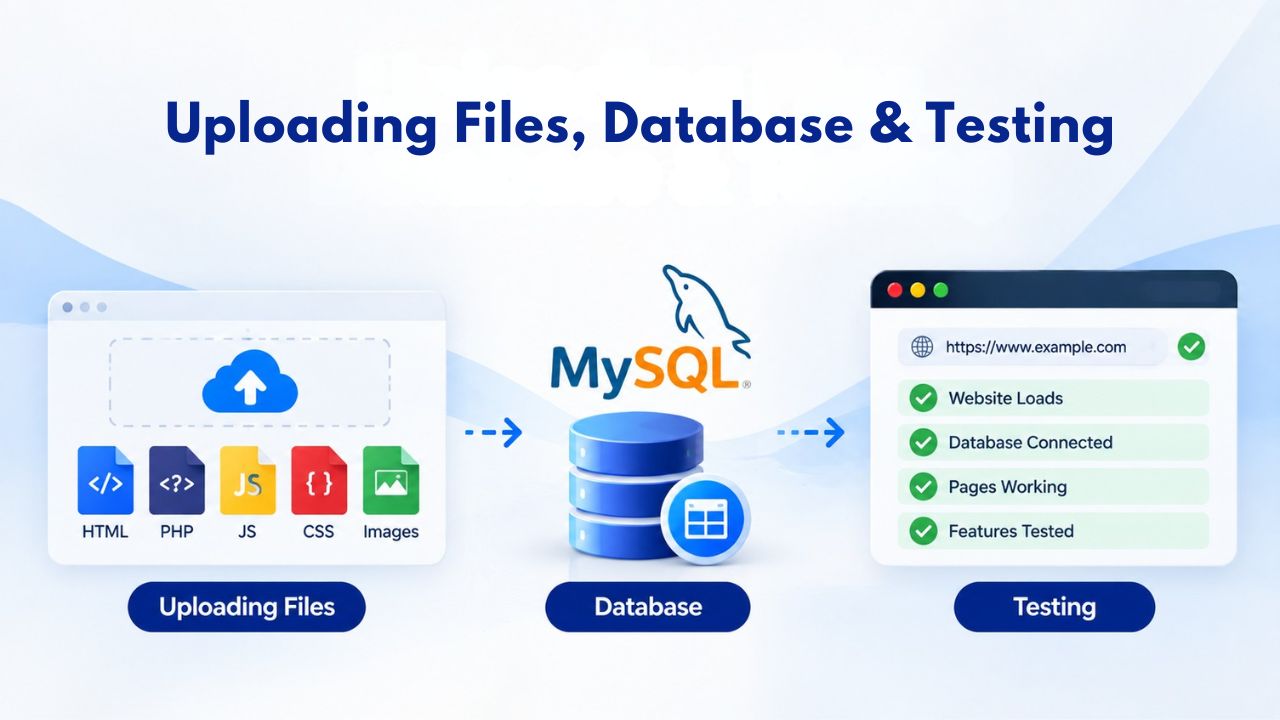
With your new account prepared and configured, you’re ready to restore your backed-up site and test it thoroughly before making it live to the public.
Restore Website Files
Download your website files from your backup or extract them from the backup archive file. Using your new host’s File Manager (a graphical browser-based tool) or an SFTP client like FileZilla (a standalone application), upload your site files to the appropriate directory. For a primary domain, this is typically the public_html directory. For add-on domains, it’s usually a subdirectory like public_html/addon-domain.com or sometimes a parallel directory structure depending on your host’s setup. For a typical WordPress site, this includes /wp-content, /wp-admin, /wp-includes folders, and your wp-config.php configuration file.
If your backup is very large (over 500 MB), uploading via the control panel’s File Manager can be slow or fail partway through. SFTP clients like FileZilla are more reliable for large transfers because they resume interrupted uploads and provide detailed progress feedback. Alternatively, if your hosting provider offers a restore-from-backup feature in their control panel, use it, as it’s typically faster than manual upload and handles large files more reliably.
Restore Your Database
Create a new database on your new host using the control panel’s database creation tool. Note the database name, username, and password you create. Then, import your backed-up database into this new database. Most hosts provide phpMyAdmin, a web-based database management interface accessible from your control panel. Log in to phpMyAdmin, select your newly created database, and use the “Import” tab to upload your backed-up SQL file. The import process typically completes within seconds or minutes depending on database size.
After the import completes successfully, verify that your site’s configuration file (wp-config.php for WordPress, settings.php for Drupal, or your framework’s equivalent) is pointing to the correct new database credentials. Edit the file via File Manager or SFTP and update the database name, username, and password to match your new host’s setup. Failure to update these credentials causes your site to fail with a “connection refused” or similar database error.
Test Your Site Before Cutover
Before you point your domain to the new host, test your site locally on the new server. Most hosting providers assign a temporary domain name (like tempaccount.yournewhostname.com or example.niyadigital.com) to your account while you set up. Visit that temporary domain in your browser and verify that your site loads completely, pages render correctly, images display, and forms submit properly. You can log in to any admin dashboards or user accounts. Test a few key user workflows: adding a product to a cart if you run an e-commerce site, submitting a contact form to verify email, or accessing a member-only page.
This testing step catches configuration errors before they affect your live site and your visitors. If something is broken- a missing image, a form that doesn’t submit, a database connection error- you discover and fix it now while your old host is still live and serving traffic. Only after testing passes completely do you proceed to the DNS cutover step.
Updating DNS & Email Settings
DNS is the bridge between your domain and your hosting provider. Updating DNS settings is the moment your site “goes live” on the new host. This step requires access to your domain registrar (where you purchased your domain), not your hosting provider.
Understanding DNS & Nameservers
Your domain’s nameservers tell the internet where to find your website. When someone types your domain into a browser, their request passes through the DNS system to your nameservers, which point to your hosting provider’s servers. To move your site to a new host, you update your domain’s nameservers to point to your new host’s nameservers instead.
This change is made at your domain registrar (the company where you bought your domain), not at your hosting provider. If your domain is registered at the same company as your old hosting provider, nameserver updates might be done in the same control panel. If your domain is registered elsewhere, you’ll log in to your domain registrar’s separate control panel to update them.
Perform the Nameserver Cutover
Before you make the change, note your new host’s nameservers. They’re typically listed in your new hosting account’s welcome email or in your control panel’s setup documentation. Nameservers usually look like ns1.newhost.com and ns2.newhost.com (the exact format varies by provider). Log in to your domain registrar’s control panel and locate the nameserver settings, usually under “Domain Management,” “DNS Settings,” or “Nameservers.” Replace your old host’s nameservers with the new host’s nameservers. Save the change.
DNS propagation begins immediately but takes time, typically 24 to 48 hours for the change to propagate globally. During this propagation window, some visitors may reach your old site, and others may reach your new site, depending on which nameserver their ISP’s DNS resolver contacts. This is normal. Avoid major content changes during propagation to minimize visitor confusion. After 48 hours, all traffic routes to your new host.
Migrate Email Settings
Email migration requires a separate step because mail servers use MX (Mail Exchange) records, which are DNS records independent of your nameservers. If you’re moving email accounts from your old host to your new host, you have two strategies: a gradual migration (where you move some email addresses a few days before nameserver cutover) or a simultaneous cutover (where you switch MX records at the same time as nameservers).
If your new host is managing email for you, ask them to provide their MX record values. In your domain registrar’s DNS settings, update your MX records to point to your new host’s mail servers instead of the old host’s. Like nameserver changes, MX record updates take 24–48 hours to propagate globally. During propagation, emails destined for your domain may bounce to the old or new host unpredictably. Communicate the timing to important stakeholders, so they expect potential mail delays during the changeover window.
Verifying Everything Works & Post-Migration Cleanup
After DNS propagation completes, your site is live on the new host. The final steps are verification and cleanup: confirm all services work correctly, then deactivate your old hosting account.
Confirm All Services Are Live
After 48 hours have passed (or when DNS propagation is complete), visit your domain directly in a browser and verify the site loads correctly on the new host. Check that pages render, images display, and all functionality works. Test login functionality, form submissions, and any integrations with third-party services (payment processing, email subscriptions, social media embeds, analytics). If you have monitoring tools or analytics in place, confirm they’re still reporting data from your live site.
Separately, send test emails to your domain’s email addresses and verify they arrive without bouncing or delays. If you’re using a third-party email service (like Google Workspace or Microsoft 365), confirm those accounts still work. If your new host is providing email hosting, test that webmail login works and you can send and receive messages normally.
Update Email Forwarding & Integrations
If you changed email providers or your email host during migration, update any third-party services that depend on your domain’s email addresses. This includes mailing-list subscriptions, payment-gateway notifications (which often send confirmations to your admin email), CRM integrations, and any scripts or automation running on your new host that send email. Verify that each still works after the switch. A broken integration might go unnoticed for days if you don’t actively test it post-migration.
Deactivate Your Old Hosting Account
Once you’ve confirmed everything is working on the new host and DNS has fully propagated, you can cancel your old hosting account and stop paying for redundant hosting. Before you do, double-check one final time that no lingering traffic or email is still reaching the old server by checking your old host’s access logs. Most hosting providers offer a grace period (typically 30 days) before deleting your account, giving you time to catch any missed dependencies or redirects that need updating.
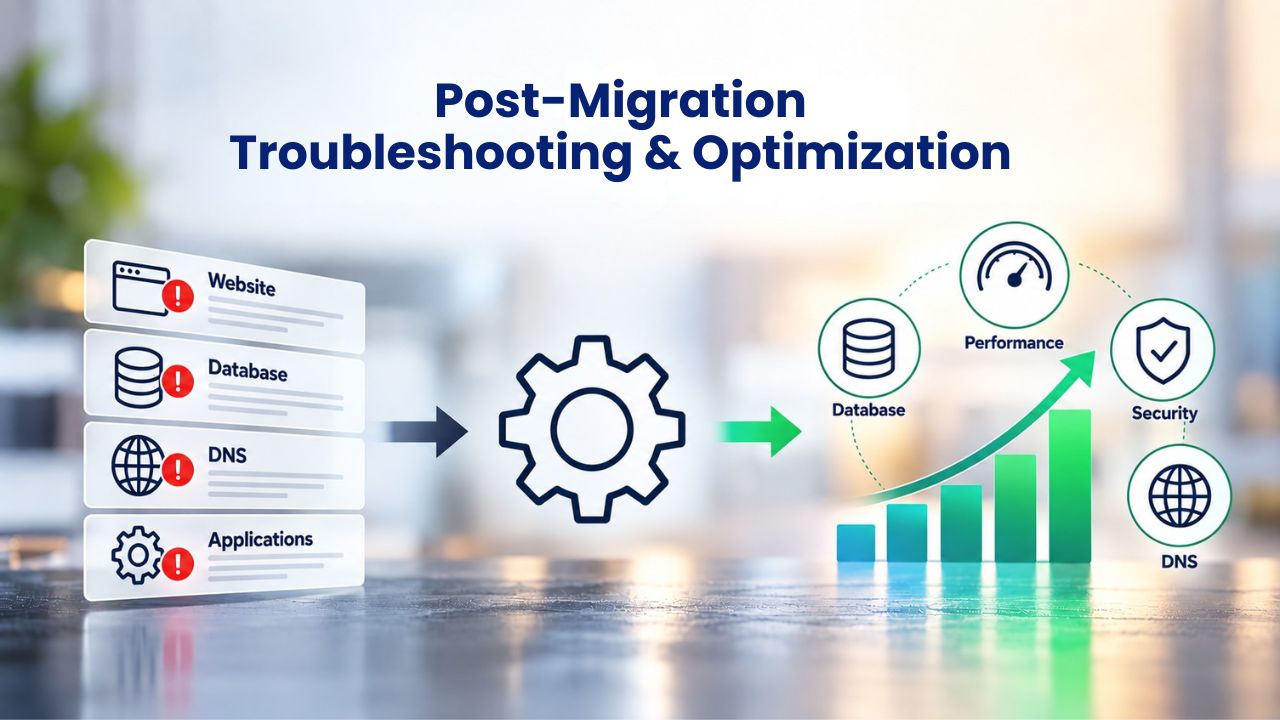
Post-Migration Troubleshooting & Optimization
Even with meticulous planning, small issues sometimes surface after migration. Knowing how to diagnose and fix them keeps downtime minimal and ensures your site performs well on the new host.
Common Post-Migration Issues
A site may load, but pages may render incorrectly if CSS or JavaScript files fail to upload. Check your File Manager or SFTP client to confirm all files in your /css and /js directories exist and match the original backup. A contact form that doesn’t work may indicate a misconfigured email address, a broken server-side script, or a missing plugin.
Check your new host’s error logs (available in the control panel, typically under “Error Logs” or “Raw Access Logs”) to identify missing dependencies or configuration issues. Database connection errors usually mean your site’s configuration file still points to old database credentials; edit wp-config.php and confirm the database name, username, and password match the new host’s setup.
Performance Tuning After Migration
After you’ve verified core functionality, optimize your site for the new host. Enable caching if not already active; most control panels include caching tools, and many CMS platforms have caching plugins. Confirm that your site’s DNS records are fully updated and not causing extra DNS lookups that add latency. If your site includes third-party resources (web fonts, JavaScript libraries from CDNs), verify those are still reachable and not adding load time.
Monitor your site’s performance over the first week using tools like Google PageSpeed Insights or your new host’s own performance monitoring dashboard. If load times are slower than on your old host, the issue is usually a misconfiguration (missing caching, wrong PHP version, too many add-on domains sharing resources) rather than the new host itself. Contact your new host’s support team if you can’t identify the issue; migration support often extends to post-migration optimization.
Make the Switch with Confidence
Migrating your site to a new Web Hosting provider doesn’t have to be stressful. Niya Digital’s Web Hosting service includes managed migration support, one-click installers for WordPress and WooCommerce, and a team ready to assist with setup, domain connection, and DNS configuration. Start exploring today.
Frequently Asked Questions
What if my website goes down during migration?
Brief downtime during nameserver cutover (a few minutes to a few hours) is uncommon but possible. To minimize risk, perform your nameserver cutover during a low-traffic time like weekends or evenings, and avoid making content changes during the propagation window.
If your old and new sites are both live simultaneously, visitors may see either one until DNS fully propagates; this is normal. If your site is offline for several hours after cutover, contact your new host’s support team immediately; they can diagnose whether DNS is resolving correctly or if there’s a server-side configuration issue.
How long does the entire migration typically take?
A straightforward migration (backup, new account setup, file upload, database restore, testing, and DNS cutover) usually takes a few hours to a full day of active work time. However, DNS propagation adds 24–48 hours before all global traffic routes to your new host. Plan for 2–3 days total from start to finish, accounting for DNS delays and any unforeseen configuration adjustments or testing.
Can I migrate while my site is live without downtime?
Yes, completely. Upload your site to the new host and test it thoroughly on the temporary domain provided by your new host. Once testing passes, switch your DNS nameservers only then. During DNS propagation, your old and new sites coexist; traffic gradually shifts to the new host as DNS updates propagate. There’s no hard cutover moment, so you can avoid downtime entirely.
Do I have to migrate all my email accounts at once?
No. Email migration is independent of website migration because MX records are separate from nameservers. You can migrate email accounts a few days before nameserver cutover, at the same time, or days after if needed. However, during any overlap period, emails may be delivered inconsistently. Plan the email cutover to minimize disruption to incoming business communications.
What if I need to roll back to my old host?
If something goes seriously wrong on your new host, you can quickly revert by changing your nameservers back to your old host’s. Because you maintained backups and your old site was still running, you can restore service within minutes. However, reverting after DNS has fully propagated may leave some visitors on the old site for a few hours until the reverse DNS change propagates. This is why thorough testing before nameserver cutover is critical.
Do I need to update my website’s internal links during migration?
No. If you’re migrating to the same domain name (just changing hosting providers), your internal links remain unchanged. If you’re moving to a new domain, you’ll need to update all internal links, a task most CMS platforms automate via find-and-replace tools. Niya Digital’s support team can assist with this if you’re switching domains as part of your migration.
How do I know if my new host supports my website’s technology stack?
Before committing to a new host, check their specifications page for PHP version, database type, server extensions, and cron job support. If your current site runs PHP 8.1 and the new host’s default is 7.4, confirm you can manually select PHP 8.1 for your domain. Most control panels allow per-domain version selection. If the new host doesn’t support a critical technology your site depends on, they’re not the right fit.
What happens to my domain during migration?
Your domain remains yours throughout the process. You still own it and can change where it points at any time. The only thing that changes is the nameservers, the servers that tell the internet where your domain’s website is hosted. The registrar, ownership, and renewal terms all stay the same.
Will my SSL certificate work on the new host?
If you purchased an SSL certificate from your old host, you may need to request a transfer or reissue it at the new host. Most modern hosts include free managed SSL certificates (via Let’s Encrypt), which are automatically provisioned for your domain on the new server. Ask your new host whether they provide free SSL; most reputable providers do. If you need a premium SSL certificate, clarify the cost and process before migrating.
What should I do with my old hosting account after migration?
Keep it active for at least 30 days after your DNS has fully propagated, and you’ve confirmed all traffic is reaching the new host. This grace period lets you catch any missed dependencies or emails still routing to the old server. After 30 days, cancel it to stop paying for redundant hosting. Before canceling, confirm one final time that all your traffic and email are reaching the new host.
How can I verify my DNS migration is complete?
Use a DNS checker tool (search “DNS checker” or “DNS propagation” online) and enter your domain name. The tool will show you the nameservers currently pointing to your domain and the IP address they resolve to. Once the IP address matches your new host’s server IP and you’ve waited 24–48 hours for global propagation, the migration is complete.
Is there a cost to migrate to a new web hosting provider?
Migration itself is free; you don’t pay to switch hosts. However, your new host charges a subscription for its web hosting plans, which may differ from your old host. Some hosts, including Niya Digital, offer managed migration support at no extra charge. Your only out-of-pocket costs are your new host’s subscription and any renewals for your domain registration.
What if my site uses a database my new host doesn’t support?
Most web hosting providers support MySQL and MariaDB, the most common open-source databases. If your site uses a more specialized database (PostgreSQL, Oracle, MongoDB), confirm the new host supports it before migrating. If they don’t, you may need to migrate to a VPS or dedicated hosting environment, or switch to a different database system; both are larger undertakings than a standard shared hosting migration.
How do I minimize email loss during migration?
Email loss during migration usually happens if emails are sent to the old host while MX records are transitioning. To minimize this risk, perform your email migration a few days before nameserver cutover, or use a gradual email cutover where you migrate some email addresses early and others later. Ask your new host whether they can temporarily receive mail for your domain during the transition period.
Should I keep my old hosting and run both sites simultaneously?
For testing purposes, yes, keep your old site live while you set up and test on the new host. This ensures you have a working fallback if something goes wrong. However, running two identical sites on two different hosts indefinitely creates duplicate content, which can confuse search engines and your analytics. Once testing passes and you’re confident in the new host, switch DNS and eventually cancel the old account.
Glossary
- Web Hosting: A service that stores your website’s files and databases on a server connected to the internet, making your site accessible to visitors worldwide. Hosting providers manage the servers, network infrastructure, and security; you maintain your site’s content and configuration.
- DNS (Domain Name System): The system that translates human-readable domain names (like example.com) into the IP addresses that computers use to locate websites. Nameservers are the DNS servers that store this mapping for your domain.
- cPanel: A web-based control panel used by many hosting providers to manage hosting accounts. It provides graphical interfaces for tasks like creating email accounts, managing databases, uploading files, and configuring domains without requiring command-line access.
- Migration: The process of moving a website, its files, databases, and email accounts from one hosting provider to another, typically to minimize downtime and prevent data loss.
- Downtime: A period when a website is unavailable or inaccessible to visitors, usually due to server issues, DNS cutover, or maintenance activities.
- Bandwidth: The amount of data that can be transferred from your hosting server to visitors’ browsers per month. Higher-traffic sites and sites with large files consume more bandwidth.
- Backup: A complete copy of your website’s files and databases stored separately from your live site, used to restore your site if data is lost, corrupted, or deleted.
- MX Records: DNS records that direct incoming email to your mail server. Updating MX records is how you change which host or email service handles your email during migration.