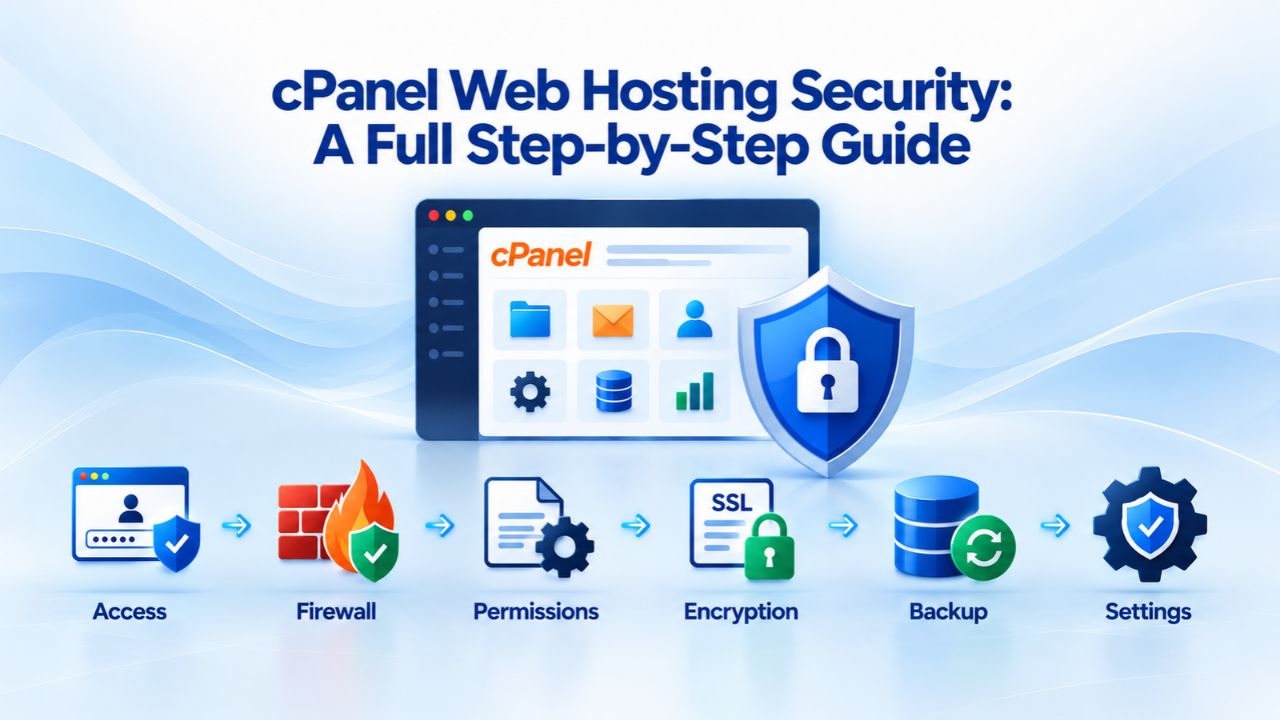
Why cPanel Security Matters
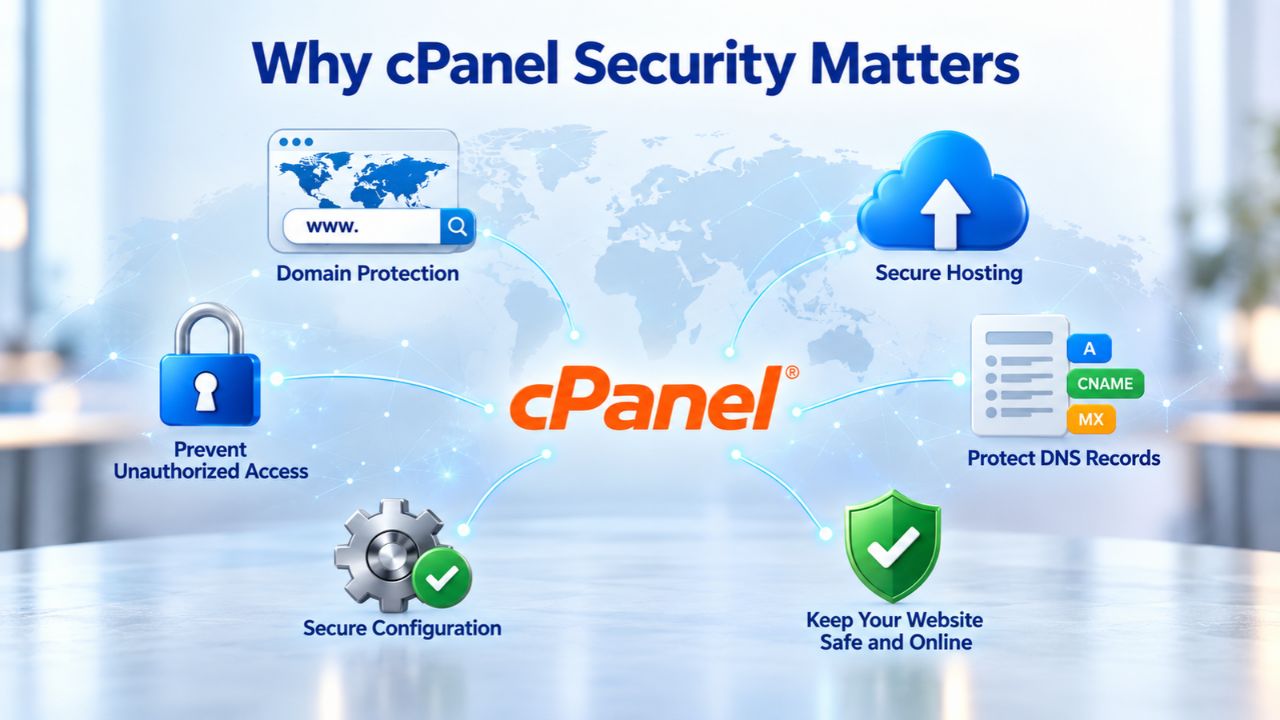
cPanel’s popularity makes it both an attractive target and a well-tested platform. Its native security features, when properly configured, significantly reduce your attack surface. This guide aims to move you beyond default settings into a genuinely hardened hosting environment. Every security step you take, from enabling two-factor authentication to scheduling regular backups, adds a layer of protection that makes your site a less appealing target to attackers.
The Threat Landscape & Why It Matters
Attackers exploit three primary categories of vulnerability: weak authentication (guessable or reused passwords, no two-factor verification), unencrypted connections (allowing credential theft in transit), and unpatched software (known exploits left unfixed). Each has a direct cPanel countermeasure you can implement immediately. Most account compromises start with a weak password or an outdated plugin, both preventable with the tools this guide covers. The attackers targeting your site are not sophisticated hackers with zero-day exploits; they’re automated systems scanning millions of sites for low-hanging fruit like unpatched WordPress installations or password-protected directories using “admin” as the username.
Niya Digital’s team has found that site owners who configure two-factor authentication, enable ModSecurity, and schedule regular backups see a dramatic drop in account compromise attempts and recover much faster if an attack does occur. The difference isn’t just the tools; it’s using them consistently. A site with 2FA enabled and ModSecurity active is rarely worth the effort when thousands of undefended sites exist. This guide shows you how to move out of the easy-target category into the protected category where security practices are genuinely implemented.
cPanel’s Role & Adoption at Scale
cPanel & WHM powers over 70 million domains worldwide, making it the industry standard for shared hosting account management. This scale creates both opportunity and risk: widespread deployment means hosting providers continuously test and refine cPanel’s security, but it also makes cPanel an attractive target for attackers studying common vulnerabilities. Hosting providers like those using GoDaddy infrastructure invest heavily in cPanel security precisely because so many users depend on it. Millions of installations have battle-tested cPanel’s security features, which are continuously updated to address emerging threats and regularly audited by third-party security researchers.
Because cPanel is so widely used, security patches are released regularly and applied across the industry relatively quickly. When a vulnerability is discovered and fixed, hosting providers can implement the patch immediately, protecting all their customers at once. This centralized approach to security patching is one major advantage of using a popular, well-maintained control panel like cPanel rather than a custom or obscure hosting interface that receives infrequent updates.
Business Web Hosting Plans & Pricing
Choose the hosting plan that fits your website, WordPress site, or growing business. Compare features, storage, performance, security, and website capacity to find the right hosting environment for your needs.
cPanel Starter
cPanel Hosting that's easy, reliable and lightning-fast.
- 1 website
- 30 GB storage
- Unmetered bandwidth*

cPanel Economy
cPanel Hosting that's easy, reliable and lightning-fast.
- 1 website
- 100 GB space
- Unlimited bandwidth*
- 100 email accounts**
- 10 MySQL databases (1 GB ea.)
cPanel Deluxe
cPanel Hosting that's easy, reliable and lightning-fast.
- Unlimited websites
- Unlimited space
- Unlimited bandwidth*
- 500 email accounts
- 25 MySQL databases (1 GB ea.)
cPanel Ultimate
cPanel Hosting that's easy, reliable and lightning-fast.
- Unlimited websites
- Unlimited space
- Unlimited bandwidth*
- 1000 email accounts
- Unlimited MySQL databases (1 GB ea.)
- 2X Processing power & memory (available for Linux/cPanel only)
- Premium DNS
- 1-year SSL certificate to secure customer data and increase search rankings
*We don't limit the amount of storage and bandwidth your site can use as long as it complies with our Hosting Agreement. Should your website bandwidth or storage usage present a risk to the stability, performance or uptime of our servers, we will notify you via email and may be required to upgrade, or we may restrict the resources your website is using.
**Email account storage is limited to 100 email accounts with 100 MB of total storage.
WordPress Basic
A great way to get started.
- 1 website
- 10 GB NVMe storage
- Unmetered bandwidth
- Free SSL Certificate *
- WordPress pre-installed
- Weekly backups
- Web Application Firewall
- Daily malware scans
- One-time malware removal

WordPress Deluxe
Improve your site performance with Cloudflare CDN.
- 1 website
- 20 GB NVMe storage
- Unmetered bandwidth
- Free SSL Certificate *
- WordPress pre-installed
- Daily backups
- Web Application Firewall
- Daily malware scans
- One-time malware removal
- Up to 2x faster performance with global Cloudflare CDN **
- Enhanced security with DDoS protection
- Staging site
WordPress Ultimate
Add online marketing with more sites, storage and security.
- 1 website
- 30 GB NVMe storage
- Unmetered bandwidth
- Free SSL Certificate *
- WordPress pre-installed
- Daily + on-demand backups
- Web Application Firewall
- Daily malware scans
- Unlimited malware removal
- Up to 2x faster performance with global Cloudflare CDN **
- Enhanced security with DDoS protection
- Staging site
- WordPress code optimizer
- Smart WordPress plugin manager
- Sell online with WooCommerce
*An SSL certificate is included with every site and free for the life of the hosting plan. Certificates are automatically installed, validated and renewed.
Web Hosting Plus Launch
For multiple basic sites.
- 100 GB storage*
- 4 GB RAM
- 2 CPUs
- Unmetered traffic
- 50 websites & databases
- Free, unlimited SSL for all your websites**

Web Hosting Plus Enhance
For high-traffic WordPress, Joomla, and other sites.
- 200 GB storage*
- 8 GB RAM
- 4 CPUs
- Unmetered traffic
- 100 websites & databases
- Free, unlimited SSL for all your websites**
Web Hosting Plus Grow
For advanced eCommerce sites like Magento.
- 300 GB storage*
- 16 GB RAM
- 8 CPUs
- Unmetered traffic
- 150 websites & databases
- Free, unlimited SSL for all your websites**
Web Hosting Plus Expand
For multiple basic sites.
- 400 GB storage*
- 32 GB RAM
- 16 CPUs
- Unmetered traffic
- 200 websites & databases
- Free, unlimited SSL for all your websites**
*The total amount of usable storage capacity for your particular Hosting Service(s) may differ from the represented capacity as there is required space for the operating system(s), system file(s) and other supporting file(s).
**If you cancel the Web Hosting Plus product, you will lose the associated SSL certificate as well.
The Shared Responsibility Model
Website security is fundamentally a shared responsibility. Your hosting provider handles the infrastructure, the servers, network, firewalls, and operating-system-level patches. You handle the account-level settings, passwords, application code, and your own backup strategy. When a breach occurs, determining responsibility means understanding which side of this line the failure occurred on. A server-level firewall misconfiguration is the provider’s responsibility; a weak WordPress password is yours.
What Your Hosting Provider Controls
GoDaddy’s support documentation clearly outlines this boundary: the provider maintains the control panel software, email system, FTP access, and manages root-level server customizations. It troubleshoots server and network issues but does not troubleshoot customer-installed applications or customer-controlled scripts. The provider also maintains server-level backups for disaster recovery and automatic snapshots in case of hardware failure or data-center incidents. These infrastructure-level backups are the provider’s responsibility and ensure that if a physical server fails, the backup infrastructure is separate and safe.
The hosting provider’s responsibility ends at infrastructure and fundamental system administration. Your site’s vulnerability to malware, weak passwords, or unpatched plugins falls outside this boundary. A plugin conflict that breaks your WordPress installation, a misconfigured application that leaks customer data, or a weak cPanel password that allows unauthorized access are all your responsibility to prevent and remediate. The provider gives you the tools (cPanel, server access, backup mechanisms); how you use those tools determines your actual security posture.
What You Must Handle Yourself
Your site’s security ultimately rests on decisions only you can make. A strong cPanel password is worthless if you reuse it across five other sites and one of those sites leaks credentials in a breach. ModSecurity blocks many common web attacks, but a vulnerable plugin in your WordPress installation can still be exploited if the plugin author hasn’t patched a known vulnerability. Backups exist only if you enable them, schedule them to run at appropriate intervals, and periodically test that they can actually be restored. You must maintain your own backup strategy separate from the provider’s infrastructure backups, regularly update your CMS and plugins, use strong and unique passwords, and monitor your account activity for anomalies.
Think of this responsibility as ongoing maintenance, not a one-time setup. You don’t configure two-factor authentication once and forget about it; you need to keep your recovery codes safe and update them if you change devices. You don’t update WordPress once and assume you’re secure; you need to enable automatic updates and periodically verify they’re working. This mindset shift, from “security is a project” to “security is a practice”, is what separates frequently compromised sites from genuinely protected sites.
Securing Your cPanel Login
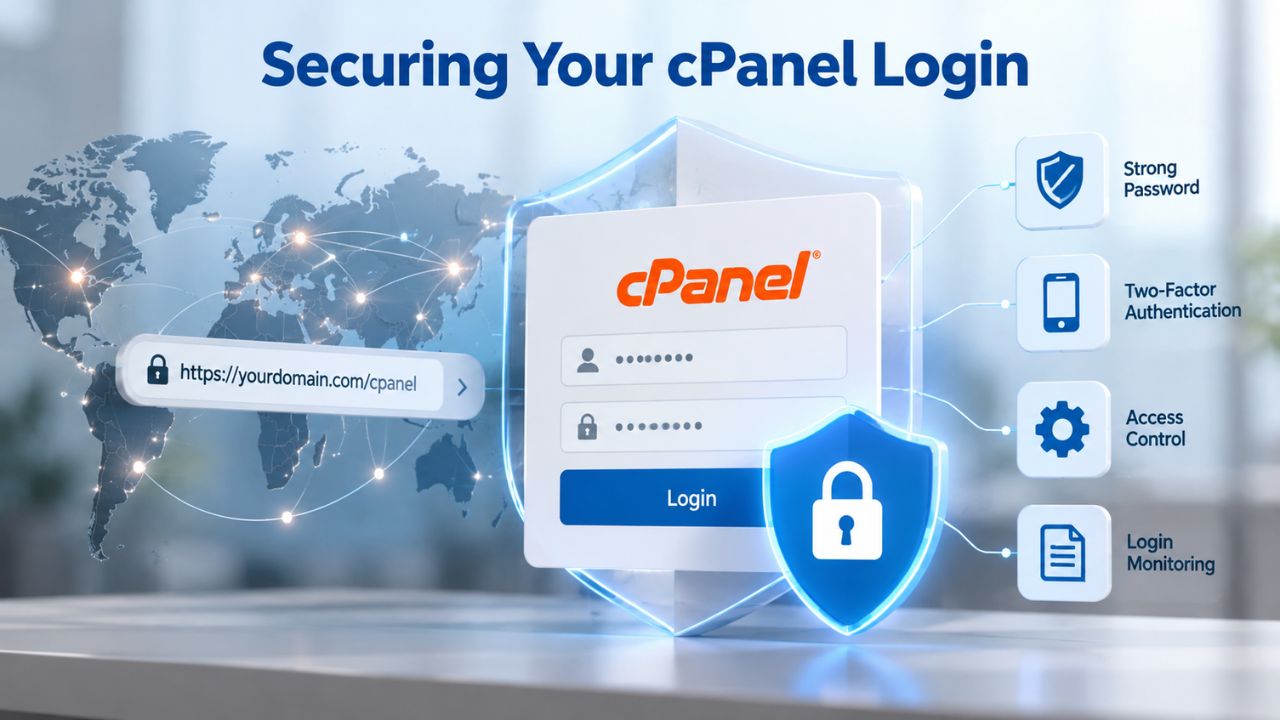
A strong cPanel login is your first line of defense. Attackers commonly use automated password-guessing tools that try thousands of common passwords per minute. A weak password, one using a dictionary word, personal information, or a simple number sequence, can be cracked in hours or less. By contrast, a strong password with random characters and adequate length can withstand years of automated guessing. Adding two-factor authentication raises the bar even further, requiring an attacker to possess both your password and your phone.
Strong Passwords & Password Generators
Create a cPanel password with at least 16 characters, including uppercase letters, lowercase letters, numbers, and special symbols. Avoid dictionary words, personal information (like your pet’s name or birth year), and predictable patterns (like 123456 or qwerty). The challenge is that humans are terrible at creating truly random passwords; our brains naturally lean toward patterns we can remember. That is why cPanel includes a built-in password generator. Access it under Security > Password & Security when you log in, and let it suggest a strong password rather than inventing one yourself.
Store your password in a password manager (such as Bitwarden, 1Password, or Dashlane), not in a browser autocomplete, email draft, or sticky note. A password manager encrypts your passwords and makes it easy to use a unique, strong password for every service. Change your cPanel password every 90 days, and never reuse old passwords. According to cPanel’s official security guidance, this single practice- strong, unique, regularly rotated passwords- stops the majority of account takeovers before two-factor authentication even becomes necessary. Many breaches happen because users reuse the same password across dozens of sites, and when one site is compromised, attackers immediately try that password on other services.
Two-Factor Authentication & Brute-Force Protection
Two-factor authentication adds a second verification step beyond your password. When 2FA is enabled, logging into cPanel requires two pieces of information: your password and a time-limited code generated by an app on your phone (such as Google Authenticator or Authy). Even if an attacker somehow guesses or steals your password, they cannot access your account without that second code, which changes every 30 seconds and exists only on your phone. To enable 2FA, navigate to Security > Two-Factor Authentication in cPanel and follow the setup wizard. cPanel will display a QR code; scan it with your authentication app, and you’re done.
Two-factor authentication significantly reduces the risk of account compromise from shared or lost passwords and protects against password-guessing attacks, including automated brute-force and dictionary attacks. cPHulk, cPanel’s built-in brute-force protection service, automatically rate-limits repeated failed login attempts. After several wrong passwords in a short window, the account locks for a period of time. This makes automated password-guessing attacks impractical; an attacker can no longer fire thousands of login attempts per hour without hitting the rate limit. cPHulk is enabled by default and requires no configuration; it simply works in the background.
Enabling and Configuring SSL/TLS
Every website should use HTTPS today. Search engines like Google rank HTTPS sites higher in search results, visitors see a padlock icon indicating a secure connection, and browsers increasingly warn visitors about non-HTTPS sites. Beyond these benefits, HTTPS is essential for protecting sensitive data. If your site has any login form, payment form, or contact form, HTTPS isn’t optional; it’s a fundamental security requirement. Modern certificates are free (via Let’s Encrypt) and automatic, making the technical barrier to HTTPS essentially zero.
Installing Free Let’s Encrypt Certificates
cPanel’s SSL/TLS interface allows you to generate, install, and automatically renew free SSL certificates from Let’s Encrypt. Navigate to Security > SSL/TLS and select “Manage SSL for your site (HTTPS).” Choose the domain you want to secure, and cPanel will auto-generate a free Let’s Encrypt certificate with no manual steps, no certificate authority contact required, and no upfront cost. The process is so automated that after a few clicks, your domain is protected with a valid, encrypted certificate. cPanel automatically renews Let’s Encrypt certificates every 90 days, so you never need to renew them manually.
Once installed, your website’s URL changes from http:// to https://, and visitors see a padlock icon in their browser address bar. This visual signal builds trust and is now expected. Your email clients, shopping carts, and login pages all run over HTTPS. Google’s search ranking algorithm also rewards sites with HTTPS, a security choice that boosts SEO while protecting visitors. The only legitimate reason not to use HTTPS today is ignorance of the process, which this guide is correcting. If your site is not yet HTTPS, enabling it is your single highest-priority security task.
Understanding TLS Versions & Cipher Strength
cPanel & WHM support TLS 1.2 and TLS 1.3, with TLS 1.2 enabled by default. TLS 1.3 is newer and slightly faster but requires OpenSSL 1.1.1 or higher. Most modern browsers and mobile devices support both versions; older devices may not support TLS 1.3. For most sites, the default configuration (TLS 1.2) is the right choice. You don’t need to manually change TLS versions unless you have a specific compatibility requirement.
cPanel’s Certificate Authority Authorization (CAA) records restrict which Certificate Authorities may issue certificates for your domain, adding a layer of protection against certificate mis-issuance. You can configure CAA records through cPanel’s Zone Editor if you want to lock down issuance to a single CA, though this step is optional for most users. A CAA record says “only Let’s Encrypt can issue certificates for my domain,” preventing other CAs from issuing unauthorized certificates even if an attacker compromises a CA’s system. For most sites, using Let’s Encrypt with the default settings is secure and sufficient.
Activating ModSecurity & Web Application Firewall
ModSecurity is enabled by default on most cPanel hosting, but you should verify it’s active on your domains and understand how to manage it. This section shows you how to confirm ModSecurity is running, what kinds of attacks it blocks, and how to handle the rare cases where it blocks legitimate traffic (called false positives). Most site owners never need to configure ModSecurity; it just works silently in the background. But understanding how it functions helps you troubleshoot the occasional false positive without reflexively disabling your firewall.
What ModSecurity Blocks & How It Works
ModSecurity detects and blocks attacks including SQL Injection (SQLi), Cross-Site Scripting (XSS), Local File Inclusion (LFI), Remote File Inclusion (RFI), Remote Code Execution (RCE), PHP Code Injection, HTTP Protocol Violations, and Shellshock. These are the attack categories listed in the OWASP Top 10 web application security risks, the industry standard for classifying web vulnerabilities. A SQL injection attack, for example, tries to trick your website’s database into executing unintended commands by injecting SQL code into a web form, maybe into a login field or search box. An attacker might enter admin’ OR ‘1’=’1 into a login form, hoping the injected SQL changes the query’s logic and grants access without a valid password.
ModSecurity blocks the request before it reaches your database, preventing the injection entirely. The attacker sees an error page instead of a successful login, then moves on to target an unprotected site. This is the whole point of a Web Application Firewall: it catches attacks at the entry point, before they can exploit your application. ModSecurity doesn’t require you to patch vulnerable code or fix insecure design; it provides a safety net that catches many attacks regardless of application design. Of course, ModSecurity is not a substitute for secure coding practices; it’s a belt-and-suspenders approach to application security.
Enabling & Managing ModSecurity
ModSecurity is enabled by default on cPanel hosting, but you can verify it’s active and manage it per domain. Navigate to Security > ModSecurity in cPanel, and you’ll see a list of your domains with an “On/Off” toggle for each. The recommended setting is On for all domains. Leave it as is unless you encounter a false positive, a legitimate request that ModSecurity mistakenly blocks. If a feature on your site suddenly breaks (a form submission fails, file uploads are blocked, or a specific page returns an error), check your application’s error logs for a ModSecurity rule ID (a numeric code), note the exact timestamp, and then contact your hosting provider’s support team.
Do not disable ModSecurity entirely to work around a false positive; disabling it removes protection for all visitors and all requests. Instead, ask your provider to whitelist the legitimate action or adjust just that specific rule while keeping the firewall active. This is a standard support request and typically takes a few minutes to resolve. Your provider can see ModSecurity’s rule set and often can identify which rule is too strict, then relax just that rule for your domain while keeping protection for everyone else. This granular approach protects your site while fixing the legitimate-traffic issue.
Getting Started with Niya Digital Web Hosting
Niya Digital’s Web Hosting service includes full cPanel access and support to implement every security step in this guide. Your hosting provider maintains firewalls, applies server patches, and backs up your account for disaster recovery. You maintain your cPanel settings, application security, and backup strategy. Start with two-factor authentication and automated backups, then expand your security posture based on your site’s risk profile.
Network & Access Control
Network access controls are particularly effective against credential-stuffing attacks, where attackers use leaked passwords from other breaches to try to log into millions of accounts. Most of these attacks come from data centers or botnets in specific geographic regions. If you’re in the United States and you see repeated login attempts from Eastern Europe, you can block that entire region. If you always log in from home and work, you can whitelist just those two IP addresses, making your account inaccessible from anywhere else on Earth.
IP Blocker & Restricting Admin Access
The IP Blocker tool allows you to block specific IP addresses or ranges from accessing your website or cPanel account. Navigate to Security > IP Blocker, enter an IP address or CIDR range you want to block, and cPanel adds it to a deny list. This is useful if you notice attack traffic from a specific IP address: block it, and the attacker’s requests are immediately rejected. Your web server won’t even process the connection; it simply drops it at the network level.
For extra protection on your own cPanel login, you can whitelist the IP addresses from which you personally access cPanel. If your Internet Service Provider (ISP) assigns you a static IP address (check with your ISP about whether you have a static IP), add that IP to an allowed list, so only logins from that IP succeed. This prevents unauthorized access even if your password somehow leaks. However, this requires coordination with your hosting provider if you travel, work from multiple locations, or use a VPN that changes your IP address. Before implementing IP whitelisting, discuss with your support team to make sure you won’t lock yourself out when you’re away from your home office.
Geo-Blocking & Regional Restrictions
Some hosting providers (including those running GoDaddy’s infrastructure) allow blocking entire regions or countries at the server level. This is useful if your site serves only one country or region, and all traffic from others is suspicious or unwanted. If you run a local business that serves only your city, blocking traffic from other countries makes sense. If you’re a content creator whose audience is primarily in North America, blocking traffic from countries where you know your site doesn’t have visitors reduces attack surface.
Discuss geo-blocking options with your hosting provider; it’s a server-level configuration, not a cPanel setting, but it’s often available with managed hosting plans. Your provider can typically block traffic by country code or by entire continents. The downside is that legitimate visitors from blocked regions can’t access your site, so think carefully about which regions you actually want to block. For most sites, geo-blocking is optional. For sites that genuinely have no business in certain regions, it’s a useful hardening step.
File & Directory Protection
Directory-level protection operates independently of your CMS or application. Even if WordPress is misconfigured or a plugin is vulnerable, a password-protected directory in front of it adds another barrier. To compromise your site, an attacker would need to defeat both the directory protection and the application’s security. This defense-in-depth approach means that no single misconfiguration completely exposes your site.
Password-Protecting Directories
The Directory Privacy tool (found under Files > Directory Privacy in cPanel) lets you restrict access to a folder using HTTP Basic Authentication. Navigate to the directory you want to protect, click Edit, and check “Password protect this directory.” Create one or more usernames and passwords for that directory. Visitors attempting to access the protected folder will see a browser login prompt; only those with valid credentials can proceed. The protection is straightforward: if you want to keep a folder private, password protection works well.
The server enforces the protection via a .htaccess file, which cPanel creates and maintains automatically. All subdirectories within the protected folder inherit the same credentials, so protecting /staging also protects /staging/uploads, /staging/includes, and any folders nested inside. This is ideal for protecting a staging environment, keeping it away from search-engine crawlers and casual visitors. You can give the staging credentials to team members or clients who need to review pre-production changes without exposing the staging site to the general public.
Hotlink & Leech Protection
Hotlink Protection prevents other websites from directly linking to your images, videos, or downloadable files, which would consume your bandwidth without your permission. When another website embeds an image from your site (using a direct image URL), they’re using your bandwidth to serve their content. Navigate to Security > Hotlink Protection, enable it, and specify file extensions you want to protect (such as .jpg, .pdf, .mp4). When another site tries to embed your image, it blocks the request, and visitors see a broken-image icon instead. This forces the other site to host its own copy or remove the link, saving you bandwidth and preventing your content from being used without permission.
Leech Protection prevents users from publicly posting their username and password to a password-protected directory, which would otherwise give everyone access to that restricted area. When enabled, leech protection monitors for suspicious access patterns (like automated downloading of all files in a protected directory) and blocks them. Navigate to Security > Leech Protection, select the directory you want to protect, and enable the feature. If someone tries to abuse access to a protected resource by downloading everything at once, leech protection detects the pattern and blocks further requests from that user, preserving your bandwidth.
Backup Strategy & Disaster Recovery
Backups are not a luxury for large sites; they’re essential for every site, regardless of size. A personal blog with no monetization still contains years of personal writing and memories, worth backing up. A small business site contains customer information and business records that are critical to back up. An eCommerce store contains customer data, payment information, and transaction history, which many jurisdictions require you to back up. The cost of recovery without backups (lost revenue, manual rebuilding, potential legal liability) far exceeds the cost of maintaining regular backups.
Setting Up Automated Backups & Choosing Destinations
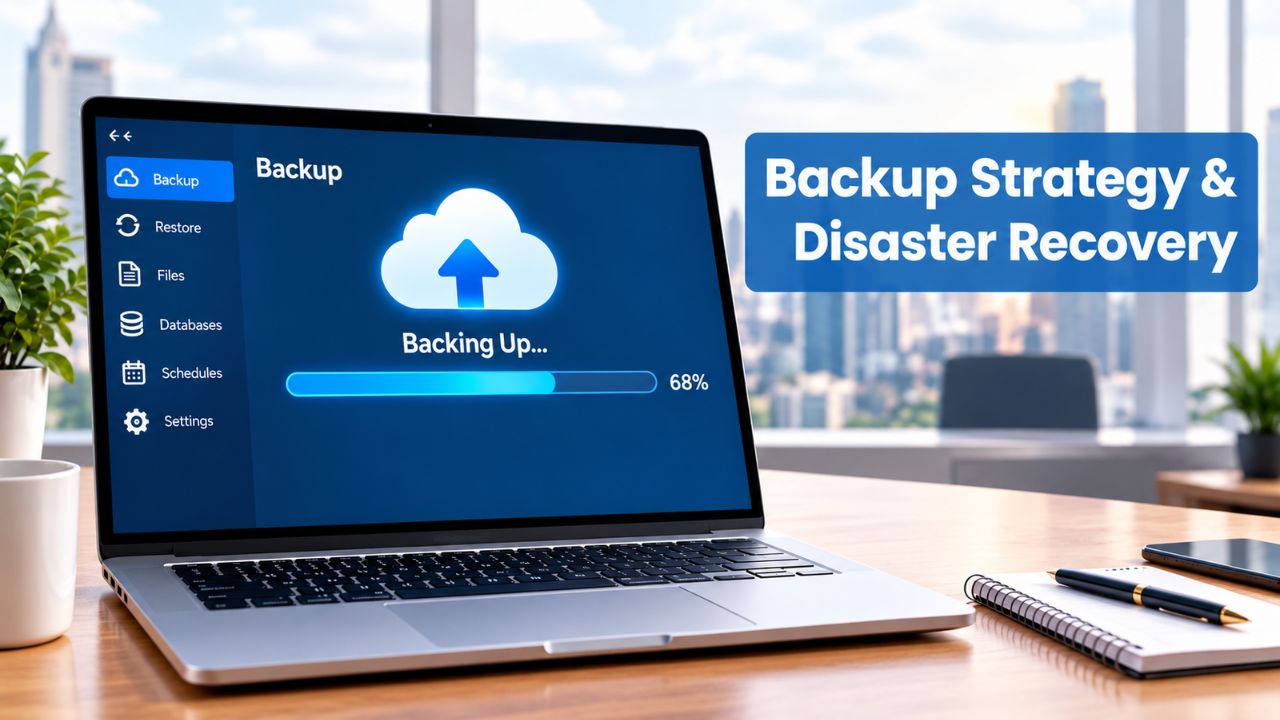
Navigate to Files > Backup in cPanel to access the backup interface. You’ll find options to schedule automated backups daily, weekly, or monthly. Choose a frequency that matches how often your site changes. An eCommerce store processing orders daily should back up daily. A blog updated twice a week can use weekly backups. A portfolio site that rarely changes can use monthly backups. The rule is: you’re comfortable losing X days of data if something goes wrong, back up more frequently than X days. If you post new content twice a week and lose three days of content, that’s unacceptable. Back up daily to ensure no more than one day of posts are lost.
Specify what to include in the backup: your entire account (files, databases, email configuration) or partial backups (just files, just one database, just email). Most users choose full account backups for simplicity, but partial backups help if your account is large and backups run slowly. By default, backups are stored on your hosting server and consume your disk-space allocation. For better protection, send backups to an external destination, such as Amazon S3, Google Drive, or an FTP server.
This ensures that if your server is compromised or suffers hardware failure, your backup is safe elsewhere. cPanel supports backup scheduling with daily, weekly, and monthly retention policies that define how many old backups to keep before they’re automatically deleted to save storage space.
Testing & Maintaining Backup Reliability
A backup is only useful if you can restore from it. After scheduling your first automated backup, wait for it to complete, then test a restoration in a staging environment (a copy of your site on a subdomain, such as staging.example.com). Download the backup, extract it, and verify that files and databases are intact. This one-time test gives you confidence that if disaster strikes, you can actually recover. Many site owners set up backups but never test them, only to discover during an actual emergency that the backups are corrupted or incomplete. Testing takes an hour; recovery without tested backups takes days or weeks.
Check your backup logs regularly (under Files > Backup in cPanel) to confirm they’re completing successfully. If backups keep failing because of low disk space, an external FTP connection timeout, or authentication errors, investigate the error and contact your hosting provider if you need help. Backup failures often have simple causes (FTP credentials changed, target server temporarily down) but are easy to miss if you’re not checking logs. A backup that exists but has never been tested and hasn’t been verified to complete successfully is almost as useless as no backup at all. Combine three practices- regular automated backups, external storage, and periodic testing- and you’re genuinely protected.
| Security Feature | What It Does | Status in cPanel | Recommendation |
|---|---|---|---|
| Strong Password + Generator | Prevents brute force & dictionary attacks | Built-in | Always enable; rotate every 90 days |
| Two-Factor Authentication (2FA) | Adds second verification layer | Built-in (Security section) | Enable for all accounts |
| cPHulk Brute Force Protection | Rate-limits repeated failed logins | Enabled by default | Keep enabled; no config needed |
| SSL/TLS (Let’s Encrypt + third-party) | Encrypts data in transit, enables HTTPS | Built-in | Enable for all domains |
| ModSecurity WAF | Detects & blocks web attacks (SQLi, XSS, RCE) | Enabled by default | Keep enabled; manage false positives |
| IP Blocker | Restricts access by IP address | Built-in (Security section) | Use for admin/sensitive access |
| Directory Password Protection | Authenticates access to sensitive folders | Built-in (Files > Directory Privacy) | Use for non-public staging/admin content |
| Hotlink Protection | Prevents bandwidth theft via direct linking | Built-in (Security section) | Enable for media-heavy sites |
| SSH Keys | Enables passwordless, secure server access | Built-in (Security > SSH Access) | Configure for automation & 2FA |
| Automated Backups | Enables data recovery after incidents | Built-in (Files > Backup) | Schedule regular backups; test restoration |
Updates & Ongoing Maintenance
Initial configuration is not enough. Attackers constantly discover new software vulnerabilities, and hosting providers release patches as soon as fixes are available. Staying current is an ongoing responsibility. A site that’s secure today can become vulnerable tomorrow if you don’t apply security updates. This section covers how to keep cPanel, your CMS, plugins, and server software up-to-date. It also covers monitoring your account activity for signs of compromise. Security is not a state you reach and then stop worrying about; it’s a continuous practice.
Keeping cPanel & CMS Current
Your hosting provider handles cPanel updates automatically in most cases, but you should periodically confirm that your cPanel version is current. Ask your support team to confirm your cPanel version, and check cPanel’s website or your hosting provider’s documentation to confirm you’re running a recent release. Outdated cPanel versions may have known security vulnerabilities that your provider has chosen not to patch, which is a red flag. cPanel issues security updates regularly; if your provider is slow to update (more than a month after a security release), escalate the concern. A hosting provider should apply security patches within days, not months.
Most website compromises come not from cPanel itself, but from outdated WordPress plugins, unpatched CMS cores, or vulnerable third-party applications. Every month, visit Software/Services in cPanel (or your application’s admin panel) to check for updates. Enable automatic updates where available. For WordPress, navigate to Settings > Updates and enable auto-updates for plugins, themes, and the WordPress core. Most WordPress plugins and themes now support automatic updates, reducing your maintenance burden. For other CMS platforms (Drupal, Joomla, Magento), check the admin dashboard for an updates section and enable automatic patching. Automatic updates mean you can sleep easier knowing your site is current, even if you forget to check manually.
Monitoring Logs & Security Events
cPanel logs login attempts, backup successes or failures, and security events. Periodically review these logs (under Files > Raw Access Logs or Security > Error Log in cPanel) to spot anomalies: repeated failed logins from unexpected IP addresses, midnight maintenance windows you didn’t authorize, or backup failures that might indicate disk issues. These logs aren’t always easy to parse by hand, but checking them occasionally keeps you aware of your account’s activity. If you see anything suspicious, a successful login from an unfamiliar country, a huge spike in failed logins, or mysterious file modifications, take action immediately.
If you see anything suspicious in your logs, change your password immediately, enable or reset two-factor authentication, and contact your hosting provider’s security or support team with specific details. Provide timestamps, IP addresses, affected files, and any error messages. The faster you report, the faster they can investigate server-side logs and help you regain control of your account. Many compromises go unnoticed for weeks because site owners don’t monitor their logs. By checking occasionally, you can catch signs of compromise early, before an attacker has time to cause significant damage or establish persistent backdoors.
Building a Site-Owner Security Mindset
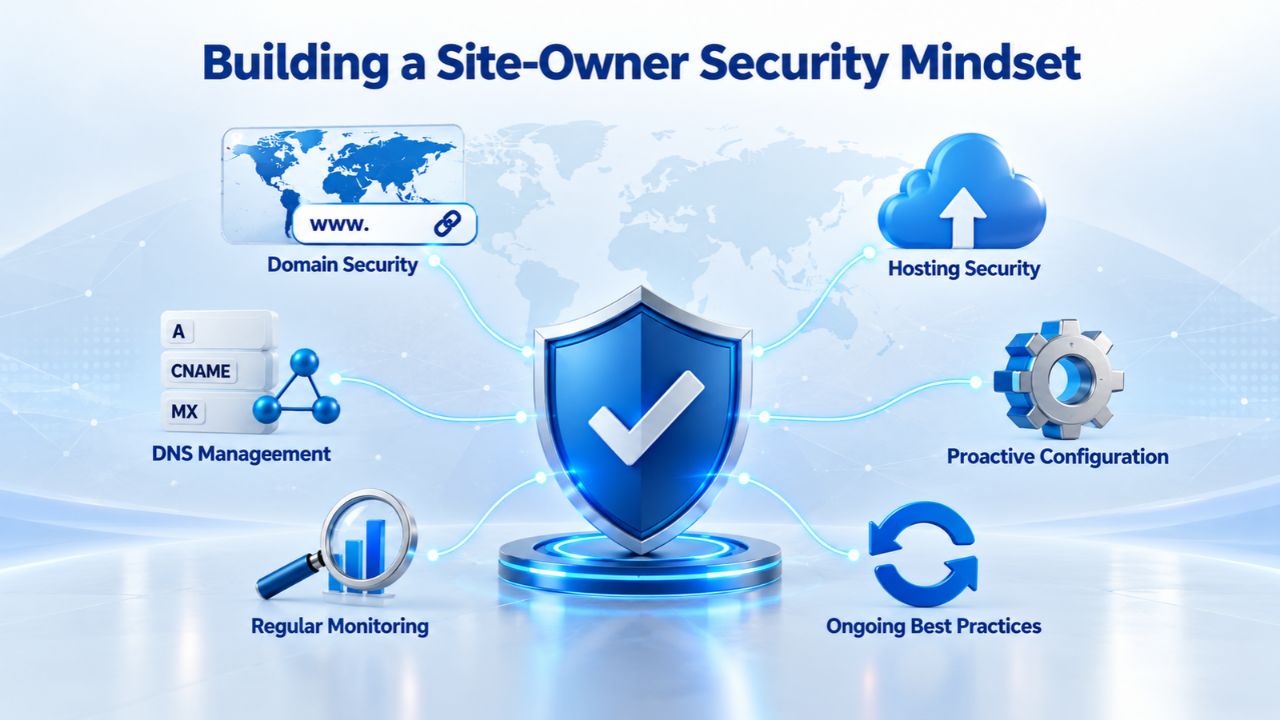
Website security is fundamentally a partnership between you and your hosting provider. Your hosting provider maintains the infrastructure, applies server patches, and provides security tools. You configure those tools, maintain your own security practices, and monitor your account activity. When a breach occurs, both parties have roles: the provider investigates server-level issues, and you investigate application-level issues. Neither can succeed without the other. This final section covers how to build this partnership, establish security habits, and respond to incidents.
Security as Partnership & Shared Language
Talk to your hosting provider about security as a partnership. Use terms like “brute-force protection,” “two-factor authentication,” “ModSecurity rule,” and “backup retention policy”; they understand these and can help you troubleshoot. When your support team says “update your plugins,” recognize it as a security responsibility, not an optional task. When they recommend enabling ModSecurity or scheduling backups, they’re not overselling their services; they’re providing best-practice guidance based on thousands of sites they manage. Trust your provider’s security recommendations and implement them promptly.
When you encounter a security incident, a suspected account compromise, a malware infection, an unexplained file change, or unusual traffic patterns, report it immediately to your hosting provider’s support team with specific details: timestamps, affected files, suspicious activity from your logs, and any error messages. The faster you report, the faster they can isolate and remediate the issue. Hosting providers have access to server logs, traffic patterns, and system resources you don’t. They can often determine whether an attack came from outside your account or from compromised code inside your account. Provide as much detail as possible so they can investigate efficiently.
Regular Audits, Habit Loops & Incident Response
Set calendar reminders: every 90 days, change your cPanel password. Every month, check for plugin updates and review backup logs. Every quarter, test a restoration from your backup. These small, recurring habits are far more effective than a one-time security overhaul. Security is not a project with a finish line; it’s a practice you maintain continuously. Building habit loops, routines that you follow automatically, is far more sustainable than relying on willpower or remembering security tasks ad hoc.
Build a security posture that fits your site’s risk level and your capacity to maintain it. A personal blog with no customer data has different security needs than an eCommerce store handling credit cards. A nonprofit with donor information faces different threats than a portfolio site. A government agency has different compliance requirements than a freelancer’s website. Right-size your effort: configure what matters most to your situation, and maintain it consistently.
Your hosting provider (Niya Digital, powered by GoDaddy infrastructure) maintains firewalls, applies server patches, and backs up your account-level data for disaster recovery. You maintain your cPanel settings, application security, and backup strategy. This partnership, with both parties doing their part consistently, is what keeps modern websites secure in an increasingly hostile threat environment.
| Site Type / Use Case | Recommended Hosting Approach | Key Security Priorities | Typical Setup Time |
|---|---|---|---|
| Personal blog, low traffic | Shared hosting with cPanel | Strong password + 2FA + SSL + ModSecurity enabled | 10–15 minutes |
| Small business with contact forms | Shared or managed hosting with cPanel | 2FA + ModSecurity + directory password protection + automated backups | 30 minutes |
| eCommerce store (payment processing) | Managed hosting with cPanel + enhanced WAF | 2FA + SSL + ModSecurity + IP whitelisting + daily backups + auto-updates enabled | 1–2 hours |
| Agency managing multiple client sites | Reseller hosting with WHM + per-account cPanel | Per-account 2FA enforcement + per-domain SSL + centralized backup strategy + external storage | 2–4 hours |
| Medical/legal office with patient/client data | Managed hosting with advanced WAF + compliance review | 2FA + ModSecurity + directory password protection + encrypted backups + HIPAA/compliance guidance | 2–3 hours |
| High-traffic membership site with user accounts | VPS or managed hosting with cPanel + advanced security | 2FA + SSL + ModSecurity + rate limiting + advanced access controls + real-time monitoring | 3–4 hours |
Getting Started with cPanel Web Hosting
Your hosting provider maintains firewalls and server patches. You maintain cPanel settings, application security, and backup strategy. Niya Digital’s Web Hosting service includes full cPanel access and support guidance through every step of this security framework. Whether you’re setting up your first secure site or migrating an existing one, the features and steps above form a complete, practical security plan. Review the tables and checklists in this guide to track your progress, check off each item as you configure it, and make your site significantly more secure within an hour.
Frequently Asked Questions
What if I forget my 2FA code and can’t log in?
Each time you enable 2FA, cPanel generates a list of backup codes. Store these codes in a secure location, your password manager or a locked drawer, not in your email or browser bookmarks. If you lose access to your phone’s authentication app, you can use a backup code to log in once, disable 2FA, and set it up again with a new device.
Save these backup codes immediately after enabling 2FA, before you finish the setup wizard. If you lose both your phone and backup codes, contact your hosting provider’s support team; they can help you regain access to your account after verifying your identity.
Is Let’s Encrypt SSL as secure as a paid certificate?
Yes. Let’s Encrypt certificates use the same encryption strength and industry-standard cipher suites as commercial certificates from other CAs. The difference is in verification scope: Let’s Encrypt verifies only that you control the domain (domain validation).
In contrast, some paid certificates from other providers may verify your business identity (organization validation). For website security (HTTPS encryption), both are equally strong. For most sites, Let’s Encrypt is the right choice: free, automatic, and cryptographically sound.
Can I use the same password for cPanel and WordPress?
No. Use a unique password for each service, and ideally for every online account. If a WordPress plugin is compromised, attackers gain access to your WordPress database but not your cPanel account.
If you use the same password everywhere, one breach exposes everything: your cPanel, your email, and other sites where you reused the password. A password manager makes managing unique passwords trivial; there’s no excuse for password reuse today.
Does ModSecurity slow down my website?
No. ModSecurity operates at the server level and is highly optimized. The performance impact is negligible, a few milliseconds at most, often less than other server-level processing.
You won’t measure a meaningful difference in page load times. The security benefit of blocking attacks far outweighs any imperceptible performance cost. Leave ModSecurity enabled on all domains.
How often should I back up my site?
Back up as often as your content changes. An eCommerce store processing orders daily should back up daily. A blog updated twice weekly can use weekly backups. A portfolio site that rarely changes can use monthly backups.
The rule: you’re comfortable losing X days of data if something goes wrong, back up more frequently than X days. If you post new content and get customer inquiries daily, daily backups make sense. If your site is static and rarely changes, monthly backups suffice.
What is a false positive in ModSecurity?
A false positive is when ModSecurity blocks a legitimate request, something you actually want to happen. This might occur if you upload a file with a suspicious name (like shell.php, even for a legitimate purpose) or if a custom form submission or API call matches an attack pattern.
Don’t disable ModSecurity to work around a false positive; instead, ask your hosting provider to whitelist that specific legitimate action or adjust the specific rule while keeping the firewall on. This is a standard support request and typically resolves in a few minutes.
Can I block an entire country from accessing my site?
Yes, but this requires server-level configuration, not cPanel settings. Contact your hosting provider to discuss geo-blocking by country IP ranges. This is useful if you serve only one region and want to reduce attack traffic from elsewhere. The downside is that legitimate visitors from blocked regions can’t access your site, so think carefully about which regions you actually want to block.
Is SSH key access more secure than password login?
Yes. SSH keys are cryptographic credentials that cannot be brute-forced the way passwords can. If you use cPanel, SSH access, or automated deployments, set up SSH keys under Security > SSH Access in cPanel instead of relying on passwords alone for automation tasks. SSH keys are the gold standard for server access; if you’re running scripts or deployments, they’re far superior to passwords.
What happens if my backup fails?
cPanel logs backup failures. Check your backup logs (under Files > Backup in cPanel) to see what went wrong: out of disk space, external FTP connection timeout, failed authentication, network timeout. Most failures have simple causes. If backups keep failing, contact your hosting provider; you may need more disk space, FTP credentials may have expired, or there may be a network connectivity issue between your hosting provider and your backup destination.
Should I enable both 2FA and IP restriction for extra security?
Yes. Layering security controls (defense in depth) is best practice. Enable 2FA for all logins, and if you have a static IP address, whitelist it in your IP restriction settings. This gives an attacker multiple barriers to overcome. Even if an attacker somehow obtains your password and your 2FA code (both unlikely), they still can’t log in from an IP address outside your whitelist.
What is cPHulk, and do I need to configure it?
cPHulk is cPanel’s built-in brute-force protection service. It automatically rate-limits repeated failed login attempts and locks an account after several wrong passwords. It’s enabled by default and requires no configuration; it works silently in the background. If you see notifications about cPHulk blocking login attempts, it’s doing its job: defending against brute-force attacks.
Can I restore a single file from my backup without restoring everything?
Yes. cPanel’s Backup interface lets you download full or partial backups, and you can extract individual files from a backup archive without restoring your entire account. If you accidentally delete a file and need to recover just that one file, partial restoration is faster and safer than restoring everything and overwriting your current site.
How do I know if ModSecurity is working?
Navigate to Security > ModSecurity in cPanel. If the toggle is set to “On” for your domains, ModSecurity is active. You won’t see day-to-day evidence of it working; that’s the point. It silently blocks attacks in the background, preventing malicious requests before they reach your site. Check your application error logs if you suspect ModSecurity is blocking legitimate traffic.
What should I do if I suspect my account has been compromised?
Change your cPanel password immediately. Reset or re-enable two-factor authentication. Check your backup logs to see if anything unusual occurred. Review your file lists and database contents for modifications. Contact your hosting provider’s security or support team with detailed information, timestamps, affected files, suspicious activity from your logs, and any error messages. They can investigate server-side logs and help you regain control.
Is password-protecting a directory with .htaccess as secure as application-level login?
HTTP Basic Authentication (what .htaccess uses) is secure for encryption (passwords travel over HTTPS), but it’s simpler than application-level login. It’s ideal for staging environments, admin tools, and restricted resources. For user-facing login (like WordPress or custom applications), use the application’s native login system, which offers more control, detailed logging, and options such as password reset flows.
Glossary
- Brute Force Attack: An automated attempt to gain account access by systematically guessing passwords or trying all possible combinations until one works. Rate-limiting and strong passwords make brute-force attacks impractical.
- cPanel: A graphical user interface (control panel) that lets you manage your web hosting account, including files, databases, email, domains, and security settings, without needing command-line or SSH access.
- ModSecurity: An open-source Web Application Firewall (WAF) that inspects incoming web requests and blocks those matching known attack patterns, including SQL injection, cross-site scripting, and remote code execution attempts.
- SSL/TLS Certificate: A digital credential that encrypts the connection between a visitor’s browser and your web server, protecting data in transit and enabling HTTPS. Let’s Encrypt provides free certificates; other CAs offer commercial options.
- Two-Factor Authentication (2FA): A security method requiring two pieces of information to log in: something you know (your password) and something you have (a time-limited code from your phone authentication app). Drastically reduces the risk of account compromise.
- Web Application Firewall (WAF): Security software that monitors and filters web traffic, blocking requests that appear to be attacks. ModSecurity is cPanel’s built-in WAF.
- Uptime / Service Level Agreement (SLA): A hosting provider’s promise of website availability, typically expressed as a percentage (like 99.9% uptime). The SLA documents the provider’s commitment and remedies if availability falls short of the promise.