
Understanding Email Hosting and Why It Matters for Your Domain
Email hosting is the foundation of professional business communication. When you create email accounts tied to your domain, you control your brand identity, build credibility with clients and partners, and ensure reliable message delivery. This section explains what email hosting is, why it matters for your business, and how it integrates into your Web Hosting plan.

Professional Branding Through Domain-Based Email
A business email address matching your domain name signals professionalism and trust in every message you send. When clients see a message from someone@yourbusiness.com, they immediately perceive your business as established and credible, unlike generic free email services that can appear unprofessional or temporary. This professional appearance extends across all correspondence, proposals, invoices, and customer support, reinforcing your brand identity with every interaction.
The difference is tangible in how your business is perceived. Niya Digital’s team has found that small business owners who upgrade to domain-based email see immediate improvements in response rates and perceived legitimacy, especially in initial outreach conversations with new clients. Your email address becomes part of your brand, just like your website and business name.
Shared Web Hosting Includes Email as a Standard Feature
Most shared Web Hosting plans, including those offered through Niya Digital’s cPanel Web Hosting service running on GoDaddy’s infrastructure, include email account creation as a standard feature with no additional cost. You don’t need to purchase a separate email service or subscribe to a different provider; email hosting is fully integrated into your hosting account. This integration significantly simplifies your business operations.
Having email, hosting, and domain management in one place means one account login, one control panel, and one support relationship for your most critical online services. When you need help with your email, your hosting provider already has access to your account and can assist quickly. This unified approach saves time, reduces confusion, and makes scaling your business straightforward as your needs grow.
Business Web Hosting Plans & Pricing
Choose the hosting plan that fits your website, WordPress site, or growing business. Compare features, storage, performance, security, and website capacity to find the right hosting environment for your needs.
cPanel Starter
cPanel Hosting that's easy, reliable and lightning-fast.
- 1 website
- 30 GB storage
- Unmetered bandwidth*

cPanel Economy
cPanel Hosting that's easy, reliable and lightning-fast.
- 1 website
- 100 GB space
- Unlimited bandwidth*
- 100 email accounts**
- 10 MySQL databases (1 GB ea.)
cPanel Deluxe
cPanel Hosting that's easy, reliable and lightning-fast.
- Unlimited websites
- Unlimited space
- Unlimited bandwidth*
- 500 email accounts
- 25 MySQL databases (1 GB ea.)
cPanel Ultimate
cPanel Hosting that's easy, reliable and lightning-fast.
- Unlimited websites
- Unlimited space
- Unlimited bandwidth*
- 1000 email accounts
- Unlimited MySQL databases (1 GB ea.)
- 2X Processing power & memory (available for Linux/cPanel only)
- Premium DNS
- 1-year SSL certificate to secure customer data and increase search rankings
*We don't limit the amount of storage and bandwidth your site can use as long as it complies with our Hosting Agreement. Should your website bandwidth or storage usage present a risk to the stability, performance or uptime of our servers, we will notify you via email and may be required to upgrade, or we may restrict the resources your website is using.
**Email account storage is limited to 100 email accounts with 100 MB of total storage.
WordPress Basic
A great way to get started.
- 1 website
- 10 GB NVMe storage
- Unmetered bandwidth
- Free SSL Certificate *
- WordPress pre-installed
- Weekly backups
- Web Application Firewall
- Daily malware scans
- One-time malware removal

WordPress Deluxe
Improve your site performance with Cloudflare CDN.
- 1 website
- 20 GB NVMe storage
- Unmetered bandwidth
- Free SSL Certificate *
- WordPress pre-installed
- Daily backups
- Web Application Firewall
- Daily malware scans
- One-time malware removal
- Up to 2x faster performance with global Cloudflare CDN **
- Enhanced security with DDoS protection
- Staging site
WordPress Ultimate
Add online marketing with more sites, storage and security.
- 1 website
- 30 GB NVMe storage
- Unmetered bandwidth
- Free SSL Certificate *
- WordPress pre-installed
- Daily + on-demand backups
- Web Application Firewall
- Daily malware scans
- Unlimited malware removal
- Up to 2x faster performance with global Cloudflare CDN **
- Enhanced security with DDoS protection
- Staging site
- WordPress code optimizer
- Smart WordPress plugin manager
- Sell online with WooCommerce
*An SSL certificate is included with every site and free for the life of the hosting plan. Certificates are automatically installed, validated and renewed.
Web Hosting Plus Launch
For multiple basic sites.
- 100 GB storage*
- 4 GB RAM
- 2 CPUs
- Unmetered traffic
- 50 websites & databases
- Free, unlimited SSL for all your websites**

Web Hosting Plus Enhance
For high-traffic WordPress, Joomla, and other sites.
- 200 GB storage*
- 8 GB RAM
- 4 CPUs
- Unmetered traffic
- 100 websites & databases
- Free, unlimited SSL for all your websites**
Web Hosting Plus Grow
For advanced eCommerce sites like Magento.
- 300 GB storage*
- 16 GB RAM
- 8 CPUs
- Unmetered traffic
- 150 websites & databases
- Free, unlimited SSL for all your websites**
Web Hosting Plus Expand
For multiple basic sites.
- 400 GB storage*
- 32 GB RAM
- 16 CPUs
- Unmetered traffic
- 200 websites & databases
- Free, unlimited SSL for all your websites**
*The total amount of usable storage capacity for your particular Hosting Service(s) may differ from the represented capacity as there is required space for the operating system(s), system file(s) and other supporting file(s).
**If you cancel the Web Hosting Plus product, you will lose the associated SSL certificate as well.
Accessing cPanel and Navigating the Email Section
cPanel is your control panel for managing everything in your Web Hosting account, including email. Understanding where to find the Email Accounts interface and how to navigate it is the first practical step toward setting up your professional email addresses. This section covers logging into cPanel and locating the email management tools.
Logging In to Your cPanel Account
To create and manage email accounts, you’ll log into your hosting account’s cPanel dashboard through a URL provided by your hosting provider. You can typically find the login link in your hosting welcome email or in your hosting provider’s customer portal. Once you’re logged in, you’ll see cPanel’s home page with various sections organized by function. Look for the Email section in the main menu; it’s clearly labeled and grouped with other mail-related tools for easy access.
Once you’ve clicked into the Email section, you’ll find the Email Accounts interface. This is where you’ll spend most of your time when creating and managing email addresses. cPanel access is usually granted immediately upon account activation, which means you can start setting up email within minutes of purchasing your hosting plan. There’s no waiting period for email functionality, no additional verification steps, and no setup delays; everything is ready to use as soon as your account is active.
The Email Accounts Interface at a Glance
The Email Accounts page displays important information about your account’s email capacity and existing accounts. At the top of the page, you’ll see your account’s email quota status, showing the total number of email accounts your hosting plan allows and how many you’ve created. If your plan includes unlimited email accounts, you’ll see an infinity symbol (∞) indicating unlimited capacity. Below that, you’ll find a Create button to add new email accounts and a list of any existing accounts you’ve already set up.
The interface also provides quick-access links to Webmail, email client configuration guides, email forwarding tools, and other email management features. Everything you need to work with email is organized in one centralized location, making the Email Accounts page your primary hub for all email management tasks. The design is intuitive even for users who’ve never used a control panel before, with clear labels and straightforward navigation throughout.
Creating Your First Email Account in cPanel: Step by Step
Creating an email account in cPanel is straightforward and takes just a few minutes. Your new account is ready to use immediately, even before your DNS records propagate across the internet. This section walks you through the exact steps to create your first professional email address.
Entering Your Email Address and Password
To create a new email account, navigate to the Email Accounts section and click the Create button. You’ll see a simple form with two primary fields: a username field and a password field. The username becomes the part of your email address that appears before the @ symbol. For example, if your domain is yourbusiness.com and you enter “support” as the username, your complete email address will be support@yourbusiness.com. Choose a username that’s relevant to the account’s purpose and professional in appearance.
Creating a strong password is essential for protecting your email account from unauthorized access. Your password should be at least 12 characters long and include a mix of uppercase and lowercase letters, numbers, and special characters like! @ # $ %. Avoid using common words, personal information like birthdays or pet names, or sequences like 123456 or qwerty. If you prefer not to create your own password, a password manager can generate and securely store a unique, strong password for this account. After you enter both the username and password, click Create to finalize the account.
Account Activation and Immediate Availability
Your email account is immediately ready for use the moment you click the Create button. Unlike domain registration or DNS record changes, which require time to propagate across the internet, cPanel email accounts are live on your server instantly. You can begin accessing the account through Webmail right away, send yourself test messages, or start configuring it on your desktop and mobile devices. No waiting period, no processing delays, and no extra steps are required before your mailbox starts working.
The instant availability of your email account is one of the biggest advantages of hosting your email on your own domain through Web Hosting. You can create an account and start using it within minutes, even if other parts of your email setup (like DNS propagation) are still in progress. This means you can test your email setup, verify that accounts are working, and begin using your professional email address without delays while other components of your email infrastructure complete their setup processes.
Accessing Your Email Through Webmail
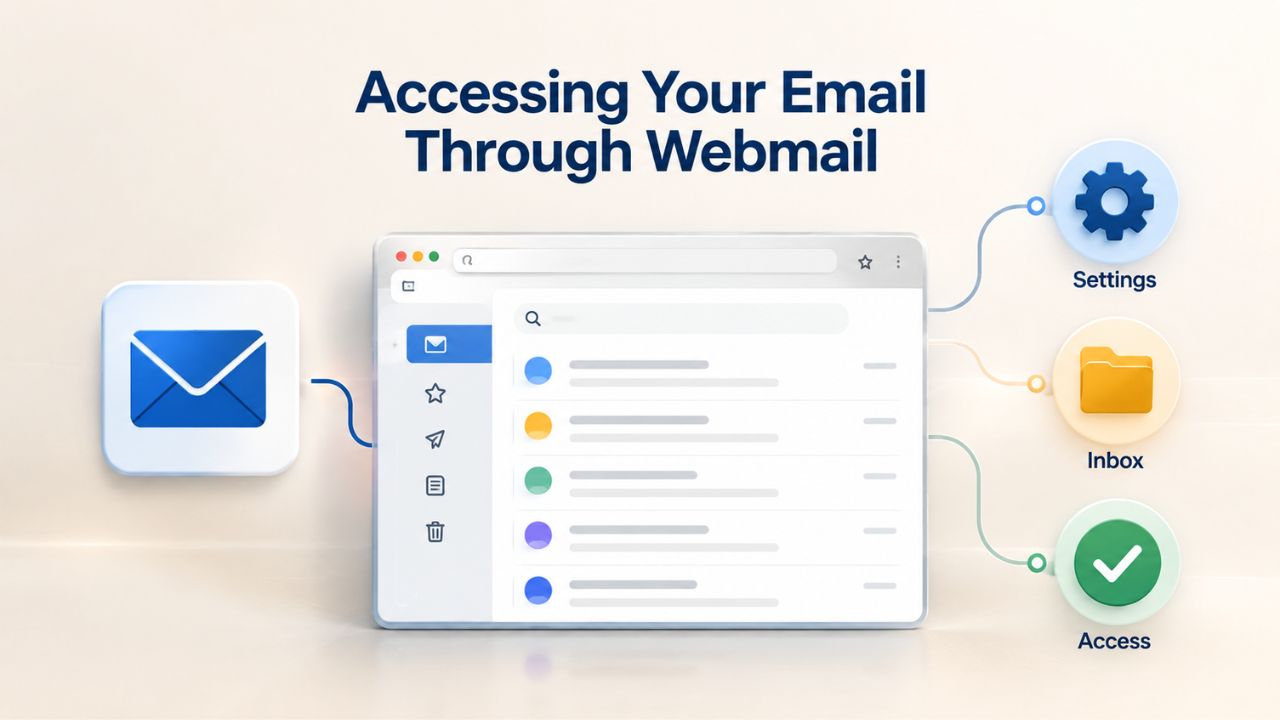
Webmail provides browser-based access to your email from any device without requiring any special software or configuration. This is the fastest and simplest way to access your email immediately after account creation, and it remains useful for accessing your email from phones, tablets, and public computers throughout your business operations.
Logging Into Webmail
To access your email through Webmail, open your web browser and navigate to your domain’s Webmail address. The standard URL format is https://yourdomain.com:2096, though your hosting provider may provide a slightly different URL. On the Webmail login page, enter the username (the part of your email address that appears before the @ symbol) and the password you set during account creation. Click Log In to access your mailbox, which opens immediately in your browser.
Webmail is accessible from any device with an internet connection and a web browser; desktop computers, laptops, tablets, and smartphones all work equally well. You don’t need to install any software or configure any settings on your device. Whether you’re at your office, working remotely, traveling, or using a public computer, you can access your email through Webmail using just your username and password. This flexibility is invaluable for maintaining business communication when you’re away from your primary computer.
Key Webmail Features and Multi-Device Access
Webmail provides a complete email experience that rivals many dedicated email applications. You can compose and send new messages, read and reply to incoming emails, create and organize folders, set up email forwarding rules, manage your contacts, and configure basic account security settings. The interface is familiar to anyone who has used web-based email services like Gmail or Yahoo Mail, making the transition to your professional domain email seamless and intuitive.
Because Webmail is accessed through your browser, your emails remain on the server at all times rather than being downloaded to your device. This means your email is always available wherever you have internet access, and you never lose messages if a device malfunctions or is replaced. All your emails, folders, and settings sync across Webmail and any email clients you configure, ensuring consistency and security regardless of the device or access method you use.
Configuring Email Clients for Desktop and Mobile
If you prefer to manage email through dedicated applications like Outlook, Thunderbird, or Apple Mail on your computer, or want to check email on your smartphone or tablet, you’ll need to configure an email client. Email clients connect to your mail server using specific protocols and port numbers, and cPanel makes this configuration straightforward by providing pre-filled settings for popular email applications.
IMAP vs. POP3: Which Protocol to Choose
cPanel supports both IMAP and POP3 protocols for configuring email clients, each with distinct characteristics and use cases. IMAP (Internet Message Access Protocol) is the recommended choice for most users because it synchronizes your email across all your devices. When you read, delete, or move an email on your phone, that change is immediately reflected on your computer and tablet, keeping all devices perfectly synchronized. IMAP stores your emails on the server rather than downloading them to your device, which means you never lose messages if a device fails or is replaced.
POP3 (Post Office Protocol 3) works differently: it downloads emails to a single device and typically removes them from the server afterward. This approach saves server storage space but creates major problems if you use multiple devices or switch devices often. Emails downloaded to one device won’t appear on another, and if you lose or replace a device, you lose those emails permanently unless you’ve backed them up separately. For professional business use where you need access from multiple devices and want reliable backup, IMAP is strongly recommended over POP3.
IMAP Configuration: Server Settings and Ports
Configuring IMAP on your email client requires entering specific server settings and port numbers. For IMAP, your incoming mail server hostname is typically provided by your hosting provider (often something like mail.yourdomain.com or your server’s specific hostname). Use port 993 with SSL encryption (the recommended and most secure option) or port 143 with TLS encryption as alternatives. For the outgoing mail server (SMTP), use the same hostname with port 465 for SSL or port 587 for STARTTLS encryption.
Your username should be your full email address (including the @ and domain name), not just the first part. Use the same password you set when creating the account in cPanel. Enable authentication for the outgoing mail server, using the same credentials as your incoming server. Port 587 with STARTTLS is often recommended for outgoing email because many internet service providers block port 25 for security reasons, and port 587 offers broad compatibility with email clients worldwide while maintaining security through encryption.
| Protocol | Incoming Server Port | Outgoing Server Port | Recommended For |
|---|---|---|---|
| IMAP | 993 (SSL) or 143 (TLS) | 465 (SSL) or 587 (STARTTLS) | Multiple devices, server-side email sync |
| POP3 | 995 (SSL) or 110 (TLS) | 465 (SSL) or 587 (STARTTLS) | Single device, local storage preference |
| Configuration Requirements | Full email address as username | Same credentials as incoming server | All email clients require authentication enabled |
| Best Practice | Use SSL on port 993 for security | Use port 587 for broad compatibility | Maximum security and universal support |
Start Your Professional Email Setup Today
Setting up email accounts on cPanel Web Hosting gives your business a professional communication infrastructure in minutes. With straightforward account creation and simple DNS configuration, you’ll have reliable business email supporting your entire team. Niya Digital’s Web Hosting platform combines easy email setup with robust hosting features and 24/7 support whenever you need help.
Configuring DNS and MX Records for Incoming Email
Creating an email account in cPanel is only half of the email setup process. For incoming email from external senders to reach your new mailbox, your domain’s DNS records must be properly configured to point to the correct mail server. DNS configuration is where many people encounter challenges, but understanding the concept makes the process straightforward and manageable.
What MX Records Do and Why They’re Essential
An MX (Mail Exchange) record is a DNS entry that tells the world’s mail servers where to deliver emails sent to your domain. When someone sends a message to contact@yourbusiness.com, their email server performs a DNS lookup to find your domain’s MX record, which specifies which mail server handles your email. Without a properly configured MX record, incoming emails cannot reach your mailbox and bounce back to the sender with a “mail server not found” error, resulting in lost communications.
MX records must be configured in your domain’s DNS settings. If your domain is registered with the same provider as your hosting, DNS management is typically available in the same control panel alongside your hosting account. If your domain is registered at a different registrar than your hosting provider, you’ll need to access DNS settings at your domain registrar’s website instead. Knowing which provider manages your DNS matters before you start configuring MX records.
Setting MX Records in Your DNS Zone
To set up your MX record, locate your domain’s DNS settings in your registrar’s or hosting provider’s control panel. Add or verify an MX record with the mail server hostname provided by your hosting provider. The hostname is typically something like mail.yourdomain.com or your server’s specific hostname, which you can find in your hosting account documentation or support ticket response. When adding the record, assign a priority value; use 10 for your primary mail server, and if you add secondary mail servers for redundancy, assign them higher numbers like 20 or 30 to indicate lower priority.
Each MX record requires two key pieces of information: the mail server hostname and the priority value. Once you’ve entered the record with correct information, save your changes in the DNS settings. DNS propagation (the process of internet servers worldwide updating with your new MX record) typically takes 24 to 48 hours, though many DNS providers achieve propagation much faster in modern deployments. During this propagation period, email delivery to your account may be inconsistent as different mail servers around the world gradually learn about your new MX record.
Understanding DNS Propagation and Email Delivery Timing
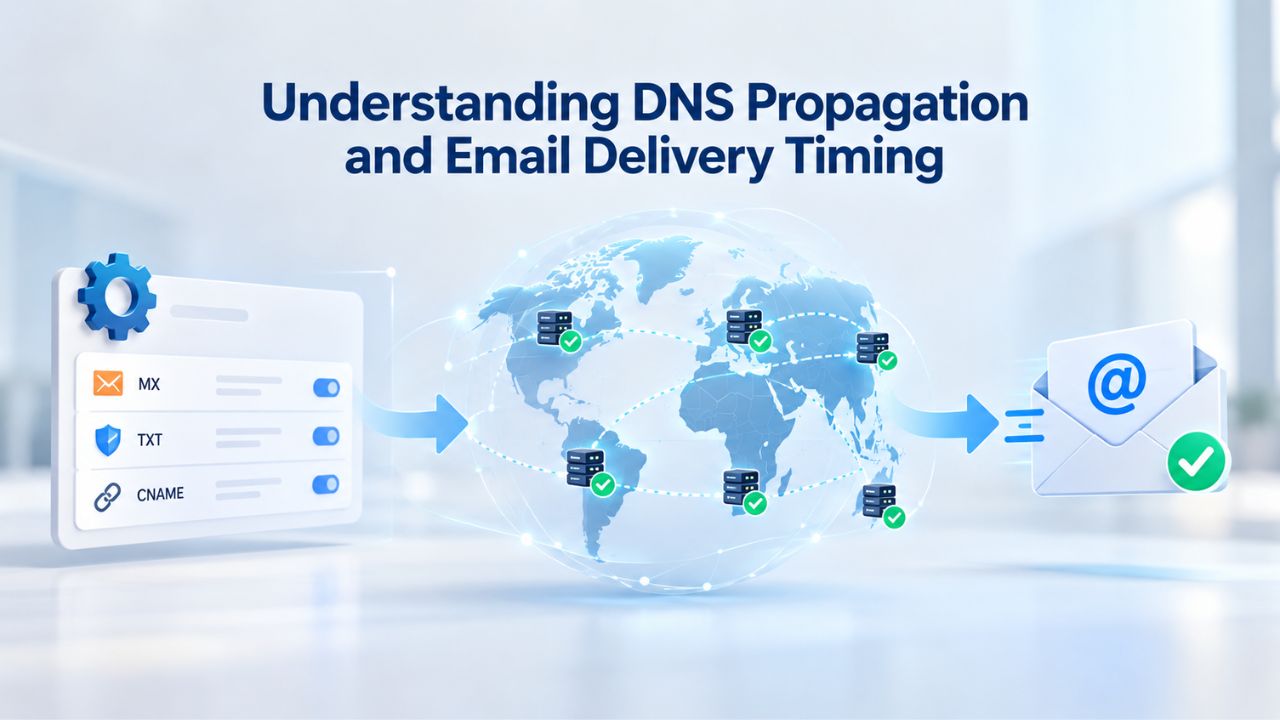
DNS propagation is the longest single step in the email setup process, but it’s also widely misunderstood. Your email account is ready for use immediately after creation, but external senders cannot reach it until DNS propagation completes. Understanding this timeline and what to expect during propagation prevents frustration and helps you plan your email migration accordingly.
The 24–48 Hour Propagation Window
When you create an MX record in DNS, your hosting provider’s DNS servers update instantly. However, DNS propagation across the entire internet takes additional time because thousands of DNS servers worldwide must query your domain’s name servers and learn about the change. These updates cascade through the internet at different speeds; some mail servers receive the update within hours, while others might take the full 24 to 48 hours to learn about your new MX record.
During the propagation period, emails sent to your domain may experience inconsistent delivery. Some senders’ mail servers might have already received your new MX record and route email to your new server successfully. Other senders’ mail servers might not yet know about the change and route email to your old mail server if you’re migrating, or the delivery might be delayed until the sending server retries. This inconsistency is normal behavior; it’s not a failure, problem, or sign that something is wrong with your setup. Patience during the propagation period is the appropriate response.
Testing Email Before Full Propagation Completes
You can test your email functionality immediately through Webmail without waiting for full DNS propagation to complete. Send yourself a test email from an external account (Gmail, Yahoo, or your previous email provider) to your new domain email address and watch for it to arrive in Webmail. This test confirms that your email account is working correctly and can receive messages, even if some external senders experience delays while DNS propagates.
If you’re migrating email from another hosting provider, keep the old mail server active during the propagation period to ensure you don’t lose any incoming email. Some senders’ mail servers may still route email to your old provider during propagation, and you want those messages to arrive at their intended destination. Once propagation completes and you’ve confirmed that all email is properly routing to your new server, you can safely remove the old MX records and deactivate the old email service.
| Email Setup Phase | What Happens | Typical Timeframe |
|---|---|---|
| Create account in cPanel | Email account ready for Webmail access and testing | 5–30 minutes |
| Add MX record to DNS | DNS record created, propagation begins across internet | 1–2 hours for record creation |
| DNS propagation completes | Internet DNS servers worldwide updated with your MX record | 24–48 hours (often faster) |
| Incoming email begins routing | External senders’ mail servers deliver to your mailbox | After propagation completes |
| Test via Webmail | Confirm email is arriving correctly from external sources | Can test immediately after account creation |
| Configure email client (optional) | Desktop and mobile access setup complete | 10–20 minutes per device |
Email Security: Strong Passwords, Encryption, and Best Practices
Email accounts are high-value targets for attackers and hackers because they often grant access to password resets, account recovery options, and sensitive business data. Taking security seriously from the moment you create your email accounts prevents costly compromises, data breaches, and business disruption. This section covers the essential security practices that protect your email and maintain the integrity of your business communications.
Creating and Protecting Strong Email Passwords
A strong email password is your first and most critical line of defense against unauthorized access. Your email password should be at least 12 characters long, mixing uppercase and lowercase letters, numbers, and special characters like! @ # $ %. Avoid dictionary words, personal information such as birthdays, pet names, or addresses, and keyboard sequences like 123456 or qwerty. Attackers often try these weak password choices first when attempting to compromise accounts.
Never reuse the same password across multiple websites or services. If one website is breached and your password is exposed, attackers will immediately try that same password on other accounts, including your email. This password reuse compromises all your accounts at once. A password manager like Bitwarden, 1Password, or your browser’s built-in password manager can generate and securely store unique, strong passwords for each account, eliminating the burden of remembering multiple complex passwords and preventing accidental reuse that weakens your security.
Enabling Encryption and Multi-Factor Authentication
cPanel email supports SSL/TLS encryption for both incoming email (IMAP or POP3 protocols) and outgoing email (SMTP protocol). Encryption protects your password and message content while traveling between your device and the mail server, preventing interception by someone eavesdropping on your internet connection. When configuring your email client, always use encrypted ports: port 993 for IMAP-SSL, port 465 for SMTP-SSL, or port 587 for SMTP with STARTTLS encryption.
Multi-factor authentication (2FA or MFA) adds a second verification layer beyond your password, significantly increasing security against account compromise. With 2FA enabled, a potential attacker needs both your password and a second factor to log in. The second factor might be a temporary code from an authenticator app (like Google Authenticator or Authy), a text message code sent to your phone, or a hardware security key like a YubiKey. Even if someone obtains your password through a data breach or phishing attack, they cannot access your account without this second factor, making 2FA one of the most effective security measures available.
Scaling Email as Your Team Grows
As your business expands and your team grows, you’ll need to create additional email accounts, manage multiple user mailboxes, and coordinate email access across your organization. cPanel handles this scaling smoothly, letting you add accounts and features without changing hosting providers or dealing with complex migrations. This section covers how to scale your email infrastructure as your business needs expand.

Creating Multiple Email Accounts on the Same Domain
Your hosting plan allows a specific number of email accounts based on your plan tier. Many hosting plans offer unlimited email accounts, while some have a set limit that can sometimes be increased for a fee. Creating additional accounts follows the same straightforward process you used for your first account: navigate to Email Accounts, click Create, enter a new username and password, and save the account. Each account is completely independent, with separate passwords, mailboxes, forwarding rules, and security settings.
If your current plan’s quota limits the number of accounts and you’ve reached that limit, contact your hosting provider about upgrading your email quota or your hosting plan. Some providers allow you to purchase quota increases without changing your entire hosting plan, giving you flexibility to add more accounts as you need them. This approach is more cost-effective than upgrading your entire hosting plan when you only need more email accounts.
Email Forwarding and Mailing Lists
As your team grows and email volume increases, you may want to set up email forwarding to automatically route copies of incoming messages from one address to another, or create mailing lists to send a single email to multiple recipients. cPanel’s email forwarding feature and catch-all address options support these common business needs without requiring third-party tools or services. A forwarding rule can automatically redirect customer inquiries to the team member responsible for handling them. At the same time, a catch-all address can capture emails sent to any unconfigured email address at your domain.
Email forwarding is configured in cPanel’s Forwarders section and takes effect immediately without requiring additional setup steps or waiting periods. You can create complex forwarding rules that route specific email addresses to different team members, set up backups by forwarding important business email to multiple recipients simultaneously, or create distribution lists that send to groups of people. These features allow you to organize email workflow efficiently as your business scales and communication becomes more complex.
Troubleshooting Common Email Setup Issues
Most email setup problems fall into a few predictable categories that are straightforward to diagnose and resolve. Knowing these quick fixes prevents frustration, reduces downtime, and helps you get back to work quickly when problems occur. This section covers the most common issues and their solutions.
Email Not Arriving After Setup
If you’ve created an account and set MX records but incoming email isn’t appearing in your mailbox, check these items in order. First, verify your MX record is correctly configured using an online MX lookup tool. Search “check MX records [yourdomain.com]” in your search engine to see what mail server the internet currently knows about. If the record is wrong or missing, correct it in your DNS settings and allow time for propagation. If the MX record is correct, wait for full DNS propagation to complete before assuming there’s a problem.
Second, confirm DNS propagation is complete by checking propagation status using online tools. Even if your MX record is correct in your DNS settings, some mail servers globally might not have received the update yet if propagation is still in progress. During the first 24 to 48 hours, some email delays or temporary delivery failures are completely normal. If it’s been longer than 48 hours and email still isn’t arriving, contact your hosting provider’s support team with details about your mail server hostname, when you created the MX record, and any error messages you’ve received.
Email Client Won’t Connect or Shows Authentication Errors
If your email client (Outlook, Thunderbird, Apple Mail) won’t connect to your email server or repeatedly asks for a password despite entering the correct one, double-check three critical elements. First, verify the server hostnames are spelled correctly and match exactly what your hosting provider provides; they should look something like mail.yourdomain.com or your server’s specific hostname. Typos or mismatches in the hostname will prevent a connection.
Second, confirm you’re using your full email address as the username, including the @ symbol and domain name, not just the first part before the @ symbol. Some email clients default to accepting just the username portion, but cPanel email requires the complete email address. Third, ensure you’re using the correct port numbers: port 993 for IMAP-SSL, port 143 for IMAP-TLS, port 465 for SMTP-SSL, or port 587 for SMTP-STARTTLS. If you’ve tried multiple configurations, remove the account completely and re-add it fresh; leftover settings from previous attempts can cause conflicts that prevent a successful connection.
Getting Started with Email Hosting on cPanel Web Hosting
Niya Digital’s cPanel Web Hosting platform combines straightforward email setup with robust hosting features, reliable uptime infrastructure, and responsive support available 24/7 whenever you need assistance. Whether you’re setting up your first email account or managing email across a growing team, the platform provides the tools and support you need to maintain professional communication.
Frequently Asked Questions
How long does it actually take to set up email in cPanel?
Email account creation in cPanel takes just 5 to 30 minutes from start to finish if MX records are already properly configured. If you need to set up MX records as part of your email setup, add another 1 to 2 hours for that configuration step, plus 24 to 48 hours for DNS propagation across the internet.
After DNS propagation completes, email delivery is fully operational and consistent. Importantly, Webmail access begins immediately after account creation in cPanel, even before DNS propagation finishes, allowing you to begin testing your email setup right away. The entire end-to-end process is remarkably quick compared to legacy email systems or complex enterprise email platforms.
Can I create multiple email accounts on one domain?
Yes, absolutely. cPanel allows you to create as many email accounts as your hosting plan permits. Many Web Hosting plans offer unlimited email accounts, while others have a set limit per plan that can sometimes be increased through your provider if needed.
Each account has its own password, storage allocation, forwarding rules, and security settings so that multiple team members can have separate, independent professional email addresses under your domain. This flexibility makes it easy to set up dedicated email addresses for different departments, functions, or team members as your business grows and organizational structure evolves.
What’s the difference between IMAP and POP3, and which should I use?
IMAP (Internet Message Access Protocol) synchronizes email across all your devices; when you read a message on your phone, it’s marked as read on your computer too. IMAP keeps emails on the server, so you won’t lose messages if you lose, steal, or replace a device.
POP3 (Post Office Protocol 3) downloads emails to a single device and typically deletes them from the server, which means emails accessed on one device don’t appear on others. For professional use where you need access from multiple devices and want automatic backup of all messages, IMAP is strongly recommended because it provides better accessibility, synchronization, and backup protection.
My email client keeps asking for a password. What’s wrong?
This usually means the server settings are incorrect or incomplete. Verify the mail server hostname is spelled correctly and matches exactly what your hosting provider specifies. Confirm you’re using your full email address (including @ and domain) as the username, not just the first part.
Check that you’re using the correct port number: 993 for IMAP-SSL or 465/587 for SMTP-TLS. Common issues include typos in the hostname, using only the username portion instead of the full email address, or using the wrong port number. Removing the account completely and re-adding it with carefully verified settings usually resolves the issue immediately.
How do MX records work, and why do I need them?
An MX (Mail Exchange) record tells external mail servers where to deliver emails sent to your domain. When someone sends an email to your domain address, their mail server looks up your MX record to determine which mail server handles your email.
Without a proper MX record, incoming email cannot find your mailbox and bounces back undelivered. You set MX records once in your domain’s DNS settings, and they remain in place as long as you use that email provider. Proper MX record configuration is essential for receiving incoming email from external senders.
Why is my email not arriving after I set up my account?
The most common causes are DNS propagation lag or incorrect MX record configuration. First, verify your MX record using an online lookup tool to ensure it points to the correct mail server hostname. If it’s correct, wait 24 to 48 hours for full DNS propagation across the internet.
During propagation, some mail servers might not yet know about your new MX record and might route emails to an old server or delay delivery. If email still isn’t arriving after 48 hours, contact your hosting provider’s support team with details about your mail server hostname and when you created the MX record.
Can I forward email from my cPanel mailbox to another address?
Yes, cPanel’s email forwarding feature allows you to send copies of incoming messages to another email address automatically. You can forward all mail from one account to another, or set up a catch-all address that captures emails sent to any unconfigured address @yourdomain.com. Forwarding is configured in cPanel’s Forwarders section and takes effect immediately without requiring additional setup steps. This feature is useful for redirecting customer inquiries to specific team members, creating backups of important email, or managing email across your organization.
Is my email encrypted, and how secure is it?
cPanel email supports SSL/TLS encryption for both incoming and outgoing connections when you configure your email client with encrypted ports (993 for IMAP-SSL, 465 or 587 for SMTP-TLS). This encryption protects your password and message content while traveling between your device and the mail server, preventing interception by someone eavesdropping on your internet connection.
Emails stored on the server are also typically encrypted at rest on hosting providers’ infrastructure for additional security. Multi-factor authentication adds another layer of security by requiring a second factor beyond your password.
What should I do if I forget my email account password?
If you forget your email account password, log into cPanel with your hosting account credentials and navigate to Email Accounts. Find the account in the list and use the password reset or change option to set a new password immediately.
You’ll need access to your hosting account to reset an email password. If you’ve also forgotten your hosting account password, contact your hosting provider’s support team to verify your identity and help you regain full account access through their identity verification process.
Can I use my cPanel email with my phone or tablet?
Yes, absolutely. You can configure your cPanel email on iOS devices, Android devices, and any other platform with an email client. Use the same server settings as you would for a desktop email client: IMAP or POP3 for incoming mail, SMTP for outgoing mail, and your full email address and password for authentication.
Most devices guide you through setup with on-screen prompts, and cPanel provides configuration guides for popular mobile email clients like Apple Mail, Gmail, and Outlook. IMAP is generally recommended for mobile devices because it keeps your email synchronized across all your devices.
What’s the difference between webmail and an email client?
Webmail is browser-based access; you log in through your domain’s webmail URL and manage email entirely in your web browser without installing any software. An email client is a dedicated application like Outlook, Thunderbird, or Apple Mail that you install on your device and use to communicate with the mail server.
Webmail works on any device with a browser and internet access, making it ideal for accessing email from public computers or when traveling. Email clients offer more advanced features and offline access, but require installation and configuration on each device.
How many email addresses can I create on my hosting plan?
This depends on your hosting plan tier. Many Web Hosting plans include unlimited email accounts, while some entry-level plans have a set limit based on their resource allocation.
Your cPanel Email Accounts page displays your account’s quota (total allowed) and current usage (accounts you’ve created). If you’ve reached your quota and need more addresses, contact your hosting provider about plan upgrades or quota increases that might be available without changing your entire plan.
Do I need a separate email hosting plan, or is it included in my Web Hosting?
Email hosting is included in virtually all Web Hosting plans at no extra cost. You don’t need to purchase a separate email service; everything is managed through your hosting account’s cPanel control panel.
This integration simplifies management and support because you work with one provider and one control panel for both Web Hosting and email. Integrated hosting and email also ensure your email infrastructure scales seamlessly as your hosting needs evolve.
What happens to my email if I change hosting providers?
When migrating to a new hosting provider, you’ll create new email accounts on the new server and migrate your existing emails to the new accounts. Some hosting providers offer email migration tools that automatically copy your messages from the old server to the new one.
During migration, you’ll update your domain’s MX records to point to the new hosting provider’s mail server. Once the new MX records propagate, new emails route to the new server; depending on your migration method, you can access or migrate emails stored on the old server.
Glossary
- cPanel: A web-based control panel that allows hosting account owners to manage websites, create email accounts, manage domains, and configure DNS records through a graphical interface instead of command-line tools or complex technical systems.
- Email Hosting: A service that lets you create and manage professional email addresses using your own domain name, with features like webmail access, email client support, server-side message storage, and automatic backups.
- MX Record (Mail Exchange Record): A DNS record that specifies which mail server is responsible for receiving, processing, and storing email messages sent to a domain.
- DNS Propagation: The time required for DNS record changes (including MX records) to be updated and distributed across internet name servers worldwide, typically taking 24 to 48 hours.
- IMAP (Internet Message Access Protocol): An email protocol that synchronizes email across multiple devices and keeps a copy of all messages on the server for backup and multi-device access.
- POP3 (Post Office Protocol 3): An email protocol that downloads messages to a single device; emails are typically deleted from the server after download, making them unavailable on other devices.
- Webmail: A browser-based email interface that allows users to access and manage their email accounts from any internet-connected device without installing or configuring dedicated email client software.