
Your domain is registered, and your web hosting account is active; now you’re ready to connect them. Without a proper connection, visitors cannot find your website, and email won’t work at all. Niya Digital’s Web Hosting service is built on GoDaddy-powered server and network infrastructure, delivered through Niya Digital’s own onboarding, support, and account management platform. Website performance, uptime, and security depend on factors beyond any single provider’s control, including site configuration, code quality, traffic patterns, visitor behavior, and the security practices you follow. Plan accordingly and test thoroughly once your connection is live.
Understanding What Domain Connection Means
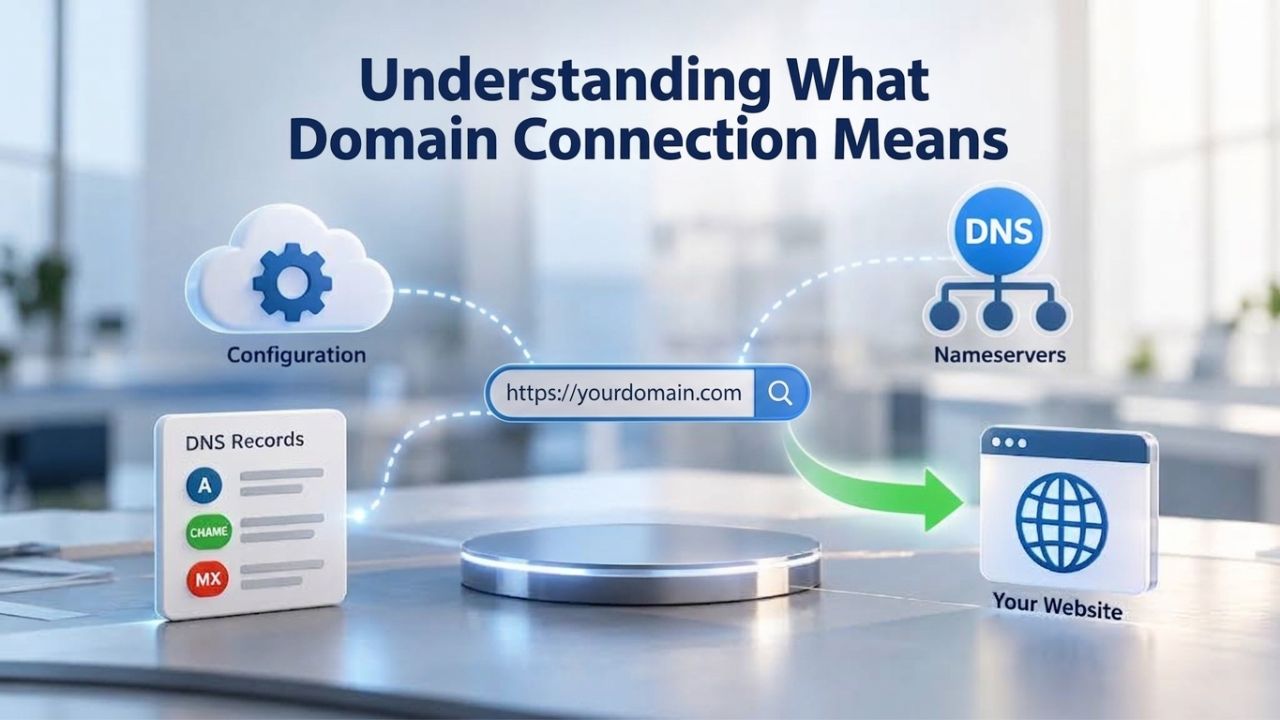
When you register a domain, you’re creating a human-readable address for your website, something like yourdomain.com. When you purchase web hosting, you rent server space where your website files live. These two pieces need to know about each other. A domain connection is the process of telling your domain where that website actually lives: at what hosting provider, on what server, at what specific IP address.
Why Your Domain Needs to Point to Your Hosting Server
A domain is your website’s address on the internet. A web hosting server is the physical (or virtual) computer storing and delivering your website files when visitors request them. For the two to work together seamlessly, your domain’s DNS (Domain Name System) records must tell the internet where that website actually lives, specifically, which hosting server’s IP address to route traffic to.
Without this connection established, your domain name exists but points nowhere. When visitors type your domain into their browser, they get an error message. Email sent to addresses at your domain bounces back undelivered. The connection happens through DNS records, instructions stored at your domain registrar or DNS host that say, “When someone asks for yourdomain.com, send them to this IP address.” Your domain needs to be connected to your cPanel much like a house needs to be connected to its address. Otherwise, your mail won’t arrive, and people won’t know where to visit you.
The process is straightforward once you understand the basics, and most domain connections complete within minutes to a few hours, depending on how quickly DNS changes propagate globally. The key is having the right information in front of you before you start making changes.
How cPanel Fits Into the Connection Process
cPanel is the control panel you use to manage your hosting account, the web-based interface where you upload files, create email accounts, manage databases, configure domains, and adjust settings. When you connect your domain, you’re not configuring cPanel itself; you’re updating DNS records (usually stored at your domain registrar) to point to the IP address of the cPanel server hosting your files.
To get started with cPanel, you first need to add your domain. cPanel includes a built-in tool called Zone Editor that lets you view and edit DNS records directly, but only if your domain’s nameservers already point to your hosting provider’s nameservers. If your domain is registered at a different company (like GoDaddy, Namecheap, or another registrar) and you’re using their nameservers, you’ll update the DNS records at your registrar instead, not in cPanel. Knowing where to make changes is the most critical first step in domain setup, and it’s where most people make their first mistake.
Business Web Hosting Plans & Pricing
Choose the hosting plan that fits your website, WordPress site, or growing business. Compare features, storage, performance, security, and website capacity to find the right hosting environment for your needs.
cPanel Starter
cPanel Hosting that's easy, reliable and lightning-fast.
- 1 website
- 30 GB storage
- Unmetered bandwidth*

cPanel Economy
cPanel Hosting that's easy, reliable and lightning-fast.
- 1 website
- 100 GB space
- Unlimited bandwidth*
- 100 email accounts**
- 10 MySQL databases (1 GB ea.)
cPanel Deluxe
cPanel Hosting that's easy, reliable and lightning-fast.
- Unlimited websites
- Unlimited space
- Unlimited bandwidth*
- 500 email accounts
- 25 MySQL databases (1 GB ea.)
cPanel Ultimate
cPanel Hosting that's easy, reliable and lightning-fast.
- Unlimited websites
- Unlimited space
- Unlimited bandwidth*
- 1000 email accounts
- Unlimited MySQL databases (1 GB ea.)
- 2X Processing power & memory (available for Linux/cPanel only)
- Premium DNS
- 1-year SSL certificate to secure customer data and increase search rankings
*We don't limit the amount of storage and bandwidth your site can use as long as it complies with our Hosting Agreement. Should your website bandwidth or storage usage present a risk to the stability, performance or uptime of our servers, we will notify you via email and may be required to upgrade, or we may restrict the resources your website is using.
**Email account storage is limited to 100 email accounts with 100 MB of total storage.
WordPress Basic
A great way to get started.
- 1 website
- 10 GB NVMe storage
- Unmetered bandwidth
- Free SSL Certificate *
- WordPress pre-installed
- Weekly backups
- Web Application Firewall
- Daily malware scans
- One-time malware removal

WordPress Deluxe
Improve your site performance with Cloudflare CDN.
- 1 website
- 20 GB NVMe storage
- Unmetered bandwidth
- Free SSL Certificate *
- WordPress pre-installed
- Daily backups
- Web Application Firewall
- Daily malware scans
- One-time malware removal
- Up to 2x faster performance with global Cloudflare CDN **
- Enhanced security with DDoS protection
- Staging site
WordPress Ultimate
Add online marketing with more sites, storage and security.
- 1 website
- 30 GB NVMe storage
- Unmetered bandwidth
- Free SSL Certificate *
- WordPress pre-installed
- Daily + on-demand backups
- Web Application Firewall
- Daily malware scans
- Unlimited malware removal
- Up to 2x faster performance with global Cloudflare CDN **
- Enhanced security with DDoS protection
- Staging site
- WordPress code optimizer
- Smart WordPress plugin manager
- Sell online with WooCommerce
*An SSL certificate is included with every site and free for the life of the hosting plan. Certificates are automatically installed, validated and renewed.
Web Hosting Plus Launch
For multiple basic sites.
- 100 GB storage*
- 4 GB RAM
- 2 CPUs
- Unmetered traffic
- 50 websites & databases
- Free, unlimited SSL for all your websites**

Web Hosting Plus Enhance
For high-traffic WordPress, Joomla, and other sites.
- 200 GB storage*
- 8 GB RAM
- 4 CPUs
- Unmetered traffic
- 100 websites & databases
- Free, unlimited SSL for all your websites**
Web Hosting Plus Grow
For advanced eCommerce sites like Magento.
- 300 GB storage*
- 16 GB RAM
- 8 CPUs
- Unmetered traffic
- 150 websites & databases
- Free, unlimited SSL for all your websites**
Web Hosting Plus Expand
For multiple basic sites.
- 400 GB storage*
- 32 GB RAM
- 16 CPUs
- Unmetered traffic
- 200 websites & databases
- Free, unlimited SSL for all your websites**
*The total amount of usable storage capacity for your particular Hosting Service(s) may differ from the represented capacity as there is required space for the operating system(s), system file(s) and other supporting file(s).
**If you cancel the Web Hosting Plus product, you will lose the associated SSL certificate as well.
A Records vs. Nameservers: Which Method to Choose
Two primary methods exist for connecting your domain to your hosting: A records and nameservers. Both accomplish the same goal, pointing your domain to your hosting server, but they work differently and have different trade-offs in terms of speed, complexity, and flexibility. Understanding the difference helps you choose the method that fits your situation.
The A Record Method, Faster, Usually Simpler
An A record is a specific type of DNS record that directly points your domain name to an IP address. This method works when your domain is registered at one provider (like GoDaddy or Namecheap), but you’re hosting it at another provider (Niya Digital or any other host). You keep your domain registration where it is and update only the A records in your registrar’s DNS manager to point to your hosting provider’s IP address.
After you create or edit A records, it can take up to 4 hours for them to take effect. In practice, A record changes often propagate much faster, sometimes within 30 minutes to an hour. An A record pointing a domain to a new IP typically propagates in 1 to 4 hours, with a maximum of 24 hours. The A record method is generally faster than changing nameservers because you’re making a small, targeted change rather than redirecting your entire domain’s DNS authority. This approach is ideal for bloggers, small businesses, freelancers, and anyone who wants to host at one place while keeping their domain registered elsewhere.
The Nameserver Method, Centralized but Slower
With the nameserver method, you change your domain’s nameservers- the addresses of the servers that hold all your DNS records- to point to your hosting provider’s nameservers instead. This approach moves your entire domain’s DNS management to your host, where you can manage all DNS records (A, MX, TXT, CNAME, and more) from one centralized place.
When you point your domain’s Name Servers to cPanel, Name Servers may take up to 48 hours to change. A name server change (moving to a new host) has a propagation time of 4 to 24 hours, with a maximum of 48 hours. Name server changes take longer because they involve updating records held by your domain registrar and the global domain registry system, which then cascade through the internet’s DNS hierarchy. Use this method when you want centralized DNS management, when you’re migrating your entire domain and all associated services (website, email, subdomains) to a new host at once, or when your registrar makes it difficult to access DNS settings directly. For most first-time connections, A records are the simpler, faster choice.
| Domain Connection Method | Time to Propagate | Best For | Editing Location |
|---|---|---|---|
| A Records | 4–24 hours typical, up to 48 hours maximum | Domain registered elsewhere, faster setup needed | Registrar DNS manager or cPanel Zone Editor |
| Nameserver Change | 24–48 hours typical, up to 48 hours maximum | Centralizing all DNS management, migrating entire domain | Domain registrar nameserver settings |
| CNAME Records | 30 minutes–2 hours typical, up to 24 hours maximum | Creating subdomains without separate IPs | cPanel Zone Editor |
Finding Your cPanel IP Address & Hosting Details
Before you update any DNS records, you’ll need critical information from your hosting account, most importantly, your hosting provider’s IP address. This numeric identifier tells DNS exactly where your website files live. You’ll also need to know where to edit your DNS records and which nameservers your domain currently uses.
Locating Your Hosting IP Address in cPanel
Your hosting provider’s IP address is the key piece of information you need to connect your domain. Log in to your cPanel account using the credentials you received when you purchased your hosting plan. Once logged in, look at the main dashboard. You will find your cPanel IP address in the cPanel main menu on the right side of the screen under Shared IP Address.
If you’re on a shared IP address (the most common setup for shared hosting), the address will be clearly labeled in the right sidebar of the cPanel dashboard. If you’re on a dedicated IP (a more advanced hosting setup), the address may be labeled differently, but it will still be prominently displayed on your main cPanel page. Write down or copy this IP address and save it somewhere safe; you’ll need it when you update your DNS records. Do not guess or use a different number; using the wrong IP address is one of the most common mistakes that causes domain setup to fail.
Understanding What Your Hosting Welcome Email Contains
When you purchase web hosting, your provider sends a welcome email with critical information. This email typically includes your cPanel login URL, your username and a temporary password, the domain you’re hosting, the server name, and your hosting account’s IP address. After you purchase a Web Hosting (cPanel) plan, you need to set it up before you can use it to host your website. Save this welcome email in a secure location; you’ll reference it during initial domain setup and potentially later when troubleshooting issues.
If you’ve lost your welcome email or can’t find it in your inbox, log into your hosting account through your hosting provider’s main website (not cPanel), and look for account settings, server information, or a dedicated section labeled “Hosting Details,” “Account Info,” or “Server Information.” Niya Digital’s team has found that organizing these details in one place before starting DNS configuration prevents setup delays and confusion. Write down your cPanel username, the hosting server name (if listed), and the IP address in one document for easy reference.
Step-by-Step Domain Connection via Zone Editor
Zone Editor is the cPanel tool where you manage DNS records for your domains. If your domain’s nameservers point to your hosting provider, you’ll use Zone Editor to add or update your A records. The process is straightforward once you locate the right tool and understand what each field means.
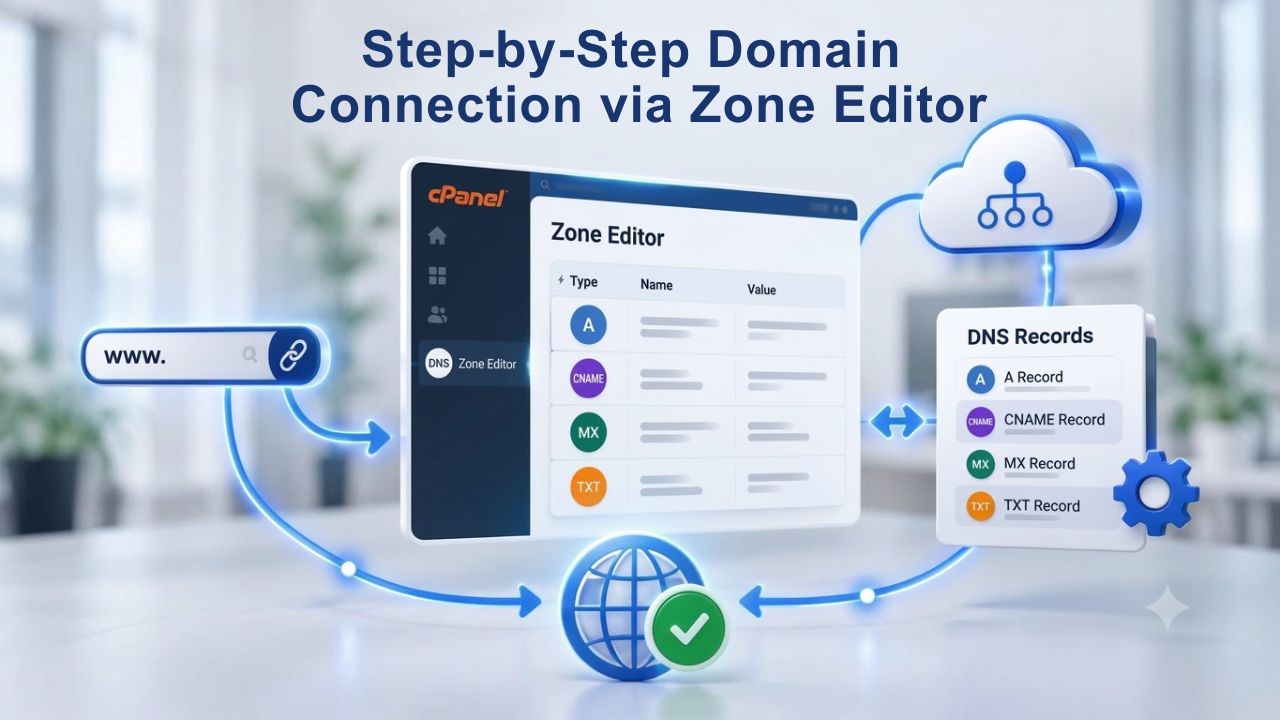
Accessing cPanel’s Zone Editor and Locating Your Domain.
Log into your cPanel account using your username and password. Once you’re logged in, look for the Domains section on the main dashboard or in the sidebar navigation. Log in to your cPanel account. Scroll to the Domains section and click Zone Editor. You’ll see a list of all domains associated with your hosting account. Click Manage next to the domain you want to work with.
The Zone Editor interface displays all current DNS records for that domain in a table with columns for Name, TTL (Time To Live, measured in seconds), Type (A, CNAME, MX, etc.), and Record value. If you’re connecting a new domain that isn’t yet in your cPanel account, you may need to add it to your account first through the Addon Domains section, or contact your hosting support to have it added for you. Once the domain appears in Zone Editor, you’ll see existing records, usually a default A record pointing somewhere, and possibly MX, nameserver, and other entries left from previous setups.
Before making any changes, always keep a copy of your existing DNS settings. Take a screenshot of the current state of your DNS records or use your browser’s print function to save a PDF. This backup protects you if you need to undo a change or if something goes wrong. Most hosting providers keep automatic backups, but having your own copy gives you peace of mind and speeds up troubleshooting if issues arise.
Adding or Editing the A Record for Your Domain
In the Zone Editor, locate the existing A record with Name = @ (the @ symbol represents your root domain, yourdomain.com without the www). If an A record doesn’t exist for your root domain, you’ll need to create one. Click the button to add a new record, which will prompt you to select a record type. Click Add Record at the top of the page. Select your record type from the dropdown (A, CNAME, MX, TXT, etc.), fill in the required fields, and click Add Record to save.
For a new A record, set the Type field to “A”, the Name field to “@”, and the Record field to your cPanel IP address (the one you located in your cPanel dashboard). If an A record already exists but points to the wrong IP address, click the Edit button next to it, change the Record value to your correct cPanel IP address, and save the changes. Leave the TTL at the default value (usually 3600 seconds, which equals 1 hour) unless your hosting provider specifically instructs you to change it. Do not delete any system-generated records unless you’re explicitly instructed to do so; focus only on the A record that points to your hosting server. Once you save your changes, your DNS host submits the update, and propagation begins immediately. However, it takes time for all nameservers worldwide to receive and update the new information.
Configuring for www and Root Domain
Both yourdomain.com and www.yourdomain.com must resolve to your website. Visitors type domains into their browsers differently; some enter the root domain without www, others add the www prefix. Configuring both ensures your website loads regardless of which version visitors use.
Why Both yourdomain.com and www.yourdomain.com Matter
Visitors type domains into their browsers in different ways. Some enter yourdomain.com (called the root domain), while others type www.yourdomain.com (the www subdomain). Both must point to the same hosting server so that either entry loads your website successfully. You will need to edit two A records: your root domain A record (which is just your domain name, e.g., yourdomain.com) and your www subdomain (which is your domain name with www at the beginning, e.g., www.yourdomain.com). This is because when customers search your domain, whether they type yourdomain.com or www.yourdomain.com, it loads the same website.
In the Zone Editor, you’ll see or need to create two A records: one with Name = @ (representing the root domain) and one with Name = www (representing the www subdomain). Both should have the same Record value: your cPanel IP address. Most cPanel configurations handle this automatically when you set the root domain’s A record, automatically creating a www CNAME record that aliases the root domain. If your Zone Editor shows both records but they point to different IP addresses, edit the www record so it matches the root domain’s IP address. Having both records point to the same place eliminates the risk that visitors using different URL formats will reach different content or error pages.
Adding Subdomains Beyond www
If you plan to use additional subdomains in the future (like mail.yourdomain.com for webmail access, or blog.yourdomain.com for a separate blog site), you’ll add CNAME records for those. CNAME (canonical name) records define aliases by associating one domain name with another. For example, you could create a CNAME record for mail.yourdomain.com that points to yourdomain.com. When a DNS lookup for mail.yourdomain.com occurs, it receives the associated yourdomain.com domain in response and then performs a lookup on its A record.
For a webmail subdomain, you’d set the Name field to “mail”, Type to “CNAME”, and Record to “yourdomain.com” (your root domain). Most hosting providers automatically generate the necessary CNAME records during the initial domain setup; verify that they’re already in place before creating new ones yourself. For now, focus on getting the root domain and www working correctly. Subdomains and additional records can be added or adjusted later once the primary domain is live and verified. Keeping only the essential A and www records reduces the risk of configuration errors.
Get Started with cPanel Web Hosting
Niya Digital’s Web Hosting service provides full cPanel access, domain connection support, and expert onboarding to guide you through domain setup and beyond. With straightforward domain management and responsive support, you can get your website live quickly and confidently.
Understanding DNS Propagation & Realistic Timeframes
DNS propagation is the process by which DNS changes spread across the internet. When you update a DNS record, the change doesn’t take effect instantly worldwide. Instead, DNS servers worldwide need time to receive, cache, and serve the updated information. Understanding propagation helps you know what to expect and when.
What Propagation Is and Why It Takes Time
DNS propagation refers to the process of updating a domain name’s information across the internet. When DNS records for a domain are modified, such as updating nameservers or adding MX records for email services, these changes initiate the propagation process. DNS servers then distribute the latest information globally to ensure they have the most current data. DNS propagation is not instantaneous. Every DNS server worldwide caches (stores a copy of) DNS records to reduce lookup time and reduce load on authoritative servers. When you change a DNS record, each DNS server worldwide must wait for its cached version to expire based on the TTL (Time To Live) setting, then fetch the new one from the authoritative source.
Nameserver changes can typically take 0 to 24 hours to take effect. Still, they can take up to 48 hours to take full effect. DNS zone record changes, such as A, MX, and CNAME records, typically take 0 to 4 hours to resolve, but can take up to 8 hours to fully propagate. A Records, which you’re using to connect your domain, usually propagate faster than nameserver changes because they involve fewer layers of the DNS hierarchy. During the propagation period, some visitors may see your website immediately, others may see an old cached version of a different site, others may see a “not found” error, and still others may see nothing at all because their ISP hasn’t yet refreshed its DNS cache. This is normal behavior during propagation.
Checking Propagation and Knowing When It’s Complete
The process usually completes within 48 hours, but it can be quicker in some cases. You can try clearing your local DNS cache or checking from a different network to see if the changes have reached your area. However, the global update still takes time. To monitor propagation status in real time, use a free DNS propagation checker tool like whatsmydns.net or dnschecker.org. Enter your domain name and select the record type you want to check (A, CNAME, or MX), and the tool will show you which DNS servers worldwide have received the update and which have not. You’ll see a global map showing propagation status from different regions.
Do not rely on your own browser to judge whether propagation is complete, as your local device may have cached an old result from before you made changes. Instead, test from a different network or device, or use one of the DNS propagation checker tools mentioned above. If you want to be certain before moving forward, wait the full 48 hours to allow for maximum global distribution. If propagation takes significantly longer than 48 hours (like several days), it usually indicates a configuration error rather than a normal delay. Go back and check your DNS records in Zone Editor to verify the IP address is correct and has no typos.
What to Check Before Connecting & Common Mistakes to Avoid
Taking time to verify your setup before making DNS changes prevents most domain connection problems. A simple checklist and understanding of common mistakes can save you hours of troubleshooting.

Pre-Connection Verification Checklist
Before you update any DNS records, confirm that three fundamental things are in place:
(1) your domain is registered and active (not expired or in a pending state),
(2) your hosting account is fully set up and ready to use, and
(3) you have written down the correct cPanel IP address from your hosting dashboard.
Delete the extra A, AAAA, and CNAME records. Verify that domain forwarding is disabled (for example, in Namecheap or GoDaddy). If your domain currently has an active domain forwarding rule (a redirect that sends all traffic to another website), that forwarding will override DNS changes, and your new setup won’t work. Log in to your domain registrar account and disable any forwarding before proceeding.
| Pre-Connection Checklist Item | What to Verify | Where to Check |
|---|---|---|
| Domain Status | Domain is registered, active, and not expired | Domain registrar account |
| Hosting Account | Hosting account is set up, activated, and ready to use | Hosting provider dashboard or welcome email |
| Hosting IP Address | You have the correct cPanel IP address written down | cPanel main dashboard under “Shared IP Address” |
| Current Nameservers | You know which nameservers your domain currently uses | Domain registrar’s nameserver or DNS settings section |
| DNS Record Location | You’ve identified where to edit DNS records | Check if nameservers point to host or registrar |
| Domain Forwarding | Any domain forwarding rules are disabled | Domain registrar domain management section |
| Old DNS Records | No conflicting or old DNS records exist | Registrar DNS manager or cPanel Zone Editor |
Common Mistakes That Break Domain Setup
Several mistakes keep coming up during domain setup. You can prevent them with care and attention. Wrong A Record Configuration: If your A record points to the wrong IP address, visitors will be directed to the wrong server, causing your website to go down. CNAME Errors: A CNAME record that incorrectly points to a non-existent or incorrect domain can cause issues with loading your website or subdomains. Incorrect MX Records: If MX records are set incorrectly, your email will fail to deliver, or you may not receive emails at all.
After you update your DNS records, wait at least 4 to 24 hours before concluding something is wrong and reaching out to support. If propagation is complete and your domain still doesn’t resolve correctly, carefully re-examine every character in your A record value for typos, extra spaces, or incorrectly entered numbers. A single wrong digit in an IP address breaks the entire connection. Another frequent error is accidentally deleting system-generated DNS records. Only edit the A record(s) pointing to your hosting server. Leave other entries like SOA, NS (nameserver), and DNSSEC records completely untouched unless your host explicitly instructs you to modify them. If you accidentally delete a critical record, you may be able to restore it from a backup. Finally, if you moved a domain from one host to another, make sure you remove the old host’s DNS records from your registrar once the new ones are confirmed live. Old conflicting records can interfere and cause intermittent issues where your site works sometimes but not consistently.
Email Setup: Connecting MX Records After Domain Connection
Once your domain’s A record points to your hosting server, your website is live. Email, however, requires separate DNS configuration. MX records tell the internet’s mail servers where to deliver email sent to your domain address.
What MX Records Do and Why They Matter
MX records in DNS settings direct email traffic to your email hosting service; these must be configured correctly. An MX record (Mail eXchange record) tells the internet’s mail servers where emails sent to your domain should be delivered. If your hosting plan includes email hosting, which most shared hosting plans do, you’ll create MX records that point to your hosting provider’s mail server. An MX record, or Mail Exchanger Record, is a DNS record that directs email to the specified mail server. For domains that are configured to receive email, their MX records are available and accessible through public DNS servers.
In cPanel’s Zone Editor, you’ll add an MX record with Name = @ (your root domain), Type = MX, and Record = your hosting provider’s mail server address (your host should provide this in their documentation; it’s often something like mail.yourdomain.com or mail.yourhost.com). You may need to set a Priority value; lower numbers indicate higher priority. If your host provides multiple MX records for redundancy, add them all with their respective priority values. Like A records, MX changes propagate across nameservers worldwide. DNS propagation takes 1-24 hours after configuring MX records; email won’t work immediately. It can take hours for all mail servers globally to recognize the new email routing, so don’t be alarmed if email doesn’t work right away.
Setting Up SPF Records and Email Authentication
After setting up your MX records, add an SPF (Sender Policy Framework) record to improve email deliverability and protect your domain from being impersonated. SPF, or Sender Policy Framework, is a TXT record in your domain’s DNS settings that lists the mail servers authorized to send emails from your domain. If the sending server or IP address matches an authorized entry in the SPF record, the email is considered legitimate and is less likely to be flagged as spam. In Zone Editor, add a TXT record with Name = @, Type = TXT, and Record = v=spf1 include:mail.yourdomain.com -all (adjust the mail server reference based on your host’s specific instructions).
SPF records are not strictly mandatory, but they’re highly recommended for anyone serious about email deliverability. Without an SPF record, emails you send from your domain are significantly more likely to land in recipients’ spam folders or be rejected entirely. DKIM and DMARC records provide additional layers of email authentication and protection, but start with SPF if you’re new to email setup. Your hosting provider’s documentation should specify the exact SPF value to use for your particular mail server. Once your MX and SPF records have propagated through the DNS system, email sent to your domain should start arriving in your hosting account’s mailboxes, and your users should be able to send email from their custom domain addresses.
Adding SSL/HTTPS: Automatic with Let’s Encrypt in cPanel
A secure website displays HTTPS (instead of HTTP) in the address bar and shows a padlock icon next to the domain name. This indicates an SSL certificate is encrypting all data transmitted between your visitors’ browsers and your server.
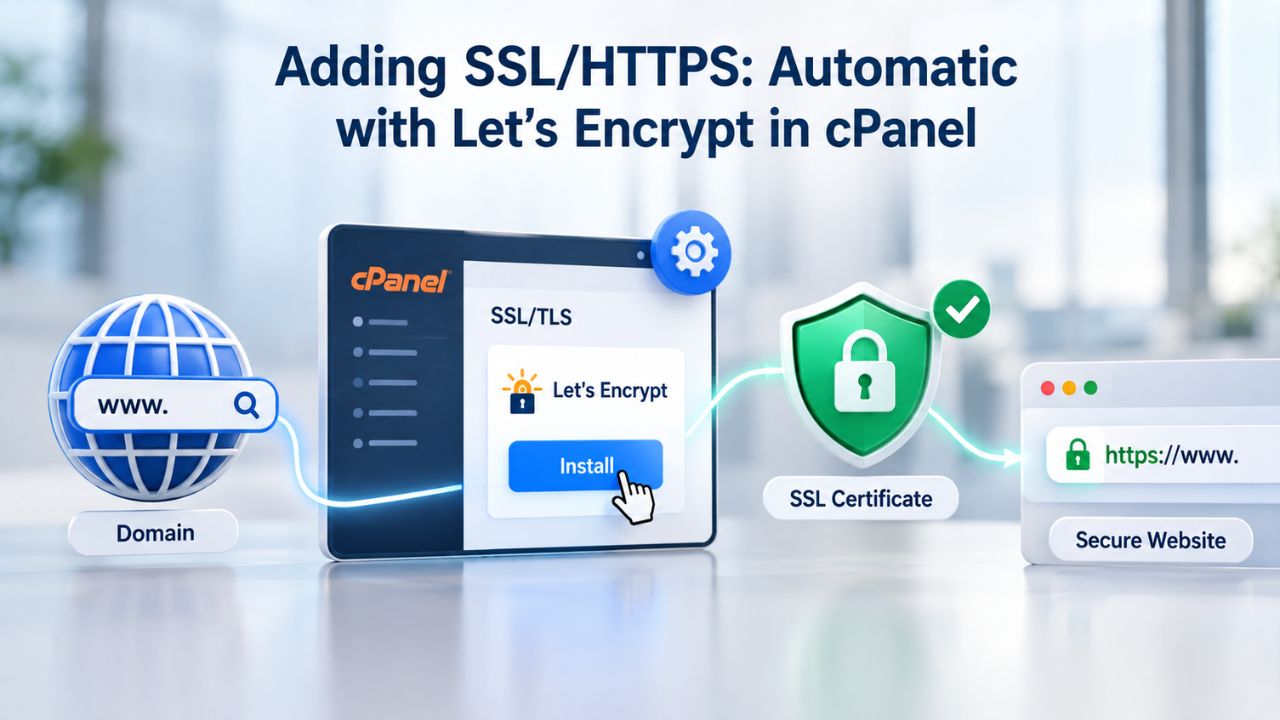
Why SSL Matters and What Let’s Encrypt Provides
An SSL certificate encrypts the communication between your website and your visitors’ browsers, protecting sensitive data like passwords and credit card information. The presence of “HTTPS” and a padlock icon in the browser’s address bar indicates that a website has an active SSL certificate, building trust and improving your search engine ranking. If your website collects any sensitive information, login credentials, payment information, or personal data, SSL is essential. Even if you don’t collect sensitive information, HTTPS helps build visitor trust and boosts search engine rankings, making SSL a best practice for all websites.
Let’s Encrypt offers a free, fast, and reliable way to encrypt your site with HTTPS. Managed by the non-profit Internet Security Research Group (ISRG), Let’s Encrypt provides SSL certificates that are trusted by all major browsers. cPanel includes AutoSSL. This feature automatically installs Let’s Encrypt SSL certificates for your domains at no cost. Log in to your cPanel account. Navigate to SECURITY > SSL/TLS Status. Select your domain(s) and subdomain(s). Click Run AutoSSL to issue and install the SSL certificate. Your domain must be properly connected (A records pointing to your hosting server) before AutoSSL can validate domain ownership. Once installed, AutoSSL renews your certificate automatically, so it never expires, and you don’t have to renew it manually.
Enforcing HTTPS and Verifying Installation
After AutoSSL installs your certificate, you should see a green padlock icon next to your domain in the cPanel SSL/TLS Status page. Verify installation by visiting your domain in a web browser; you should see HTTPS (not HTTP) in the address bar and a small padlock icon. On some older browsers or devices where JavaScript is disabled, the padlock may not display, but the connection is still encrypted and secure.
To ensure all visitors automatically use the secure HTTPS connection (and to prevent mixed-content warnings), enable HTTPS redirection so that any request to http://yourdomain.com automatically redirects to https://yourdomain.com. In cPanel, many hosting providers include a checkbox for “Force HTTPS Redirect” or “Auto-redirect HTTP to HTTPS” in the SSL/TLS Status section. If this option isn’t available on your hosting plan, you can add redirection rules to your .htaccess file in your site’s root directory. Once HTTPS redirection is configured, all traffic to your site will be automatically encrypted. After enabling HTTPS redirection, test your site thoroughly to ensure all resources (images, stylesheets, scripts) are loading correctly and over HTTPS; if any resources still load over HTTP, you’ll see mixed-content warnings in visitor browsers.
Troubleshooting: Domain Not Resolving or Email Not Arriving
Sometimes domain connections don’t work immediately, even after waiting for propagation. Understanding how to diagnose the issue saves significant time and frustration.
Why Your Domain Might Not Be Working Yet
If you’ve updated your DNS records and waited several hours but your domain still doesn’t load, work through these checks systematically. First, confirm that propagation is actually complete using a free tool like whatsmydns.net. Second, verify the A record in Zone Editor shows the correct IP address; check carefully for typos or extra spaces. Third, test from a different network or device; your local computer’s DNS cache may be serving an old result from before you made changes. Fourth, clear your browser’s DNS cache (Windows users run ipconfig /flushdns in Command Prompt; macOS users run dscacheutil -flushcache in Terminal).
Verify name servers to prevent a common DNS issue that can take your entire site offline. Review DNS records like A, CNAME, and MX to fix misconfigurations. Allow for propagation time when recent updates trigger temporary DNS issues. If your domain’s nameservers point to the wrong location, they may not point to your hosting provider’s nameservers. All DNS changes you make in Zone Editor are being ignored because they’re not the authoritative source. Log into your domain registrar and confirm the nameservers match your host’s nameservers. If they don’t, update them at the registrar and wait 48 hours for that change to propagate. If the IP address is correct, the nameservers are right, and you’ve waited long enough, contact your hosting provider’s support team; a server-level issue or a configuration setting may be blocking the domain from resolving.
Resolving Email Not Working After Domain Connection
After connecting your domain, if email still isn’t arriving in your mailboxes, verify that your MX records have propagated and point to the correct mail server. Use an MX lookup tool to see which mail servers are currently listed for your domain. Identify the common DNS issue by checking whether your website, email, or both are affected. If the MX lookup shows your hosting provider’s mail server, propagation is complete, and email should work. If the lookup shows your old provider’s mail server or no results, your MX records either haven’t propagated yet or you updated them in the wrong location.
If MX records are correct and pointing to the right mail server but email still doesn’t arrive, check that you’ve actually created email accounts in cPanel. Navigate to Email → Email Accounts in cPanel and verify that mailboxes exist for your domain. A domain can have MX records perfectly configured and pointing to a mail server, but if no actual mailboxes exist on that mail server, incoming email bounces back undelivered. Once mailboxes are created and MX records have propagated, test your setup by creating an email account and having someone send a test message to that address. If the email arrives, both your domain connection and email setup are working correctly. If the email bounces, SPF or other authentication records may need adjustment; consult your hosting provider’s email setup documentation or contact their support team.
Ready to Connect Your Domain Today?
Niya Digital’s Web Hosting service provides full cPanel access, expert support for domain setup, and a reliable hosting platform to keep your website running. Connect your domain and start hosting a website that works for you and your visitors.
Frequently Asked Questions
How long does it really take for a domain to work after updating DNS records?
Most A record changes are visible to at least some users within 4 hours and to the majority of users within 24 hours. In some cases, full global propagation can take up to 48 hours. The exact time depends on TTL settings on your DNS records, your Internet Service Provider’s DNS cache refresh cycle, and how many nameservers worldwide have updated. During propagation, your website may work perfectly for some visitors while others see an old cached version or a “not found” error. This is normal. Use a free DNS propagation checker tool like whatsmydns.net to see which nameservers worldwide have received your update.
Can I update my domain’s DNS records while it’s still pointed to my old host?
Yes, if your domain uses your registrar’s nameservers (not your old host’s nameservers), you can update DNS records without losing access to your old site. However, if your domain’s nameservers point to your old host’s nameservers, any DNS changes must be made at the old host until you move the nameservers. Once you change your domain’s nameservers to your new hosting provider, your old host’s DNS records are ignored, so set up your site at the new host first, then change the nameservers.
What if I enter the wrong IP address in my A record?
Your domain will point to the wrong server, and your website won’t load. If you realize the mistake immediately, go back to Zone Editor and correct the A record value to the right IP address. The change takes effect within hours as it propagates. If you’re unsure which IP is correct, log into your cPanel and check the Shared IP Address field in the main dashboard, or contact your hosting provider’s support team with your account details.
Do I have to use cPanel’s Zone Editor, or can I edit DNS at my registrar instead?
If your domain’s nameservers point to your hosting provider’s nameservers, you must edit DNS in cPanel’s Zone Editor because that’s where the authoritative nameserver looks for records. If your nameservers point to your registrar or a third-party DNS service, you edit records there. Check your domain’s nameservers first. If you edit records in the wrong location, your changes will be ignored because the authoritative nameserver (the one that actually answers DNS queries) is elsewhere.
Does free Let’s Encrypt SSL work on all cPanel hosting plans?
Yes, most cPanel hosting plans include free Let’s Encrypt SSL via AutoSSL. Log into cPanel, navigate to SSL/TLS Status under the Security section, select your domain, and click Run AutoSSL to issue a certificate. The certificate is valid for one year and renews automatically, so you never have to think about renewal. If AutoSSL is not available on your plan, contact your hosting provider. Most modern hosting providers include it at no extra cost.
Can I connect multiple domains to the same cPanel hosting account?
Yes, cPanel allows multiple domains per account. Add each domain through the Addon Domains section in cPanel, then update each domain’s A record to point to your hosting server’s IP address (the same IP for all domains on the account). Each domain gets its own DNS records, email accounts, and website files, so you manage each domain independently.
What’s the difference between an A record and a CNAME record?
An A record points a domain directly to an IP address (yourdomain.com → 192.0.2.1). A CNAME record creates an alias that points one domain to another domain (www.yourdomain.com → yourdomain.com). Use A records for your main domain and CNAME records for subdomains. Both eventually resolve to the same IP address, but CNAME is cleaner for managing subdomains.
How do I know if my DNS records are actually pointing to my hosting server?
Use a free IP lookup tool like MXToolbox or whatsmydns.net. Enter your domain, and the tool returns the IP address it currently resolves to. Compare that to your hosting server’s IP address (found in cPanel under Shared IP Address). If they match, your DNS records are pointing correctly. If they don’t match or the lookup returns no result, your records are either incorrect or still propagating.
Is it normal for email not to work immediately after connecting my domain?
Yes, completely normal. Email requires both a working A record (for the domain connection) and an MX record (to route mail to your mail server). If you’ve just connected your domain, the A record may be live, but the MX record is still propagating. Wait 24 hours for MX propagation to complete, then test. If email still doesn’t arrive after 24 hours, verify the MX record value is correct and that you’ve created email accounts in cPanel.
Can I move my domain to a different hosting provider later without losing data?
Yes, absolutely. Before changing nameservers or switching hosts, back up all your website files, databases, and email. Most hosting providers offer migration tools or migration assistance. Once your new host is set up and tested, change your domain’s nameservers to your new host’s nameservers, or update your A records if you’re keeping your registrar’s nameservers. The transition usually takes a few hours to a day, depending on DNS propagation time.
What does TTL mean, and why does it matter?
TTL (Time To Live) is a value in DNS records, measured in seconds, that tells DNS nameservers how long to cache (store a copy of) your record before checking for updates. A TTL of 3600 means the record is cached for 1 hour. Lower TTL values (like 300 seconds) make DNS changes propagate faster but use more server resources. Before moving a domain to a new host, lower your TTL a day or two in advance so changes propagate faster when you actually update records.
Will changing my domain’s DNS records affect my email if I use a different email provider?
Not if MX records for your domain are correctly configured for that other provider. If you use Google Workspace, Microsoft 365, or another email service, add that service’s MX records to your domain’s DNS. Those MX records point to that provider’s mail servers, so email routes there regardless of where your website is hosted. Your website and email hosting can be with completely different providers.
How do I verify that my domain connection is working before launching my website?
Once your A record has propagated, visit your domain in a web browser. If you see your website, the connection is working. If you see a “not found” or error page, propagation is still happening or records are incorrect. Check Zone Editor for typos in the A record. Test from different networks or devices to rule out local caching issues. Once the site loads in your browser, create a test email account in cPanel and have someone send a test message to that account. If the email arrives, both the domain and email are working.
What should I do if DNS propagation is taking longer than 48 hours?
First, verify that your DNS records are actually correct by checking the Zone Editor for typos in the IP address. Confirm that your nameservers point to the right location. If records are correct and nameservers are right, the delay is likely due to ISP-level DNS caching or a DNS query getting routed through an unusually slow path. Contact your hosting provider’s support team; they can check server-level logs to rule out configuration issues. In rare cases, a domain registrar may need to update records manually.
Glossary
- cPanel: A web hosting control panel that allows account holders to manage domains, email accounts, website files, databases, and hosting services through a graphical interface without needing command-line or terminal access.
- DNS (Domain Name System): The system that translates human-readable domain names (like yourdomain.com) into numeric IP addresses (like 192.0.2.1) so that web browsers and email servers can locate the correct servers and computers to connect to.
- A Record: A DNS record type that points a domain name or subdomain directly to an IPv4 address. Used to connect domains to web hosting servers and direct web traffic to the correct location.
- MX Record: A DNS record that directs email sent to your domain to the correct mail server. Required for email to work properly with your custom domain name.
- TTL (Time To Live): A value in DNS records, measured in seconds, that tells nameservers how long to cache (store a copy of) a DNS record before checking the authoritative source for updates. The standard value is 3600 seconds, or 1 hour.
- cPanel Control Panel: A web-based interface included with cPanel hosting that allows you to manage all aspects of your hosting account from one dashboard, including domains, emails, files, databases, and settings.
- Zone Editor: The DNS management tool built into cPanel where you can view, add, edit, and delete DNS records for domains hosted on your cPanel account.
- DNS Propagation: The process by which DNS changes spread across nameservers throughout the internet. Takes minutes to hours for A records and up to 48 hours for nameserver changes to fully propagate globally.
- Nameserver: A server on the internet that stores DNS records and responds to DNS queries, telling web browsers and other clients where to find a domain’s website or mail server.