
Niya Digital is an authorized reseller of SSL Certificates issued and validated by GoDaddy and Starfield Technologies, not a Certificate Authority itself. Website security depends on correct SSL installation, proper HTTPS configuration, and securing all page resources; no single provider can guarantee protection against all threats.
What Mixed Content Is and Why It Occurs After SSL Installation
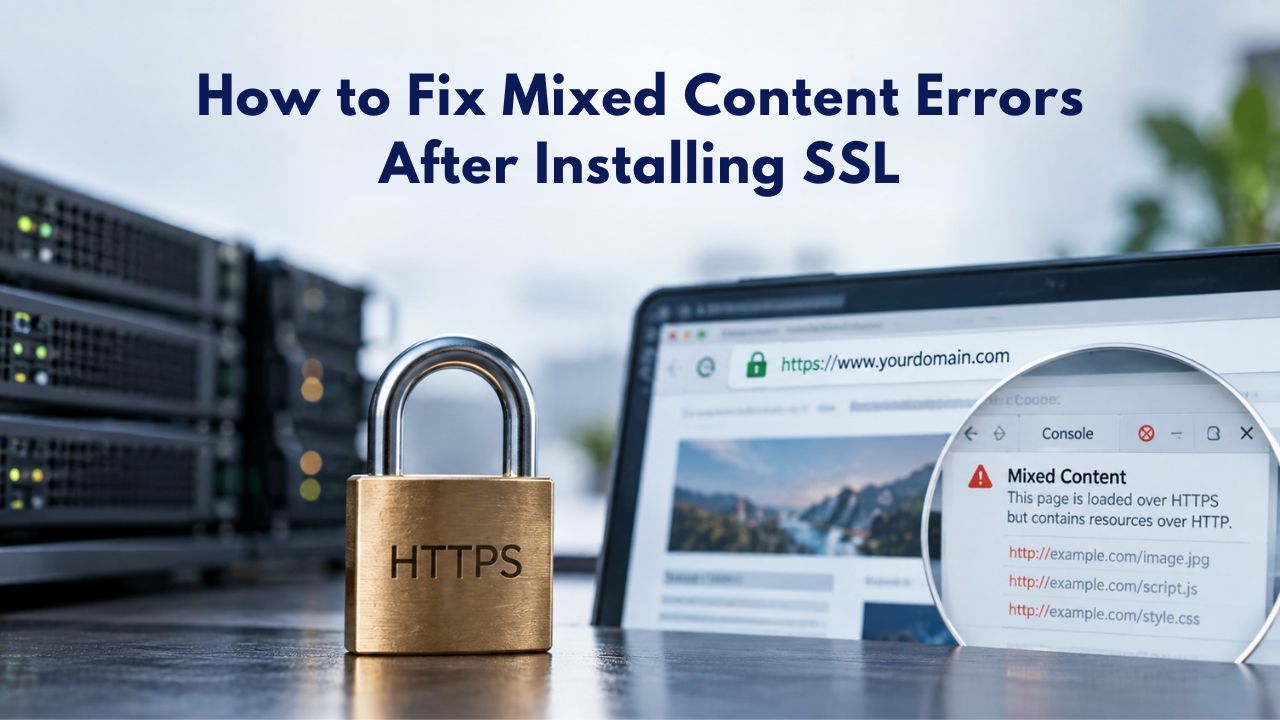
Mixed content happens when a webpage loaded over HTTPS includes resources (images, scripts, stylesheets, iframes, fonts, videos) requested over HTTP. Browsers detect this mismatch and block or warn about the insecure resources to protect visitor data. An SSL Certificate encrypts the connection between your server and browser, but it doesn’t automatically rewrite every link on your site to use HTTPS. Installing an SSL Certificate is step one; fixing mixed content is step two.
Comparison: Active vs. Passive Mixed Content
| Aspect | Active Mixed Content | Passive Mixed Content |
|---|---|---|
| Examples | Scripts, stylesheets, iframes, fetch requests | Images, video, audio, embedded media |
| Browser Action | Blocked by default; page may not function | Auto-upgraded to HTTPS or warned about |
| Security Risk | High, can execute code, steal data, inject malware | Medium, can mislead or be modified but can’t run code |
| Page Impact | Immediate breakage; missing functionality | Visual issues; broken layout or missing media |
| Fix Urgency | Highest priority, fixes broken pages | Important, completes security but lower urgency |
| User Notice | Very visible; broken page obvious | May be subtle; missing images or videos |
The Difference Between Certificate Installation and Mixed Content Resolution
A valid, properly installed SSL Certificate establishes an encrypted tunnel between visitor and server. It proves your domain identity to browsers and removes the “Not Secure” warning, but only if all page elements load over HTTPS. If even one image, script, or stylesheet still loads over HTTP, browsers show a broken or crossed-out padlock icon. Niya Digital’s team has found that site owners often assume SSL installation completes the work, only to discover broken layouts or missing images afterward because underlying resources still point to HTTP addresses.
The distinction matters because it changes where you look for solutions. You don’t reissue or reinstall the certificate. Instead, you find each HTTP URL on your pages and change it to HTTPS. You update WordPress settings. You clear caches. You verify the fix in multiple browsers. This is configuration work, not certificate work. Understanding this separation prevents wasted time troubleshooting problems that don’t actually exist.
How Mixed Content Threatens Security and Trust
An HTTPS connection protects data from eavesdropping while it travels the network. But if a page loads a script over HTTP, an attacker can intercept and modify that script to steal passwords, inject malware, or redirect the entire page. One unprotected resource defeats the encryption you paid for. The W3C Web Application Security Working Group defines mixed-content handling in the Mixed Content specification, which browsers follow to enforce this security boundary. Fixing mixed content isn’t cosmetic; it’s essential.
Visitors also read visual signals from their browser. A broken or missing padlock signals something is wrong, even if they don’t know what. Many visitors leave sites that look insecure, even if the actual risk doesn’t match the warning. Beyond the technical security benefit, fixing mixed content restores visitor confidence and maintains the trust that HTTPS is meant to establish.
SSL Certificate Plans & Pricing
Choose from a selection of SSL certificates designed to meet different website security and validation requirements. Find the right certificate to secure your website, protect sensitive information, improve search visibility, and build trust with your visitors.
Domain Validated (DV) SSL
(1-Site)
Protect 1 site.
- Domain validation
- SHA-2 & 2048-bit encryption.
- Boost SEO rankings
- Fast issuance in 5min
- Display HTTPS & padlock
- Security trust seal
- Support unlimited servers
- Free unlimited reissues
- $100,000 USD warranty
Domain Validated (DV) SSL
(5-Site)
Protect 5 sites.
- Domain validation
- SHA-2 & 2048-bit encryption.
- Boost SEO rankings
- Fast issuance in 5min
- Display HTTPS & padlock
- Security trust seal
- Support unlimited servers
- Free unlimited reissues
- $100,000 USD warranty
Extended Validation (EV) SSL
(1-Site)
Protect 1 site.
- Extended validation
- SHA-2 & 2048-bit encryption.
- Boost SEO rankings
- Display HTTPS & padlock
- Green address bar
- Security trust seal
- Support unlimited servers
- Free unlimited reissues
- $1,000,000 USD warranty
Extended Validation (EV) SSL
(5-Site)
Protect 5 sites.
- Extended validation
- SHA-2 & 2048-bit encryption.
- Boost SEO rankings
- Display HTTPS & padlock
- Green address bar
- Security trust seal
- Support unlimited servers
- Free unlimited reissues
- $1,000,000 USD warranty
Domain Validated (DV) SSL
(Wildcard)
Protect unlimited sub-domains.
- Domain validation
- SHA-2 & 2048-bit encryption.
- Boost SEO rankings
- Fast issuance in 5min
- Display HTTPS & padlock
- Security trust seal
- Support unlimited servers
- Free unlimited reissues
- $100,000 USD warranty
How Modern Browsers Detect and Block Mixed Content
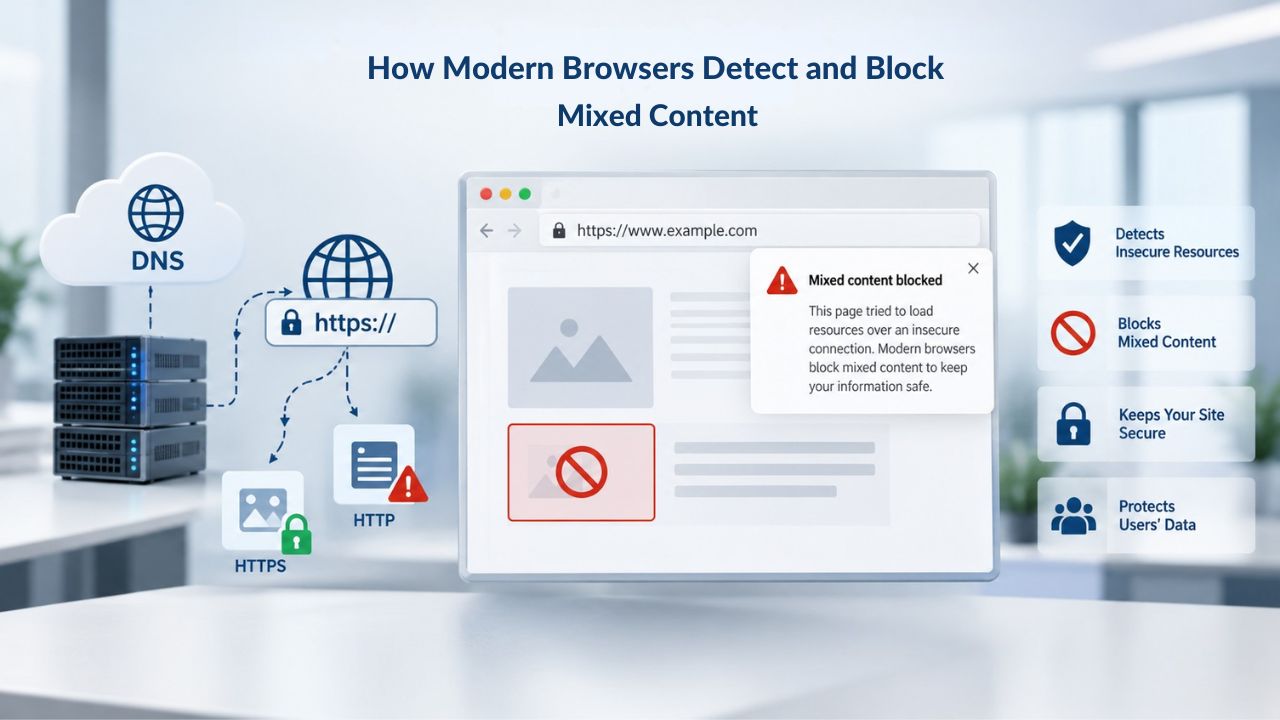
Browsers divide mixed content into two categories based on the damage an intercepted resource can cause. Active mixed content includes scripts, stylesheets, iframes, and fetch/XMLHttpRequest calls- anything that can execute code or modify page content. Browsers block active mixed content by default with no user override option. A single HTTP script can steal session cookies, capture keystrokes, or redirect an entire page to a phishing site.
Why Different Resource Types Receive Different Treatment
Scripts and stylesheets are blocked outright because they can run code in the page’s security context. An HTTP stylesheet can change how forms look, tricking users into entering data on a fake form. An HTTP script can silently capture everything typed in a password field. Iframes are blocked for similar reasons; they can load an entire fake login page inside your page. Browsers take an uncompromising stance: zero tolerance for active content from insecure origins.
Images, video, and audio receive different treatment because they’re largely passive. Modern browsers have auto-upgraded passive mixed content from HTTP to HTTPS since 2020 if an HTTPS version exists; otherwise, they block or warn about it. A modified image is usually obvious (the wrong image loads or nothing appears), so the attack is self-defeating. This pragmatic approach balances security with usability on sites that embed media from older services that might not yet support HTTPS. You’re still responsible for fixing these sources, but the urgency is lower than for active mixed content.
Why Blocking Behavior Matters for Your Website
Active mixed content breaks functionality immediately. Visitors see a blank or broken page because the scripts or stylesheets that make it work never load. Passive mixed content may let the page load but shows warnings or missing images and videos. Either way, the visual damage to trust is real. Visitors see a broken padlock icon or “Not Secure” warning, and many leave the site rather than trust a page that looks compromised, even if technically only an image is missing.
Finding Mixed Content Using Browser Developer Tools
The fastest diagnostic method is your browser’s built-in developer console. Open any page on your site that shows a security warning, press F12 (Windows/Linux) or Cmd+Option+I (Mac), and navigate to the Console tab. Refresh the page. Chrome, Firefox, and Safari will log specific error messages with the exact HTTP URL causing the problem. Each message tells you the resource type (script, image, font, etc.) and the complete insecure URL you need to fix.
Building Your Inventory of Insecure Resources
Write down or screenshot every mixed content error you see. You’ll need these exact URLs to fix them later. The console shows only the page you’re currently viewing, so you must visit each page that displays a warning and check its console output. For the homepage, product pages, checkout page, and any other pages with warnings, repeat this process to build a complete inventory of insecure resources. Systematically documenting each error prevents you from missing one during the fix phase.
For larger sites or faster comprehensive scans, use free online tools like Why No Padlock that crawl your domain and report every insecure resource across multiple pages without requiring manual checks on each page. These tools save hours on large sites but work best after you’ve already addressed the most obvious issues (database URLs, hardcoded links in theme files). Start with the browser console for precise diagnosis, then use automated tools to confirm site-wide that you’ve caught everything.
Using Network and Storage Tabs for Advanced Diagnosis
For persistent problems, use the Network tab in browser DevTools instead of just the Console tab. The Network tab shows all resource requests, including their URLs, status codes, and response headers. Filter by XHR (XMLHttpRequest) and fetch requests to find JavaScript-initiated resource loads that might not appear in the Console. This advanced view often reveals dynamic mixed content that the Console misses because JavaScript constructs URLs at runtime rather than embedding them in HTML.
Identifying Hardcoded HTTP URLs in Theme and Plugin Code
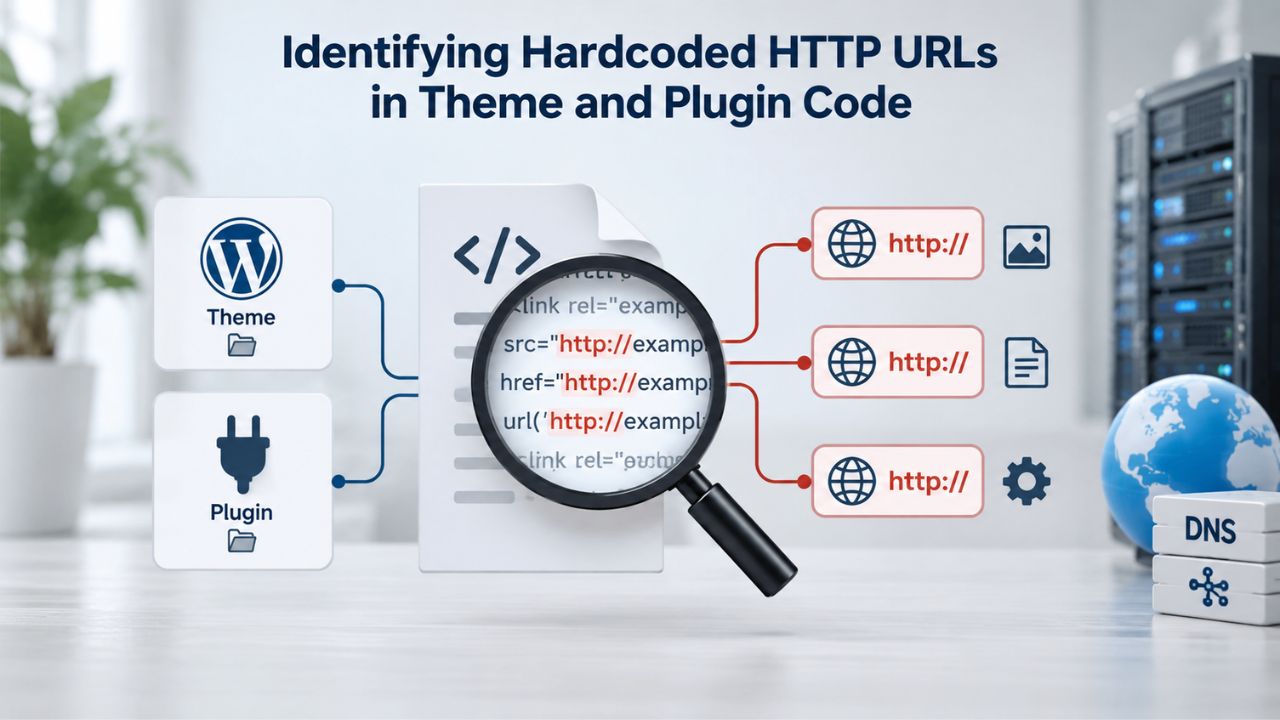
Hardcoded HTTP URLs in theme and plugin files are a common source of mixed content. A developer may have written <img src=”http://yourdomain.com/image.jpg”> years ago, and it may still be in the code even after the site switched to HTTPS. Themes frequently load external resources, Google Fonts, FontAwesome icons, and JavaScript libraries, using outdated HTTP URLs that now cause mixed content warnings.
Direct Code Fixes and Backup Procedures
If you have direct access to your theme or plugin files via FTP or your hosting file manager, search for any line containing http:// (not https://) and change it to https://. Use your text editor’s find-and-replace feature to speed the process. Be careful: some plugins use conditional logic that can break if you edit carelessly. Always back up files before editing, test the site after each change, and revert if anything breaks. Many themes and plugins use conditional logic, so changing one URL can unexpectedly affect another; test thoroughly after each modification.
After identifying and documenting which files you edited, clear your browser cache and reload the site to confirm the fix works. If the padlock disappears or new errors appear in the console, revert your changes and investigate further. Sometimes a file has multiple versions (minified vs. source), so you may need to edit both. Keep detailed notes of exactly which files you changed and what edits you made.
When Professional Help Is Necessary
If you’re uncomfortable editing code, or if you’ve made changes and the site broke, contact your theme or plugin developer directly. Many popular themes and plugins have already patched hardcoded HTTP URLs in recent versions, so updating to the latest version may solve the problem without any manual edits. Check the changelog for your theme or plugins to see if previous versions specifically mention mixed content or HTTPS fixes. A simple update might resolve everything without touching code.
Fixing Database URLs in WordPress
WordPress stores multiple URLs in its database: the site address, WordPress address, and embedded content paths in post and page text. If you migrated to HTTPS without updating these database entries, WordPress continues serving images and content over HTTP, causing mixed content errors. Start by logging into WordPress admin and navigating to Settings > General.
Updating Core WordPress URLs in Settings
Check that both “WordPress Address (URL)” and “Site Address (URL)” fields begin with https://. If they still show http://, change them to https:// and click Save. This single change resolves many mixed content errors because WordPress now tells all pages to load resources over HTTPS by default. After making this change, verify that images and embedded content now load over HTTPS when you visit the site. You may need to clear your WordPress cache plugin (if you have one) to see the changes reflected immediately.
Also check any site options that reference URLs, such as custom logo URLs, favicon URLs, or any other image references in your WordPress settings. These are often forgotten during HTTPS migration and can cause mixed content errors. Review the General, Media, and any other settings pages that might contain URL references, and update them to HTTPS.
Using Search and Replace to Update Embedded Content URLs
For URLs embedded in posts, pages, and custom content areas, use a plugin like Better Search Replace to update old HTTP URLs safely across your entire database. Open the plugin, enter your old domain with http:// in the Search field, and your domain with https:// in the Replace field. Always run a dry run first to preview exactly which database entries will change before committing the replacement.
Review the dry run results carefully to confirm you’re replacing the right values. Sometimes a dry run reveals unintended matches that you’ll want to exclude (for example, URLs in external links you intentionally left as HTTP). Once satisfied, run the replacement. This plugin updates image URLs, gallery embeds, video references, and document links throughout your database in a single operation. After running search and replace, clear your WordPress cache and browser cache to see the updated database values reflected on your site.
Get SSL Support and Expert Guidance Today
Niya Digital’s SSL Certificates Service helps you select the right certificate type for your needs and provides expert guidance through installation and ongoing support. Whether you’re starting an HTTPS migration or troubleshooting mixed content after installation, professional support keeps your site protected and trusted.
Handling Third-Party Embeds and External Resources
Google Maps, YouTube videos, Google Fonts, analytics scripts, ads, and other third-party services often provide embed code using HTTP URLs. Older Google Fonts implementations loaded from http://fonts.googleapis.com/css?… instead of HTTPS. YouTube embeds in old WordPress themes may use bare HTTP iframe URLs. These external resources are outside your server’s control, but you can still fix them by updating the embed code or finding HTTPS alternatives.
Updating Third-Party Embed Code to Modern Standards
For each third-party service, check the provider’s current documentation to confirm whether they offer an HTTPS version of their embed code or API endpoint. Most modern services- Google, YouTube, Fonticons, analytics platforms- now support HTTPS and recommend it. If your site uses old embed code from a tutorial or forum post, you’re likely using the outdated HTTP version. Update to the current HTTPS version from the provider’s official documentation. Google Fonts should load from https://fonts.googleapis.com/, YouTube videos should use HTTPS iframe src attributes, and analytics scripts should come from HTTPS domains.
Contact the third-party service’s support or check their status page if you’re unsure whether they support HTTPS. Most major platforms updated their services years ago, but smaller or niche services might still be HTTP-only. Document which services you update and when, so future theme or plugin updates don’t accidentally revert to old embed code.
Managing Services That Don’t Support HTTPS
If a third-party service only offers HTTP with no HTTPS alternative, you have three options. First, replace the service with an HTTPS-supporting competitor (often the best choice because you’re also upgrading to a maintained service). Second, proxy the content through a CDN like Cloudflare that can re-serve HTTP content as HTTPS (adds complexity but works). Third, use a Content-Security-Policy HTTP header with the upgrade-insecure-requests directive to tell browsers to automatically convert HTTP requests to HTTPS.
Most services will support HTTPS by 2025. If you find one that hasn’t, it’s often because the service is no longer actively maintained and is vulnerable to other security issues. Replacing it with a modern alternative is usually the simplest, most reliable fix. Staying with unmaintained services creates ongoing security risks.
CDN and Server Caching Issues
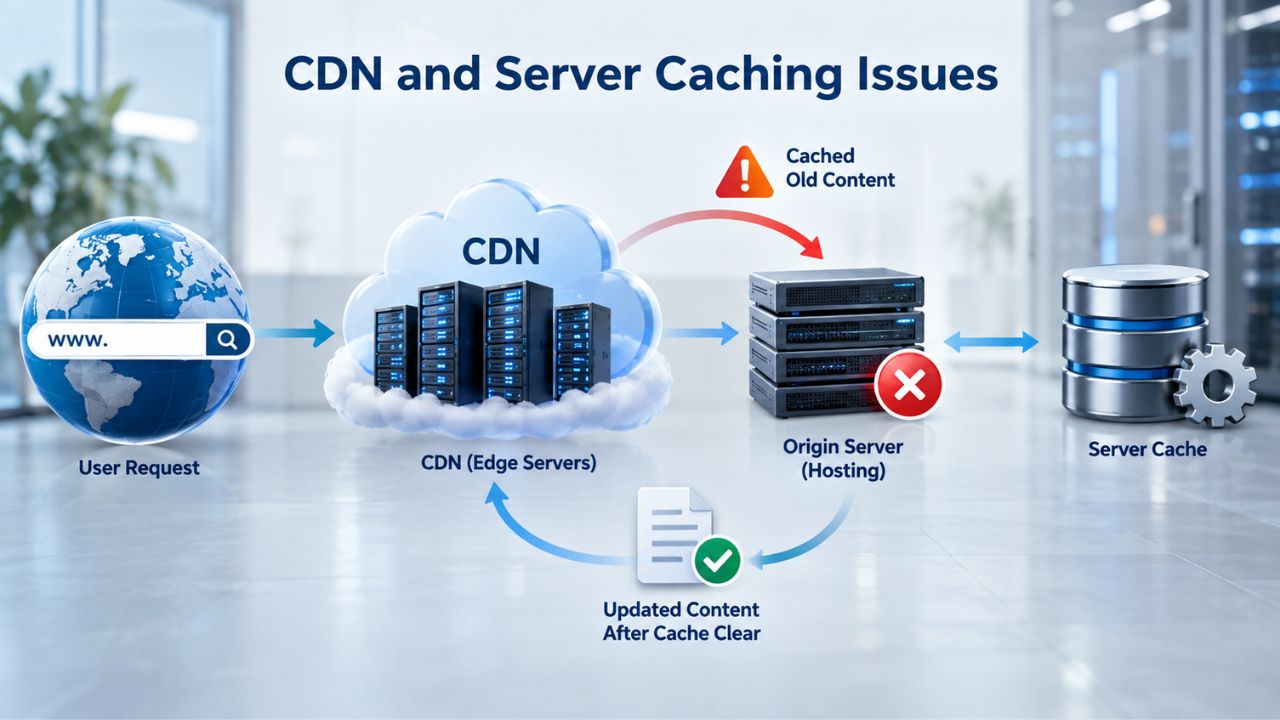
A Content Delivery Network like Cloudflare can serve cached copies of your site to visitors worldwide. If your CDN was configured before you fixed mixed content, it may continue delivering old, insecure URLs to browsers even after you’ve corrected them on your origin server. Server-level caching and WordPress caching plugins create a similar problem: they save old versions of pages and serve those cached versions instead of the freshly updated ones.
Purging CDN Cache to Release Old Versions
After fixing mixed content URLs in your code and database, purge your CDN cache to clear outdated copies. If you use Cloudflare, log in, go to Caching > Purge Cache, select “Everything,” and confirm. This tells Cloudflare to stop serving cached pages and fetch fresh versions from your server. Most other CDNs have similar purge options in their control panel. Wait a few minutes for the purge to complete across all edge servers before testing your site. Some CDNs take longer than others; check your provider’s documentation for expected purge times.
After purging, verify the fix by testing your site from a different geographic region or using a CDN purge verification tool. Different edge servers may purge at different times, so you might see mixed results immediately after purging. Wait at least 10-15 minutes before concluding that the fix didn’t work.
Clearing WordPress and Plugin-Level Caches
WordPress plugins like WP Super Cache and W3 Total Cache also cache pages and assets locally on your server. After fixing mixed content, clear these caches too. Go to your cache plugin settings and select “Purge Cache,” “Clear Cache,” or “Empty Cache”; the exact wording varies by plugin. After purging both your CDN and WordPress cache, visitors will see the fixed version of your pages. The complete cache-clearing process typically takes five to ten minutes across all systems.
Some hosting providers also offer server-level caching, controlled through your hosting control panel or cPanel. Check your hosting provider’s documentation for cache-clearing instructions specific to your hosting account. After purging everything, test your site in a private/incognito browser window to confirm you’re seeing the live version, not a cached copy.
Browser Caching and Cache-Clearing Strategies
Your browser also maintains a local cache of pages and resources to load sites faster on repeat visits. After you fix mixed content on your server, your browser may still serve you the old cached version with the same errors. Visitors will see the same problem until their browser cache expires. Clear your browser cache to force a fresh download from your server and confirm the fix actually works.
Clearing Cache in Different Browsers
In Google Chrome, press Ctrl+Shift+Delete (Windows) or Cmd+Shift+Delete (Mac) to open the Clear Browsing Data dialog. Select “Cached images and files,” set the time range to “All time,” and click Clear. In Firefox and Safari, use the same keyboard shortcut. The process takes seconds and ensures your browser isn’t hiding the problem with outdated cached data. After clearing, reload your site and check for the padlock icon and console errors. Always clear “all time,” not just recent data, to ensure you don’t leave older cached versions.
Document which browsers and versions you test. Older browser versions may behave differently than current versions, especially around mixed-content handling. Test with up-to-date versions of major browsers (Chrome, Firefox, Safari, Edge) to see how most of your visitors will experience the site. If you support older browsers, test those separately.
Using Private and Incognito Windows for Clean Testing
A faster alternative to clearing your cache is opening your site in a private or incognito window. Private windows don’t use cached data, so you always see the live version of your site from the server. If your site looks correct in a private window but broken in your normal browser window, the problem is definitely local cache, not an issue with your server or fixes. Clear your full browser cache in normal mode, then test again. If the padlock appears in the private window but not your normal window after clearing the cache, keep investigating other cache layers (CDN, WordPress, server).
Test in at least two different browsers (Chrome, Firefox, Safari, Edge) because they maintain separate caches and handle mixed content slightly differently. Consistent results across browsers give you confidence the fixes are working correctly.
Verifying the Fix: Padlock, Console, and Multi-Browser Testing
After fixing mixed content, verify the solution on multiple pages before declaring success. Reload your site and look for a solid padlock icon in the address bar; this indicates the page and all its resources loaded over HTTPS. Open the browser console (F12 > Console) and refresh the page. If no mixed-content warnings or errors appear, you’ve fixed that page.
| Aspect | Action | Expected Outcome | Time |
|---|---|---|---|
| Browser Display | Look at address bar | Solid padlock, no crossed-out or warning icon | Immediate |
| Console Check | Press F12, go to Console, refresh | No mixed content warnings or errors listed | 30 seconds |
| Multiple Pages | Test homepage, product page, checkout, blog post | Consistent secure display across page types | 5-10 minutes |
| Different Browsers | Test Chrome, Firefox, Safari, Edge | Same padlock and no warnings in all browsers | 15-20 minutes |
| Automated Scan | Run Why No Padlock or SSL Labs | Zero insecure resources reported | 5-10 minutes |
Testing Every Major Page Type on Your Website
Test every major page type on your site, particularly any page that previously showed a warning. A fix that works on your homepage might not address issues on your checkout page or blog archive if those pages load different resources. Pay special attention to pages that embed third-party content, load custom JavaScript, or display user-generated content, as these often hide mixed content issues that single-page testing might miss.
Running Final Verification Scans with Automated Tools
Use online SSL checker tools like SSL Labs and Why No Padlock to confirm that all insecure resources are gone. These tools crawl multiple pages and generate detailed reports showing exactly what they found. After you verify everything, document the changes you made for future reference.
Note which database URLs you updated, which theme files you edited, and which external services you reconfigured. This documentation helps you troubleshoot problems faster if a future plugin or theme update accidentally reintroduces HTTP URLs.
Preventing Mixed Content Errors in Future Installations
The best mixed content fix is preventing it from the start. When installing an SSL Certificate, immediately update your WordPress site URL settings to HTTPS before adding or significantly updating content. Update all theme and plugin files to use HTTPS or protocol-relative URLs (//example.com/resource instead of http://example.com/resource). Protocol-relative URLs automatically use the same protocol as the parent page, so they never cause mixed content.

Planning SSL Installation as Part of HTTPS Migration
When embedding third-party content, check the provider’s current documentation to confirm you’re using the HTTPS version of their embed code, not an outdated HTTP version from an old tutorial. Before finalizing your HTTPS migration, run a comprehensive audit scan with Why No Padlock or SSL Labs to catch mixed content before visitors do. Planning SSL installation as part of a broader, intentional HTTPS migration prevents most mixed-content problems.
Create an HTTPS migration checklist that includes installing an SSL Certificate, updating WordPress Settings > General to HTTPS, reviewing all theme and plugin code for HTTP references, checking external services for HTTPS versions, updating the database with search-and-replace, purging all caches, testing all page types, and running automated scans. Following this checklist prevents mixed content entirely.
Maintaining Security Through Regular Audits and Monitoring
After the initial HTTPS migration and mixed-content fixes, audit your site quarterly or whenever you update a theme, plugin, or third-party embed. Plugin and theme updates sometimes reintroduce HTTP URLs or misconfigured embed code. Regular audits catch these problems before visitors report them. Set a calendar reminder to run a quick scan every three months, or use automated monitoring tools that alert you if mixed content reappears. Staying proactive prevents visitors from ever seeing the broken padlock.
Document your SSL Certificate installation process, the certificate type you chose, and its expiration date. Set a renewal reminder well before expiration, so your HTTPS connection never lapses. SSL Certificate Maintenance and ongoing mixed-content monitoring are ongoing parts of website security, not one-time tasks.
Mixed Content Detection and Resolution Steps
| Step | Action | Expected Result | Time Required |
|---|---|---|---|
| 1. Identify | Press F12, open Console, refresh page | See list of HTTP URLs causing warnings | 5-10 min |
| 2. Document | Screenshot console errors or write down URLs | Complete inventory of insecure resources | 10-15 min |
| 3. Update Settings | Change WordPress Site Address to HTTPS | Database starts serving HTTPS by default | 2-3 min |
| 4. Fix Code | Search theme/plugin files for `http://` and replace | Embedded resource URLs now point to HTTPS | 10-30 min |
| 5. Bulk Replace | Use Better Search Replace plugin in database | All post/page content references HTTPS | 5-10 min |
| 6. Clear Caches | Purge CDN, WordPress cache, browser cache | Old cached versions removed from all layers | 10-15 min |
| 7. Verify | Check padlock icon, inspect console for warnings | Site loads fully over HTTPS with no errors | 10-15 min |
| 8. Test Browsers | Reload site in Chrome, Firefox, Safari, Edge | Consistent secure display across browsers | 10-20 min |
| 9. Scan Site | Run automated scan with Why No Padlock | Confirmation all insecure resources are gone | 5-10 min |
| 10. Document | Write down all changes and when they were made | Reference for future troubleshooting | 5 min |
Complete Your HTTPS Implementation With Confidence
Your SSL Certificate provides the encryption. Your HTTPS configuration provides the connection. Mixed content fixes provide the complete user experience that matters to visitors: a site they can trust without warnings, broken images, or missing functionality. Taking time to fix mixed content thoroughly pays dividends in visitor confidence and conversion rates. Sites with complete HTTPS security see lower bounce rates and higher customer trust metrics than sites with broken padlocks or warnings.
Niya Digital’s SSL Certificates Service can help you manage every stage of SSL implementation, from selection through renewal and mixed content support. Expert guidance during installation and troubleshooting support helps keep your site secure from day one.
Frequently Asked Questions
What is mixed content, and why does my browser warn about it?
Mixed content occurs when a webpage loaded over secure HTTPS includes resources, images, scripts, stylesheets, iframes, or video requested over insecure HTTP. Browsers warn or block these insecure resources because an attacker could intercept them and modify or steal data. The SSL Certificate is working; the problem is that some page elements still point to HTTP URLs. Your browser protects visitors by requiring all resources on an HTTPS page to load securely.
Why does my website still show “Not Secure” after I installed an SSL Certificate?
An SSL Certificate establishes an encrypted connection and removes the “Not Secure” warning only if all page elements load over HTTPS. If images, scripts, stylesheets, or other resources still load over HTTP, browsers show a broken padlock or “Not Secure” warning. Update your WordPress site URL settings to https://, fix hardcoded HTTP links in your theme and plugins, and use search-and-replace to update your database. The certificate is fine; the page elements need updating.
How do I find mixed content errors on my website?
Open your site in any modern browser, press F12 to open Developer Tools, navigate to the Console tab, and refresh the page. The console lists mixed-content warnings with the exact HTTP URLs causing the problem. For a site-wide scan, use free tools like Why No Padlock that automatically crawl your domain and report all insecure resources across multiple pages without requiring manual page-by-page checking.
Should I fix scripts or images first when I find mixed content?
Fix active mixed content (scripts, stylesheets, iframes) first because browsers block these by default and break page functionality immediately. Passive mixed content (images, video, audio) is auto-upgraded or warned about but less urgent. By fixing active content first, you restore full functionality, then address passive content to eliminate warnings and ensure a secure experience.
Will reinstalling my SSL Certificate fix mixed content?
No. Reinstalling the certificate won’t fix mixed content. The certificate is working correctly; the problem is that some page resources still load over HTTP. You need to change those resource URLs to HTTPS in your code, database, and configuration. Mixed content is a page content and configuration issue, not a certificate issue. Reinstalling only wastes time you should spend finding and fixing the actual HTTP URLs.
What do I do if a third-party service only offers HTTP, not HTTPS?
First, check the provider’s current documentation; many services have recently added HTTPS support. If they genuinely don’t support HTTPS, you have three options: replace the service with an HTTPS-supporting alternative (often the best choice), proxy the content through a CDN that can re-serve it securely, or add a Content-Security-Policy header to upgrade HTTP requests to HTTPS automatically. Most services have upgraded by now; if yours hasn’t, it’s often abandoned.
Do I need to update every link inside WordPress posts manually?
No. Use a WordPress plugin like Better Search Replace to bulk-update all URLs in your database with a single operation. Search for http://yourdomain.com, replace with https://yourdomain.com, run a dry run first to preview changes, then execute the replacement. This plugin updates image URLs, embedded videos, document links, and other content throughout your database at the same time. Afterward, clear WordPress cache to see results.
How do I clear my browser cache after fixing mixed content?
In Chrome, press Ctrl+Shift+Delete (Windows) or Cmd+Shift+Delete (Mac). In Firefox and Safari, use the same shortcut. Select “Cached images and files,” set the time range to “All time,” and click Clear. Alternatively, open your site in a private or incognito window to bypass cache entirely. Private windows always fetch fresh data from the server, so they’re useful for testing whether fixes actually worked.
Why does my site look fine on my computer but still shows warnings for visitors?
You’ve likely already cleared your local browser cache, so you see the fixed version. Visitors still have the old cached version on their computers. Ask visitors to clear their cache, or purge your CDN and WordPress cache to push the updated version to everyone. It typically takes a few hours for the change to propagate across all visitor browsers and CDN edge servers.
Can I fix mixed content on someone else’s website if I don’t have admin access?
No. Fixing mixed content requires changing URLs in code, database, and server configuration, which requires administrative access. If you’re a visitor reporting mixed content to a site owner, use your browser console to capture the exact HTTP URLs causing the problem and send those details to the site owner. They can then use this information to fix the issues on their side.
What’s the difference between HTTP and HTTPS, and why does it matter for mixed content?
HTTP is unencrypted; anyone on the network can see the data transmitted. HTTPS adds an SSL Certificate that encrypts data between your browser and server. For mixed content to exist, part of your page loads over HTTPS while other parts load over HTTP. Browsers block the unencrypted parts to prevent attackers from intercepting or modifying them. HTTPS is now the standard because it protects visitor passwords, payment information, and private data from theft.
Will my SSL Certificate expire and cause mixed content errors?
No. Expiration causes a different error; browsers show that the certificate is invalid, not that content is mixed. Mixed content refers to HTTP resources on an HTTPS page and is separate from certificate validity. Renew your SSL Certificate before expiration to keep HTTPS working and visitor trust intact, but expiration won’t cause mixed content errors.
Should I use a self-signed certificate to fix mixed content?
No. Self-signed certificates won’t help because mixed content is about HTTP URLs on your pages, not the certificate type. Self-signed certificates don’t encrypt connections properly anyway; browsers reject them on public sites. Always use a trusted certificate from a Certificate Authority like GoDaddy or Starfield Technologies, issued through a reputable reseller like Niya Digital.
How often should I audit my website for mixed content?
After your initial HTTPS migration and mixed-content fix, audit quarterly or whenever you update a theme, plugin, or third-party embed. Updates sometimes reintroduce HTTP URLs or misconfigured embed code. Use automated monitoring if possible. Regular audits prevent visitors from ever seeing the broken padlock. Even small changes can accidentally reintroduce mixed content if you’re not careful.
Is mixed content a real security vulnerability, or just a cosmetic issue?
Mixed content is a real security vulnerability, not a cosmetic issue. Unencrypted HTTP resources can be intercepted and modified by attackers. Scripts can steal data or inject malware. Attackers can replace images and videos with malicious content. The “Not Secure” warning is justified. Fixing mixed content ensures all resources load over the encrypted HTTPS connection, protecting visitor data and maintaining the trust that HTTPS promises.
Glossary
- SSL Certificate: A digital credential issued by a trusted Certificate Authority that encrypts data in transit between your website and a visitor’s browser, enabling HTTPS connections and establishing domain identity.
- HTTPS: Hypertext Transfer Protocol Secure; the encrypted version of standard HTTP, enabled by an SSL Certificate on your web server and required by modern browsers for secure data transmission.
- Mixed Content: A webpage loaded over secure HTTPS that includes resources (images, scripts, stylesheets, iframes, videos, fonts) requested over insecure HTTP, causing browsers to block or warn about the insecure resources.
- Active Mixed Content: Scripts, stylesheets, iframes, and JavaScript fetch/XMLHttpRequest calls that can execute code or modify a webpage’s content and functionality. Browsers block active mixed content by default.
- Passive Mixed Content: Images, video, audio, and source elements that cannot execute code or change page content. Modern browsers auto-upgrade passive mixed content from HTTP to HTTPS if available, or show warnings if it isn’t.
- Certificate Authority: An organization trusted by web browsers to issue, validate, and manage SSL/TLS certificates, confirming domain ownership and organizational identity for secure web connections.
- Domain Validation: The fastest SSL Certificate validation level, requiring only proof of domain ownership with no business identity verification, commonly used for blogs, personal sites, and small business websites.